A Mix & Match (Sectional) Bundle is an advanced version of traditional Mix & Match bundles that allows you to divide a customizable bundle into distinct sections—each representing a product category, collection, or type. This format gives customers more structured flexibility, encouraging them to mix different item types while still maintaining your bundle logic.
Unlike a basic Mix & Match Bundle, where shoppers choose multiple items from a single product pool, Sectional Bundles offer multiple product pools—one for each section.
This advanced bundling method empowers you to guide the customer journey while still allowing creative freedom. It’s ideal for curated shopping experiences that maintain structure, such as building routines, creating outfits, or sampling variety packs.
Key Benefits of Sectional Bundles
STEP 1
Go to the Kefi Bundle Builder homepage and select the Mix and Match (Sectional). Click “Select”

STEP 2
Once you've selected Mix & Match (Sectional) as your bundle type, you'll be taken to the Content Section, where you can configure the main settings for your bundle.
Here’s what you’ll set up:
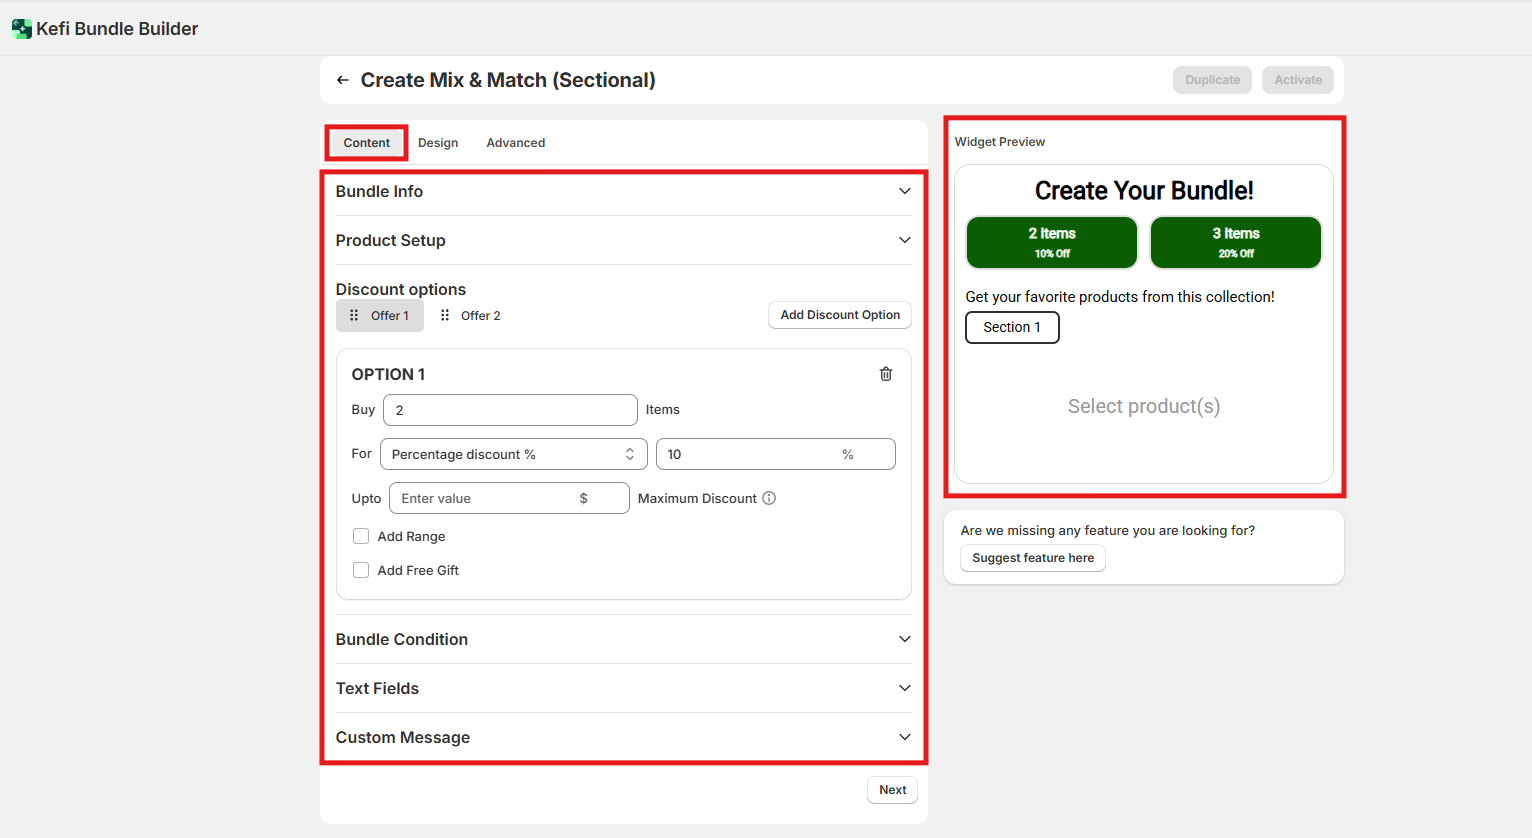
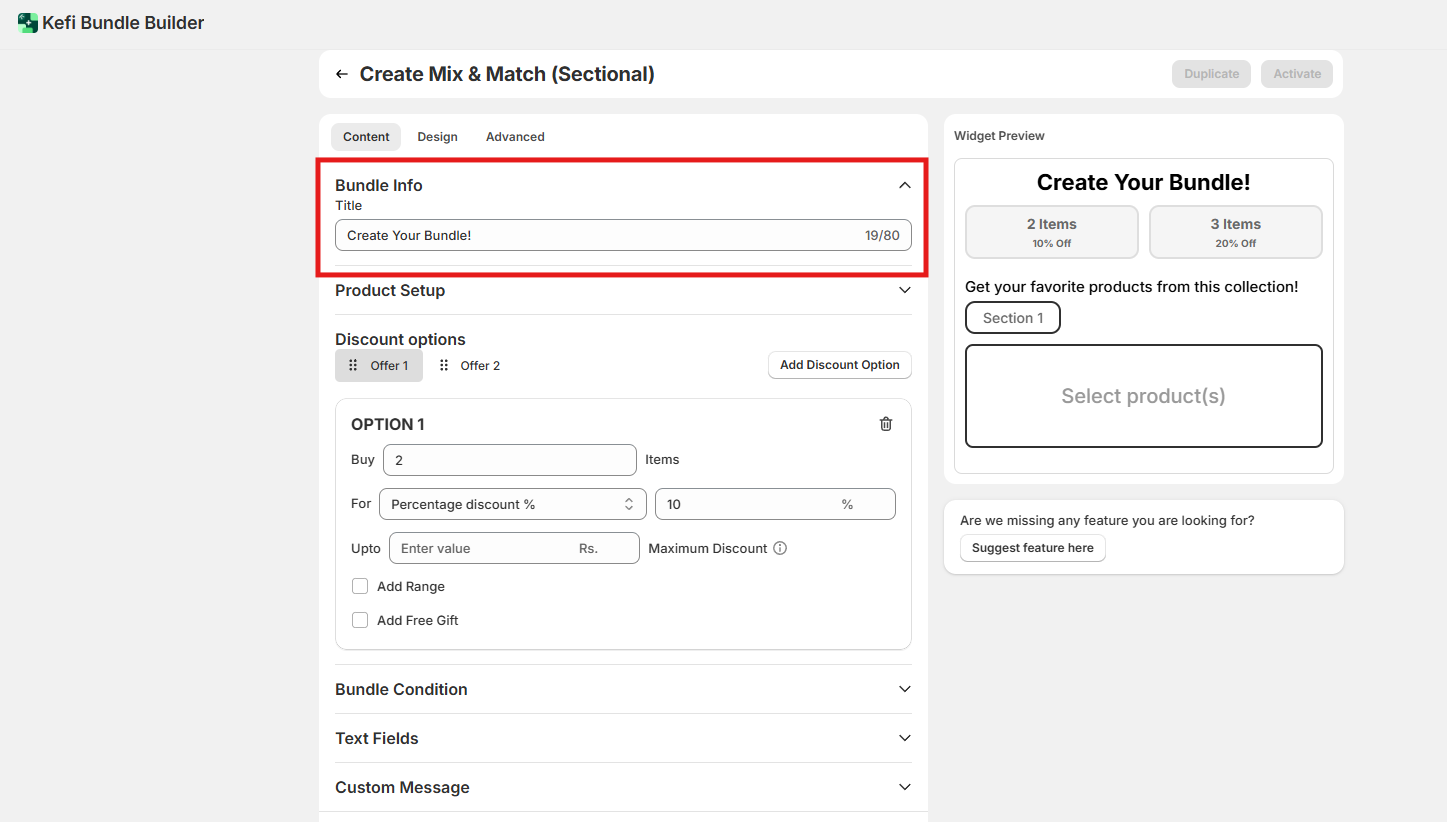
1. Bundle Info
In this section, you can add a title for your Mix and Match (sectional) Bundle. This title will be visible to customers, so make it clear and appealing.
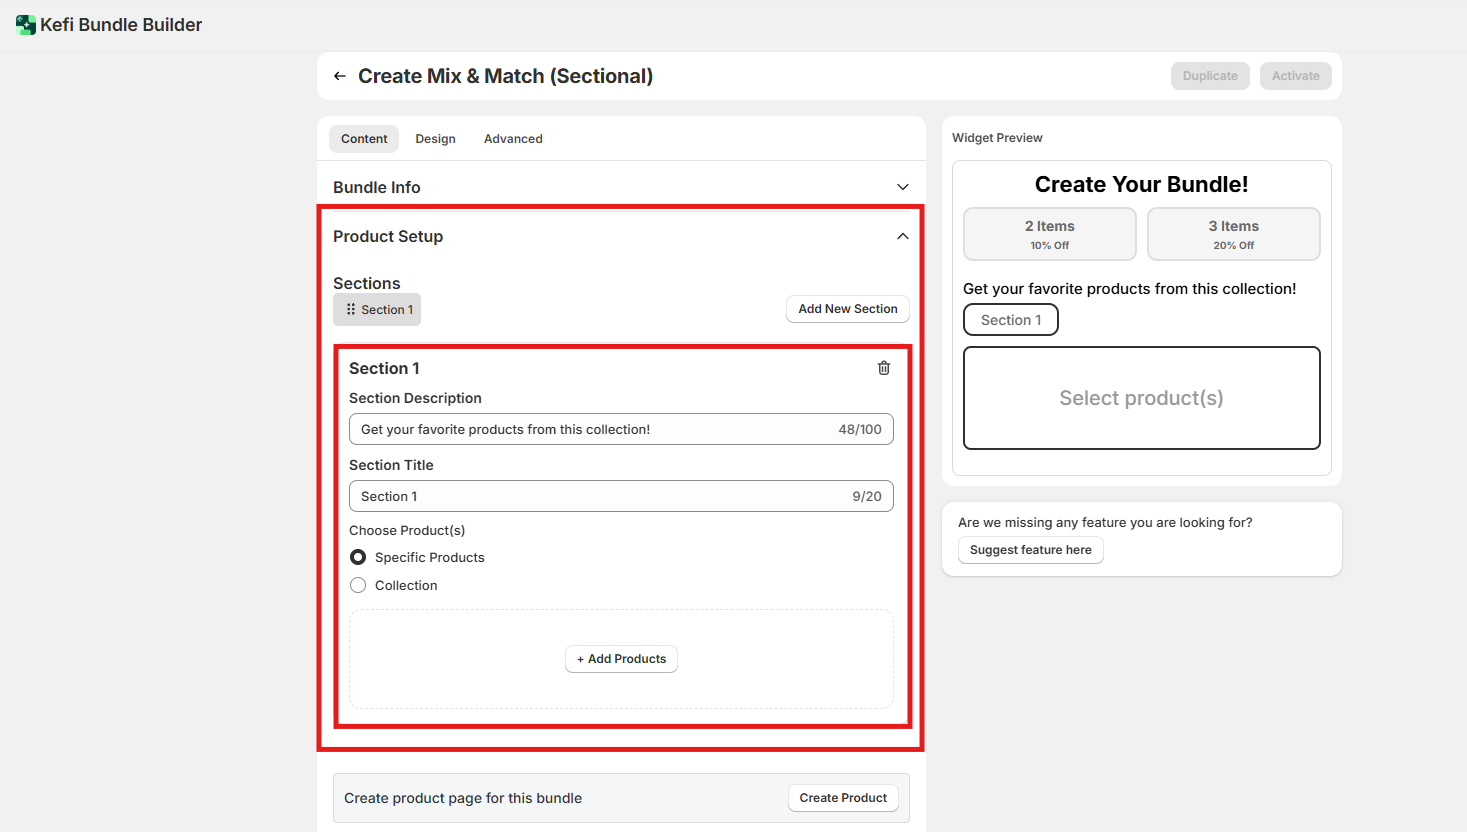
2. Product Setup
This is where the sectional logic comes into play:
Section Configuration
Within Product Setup, you can create multiple sections to organize your bundle. Each section allows for:
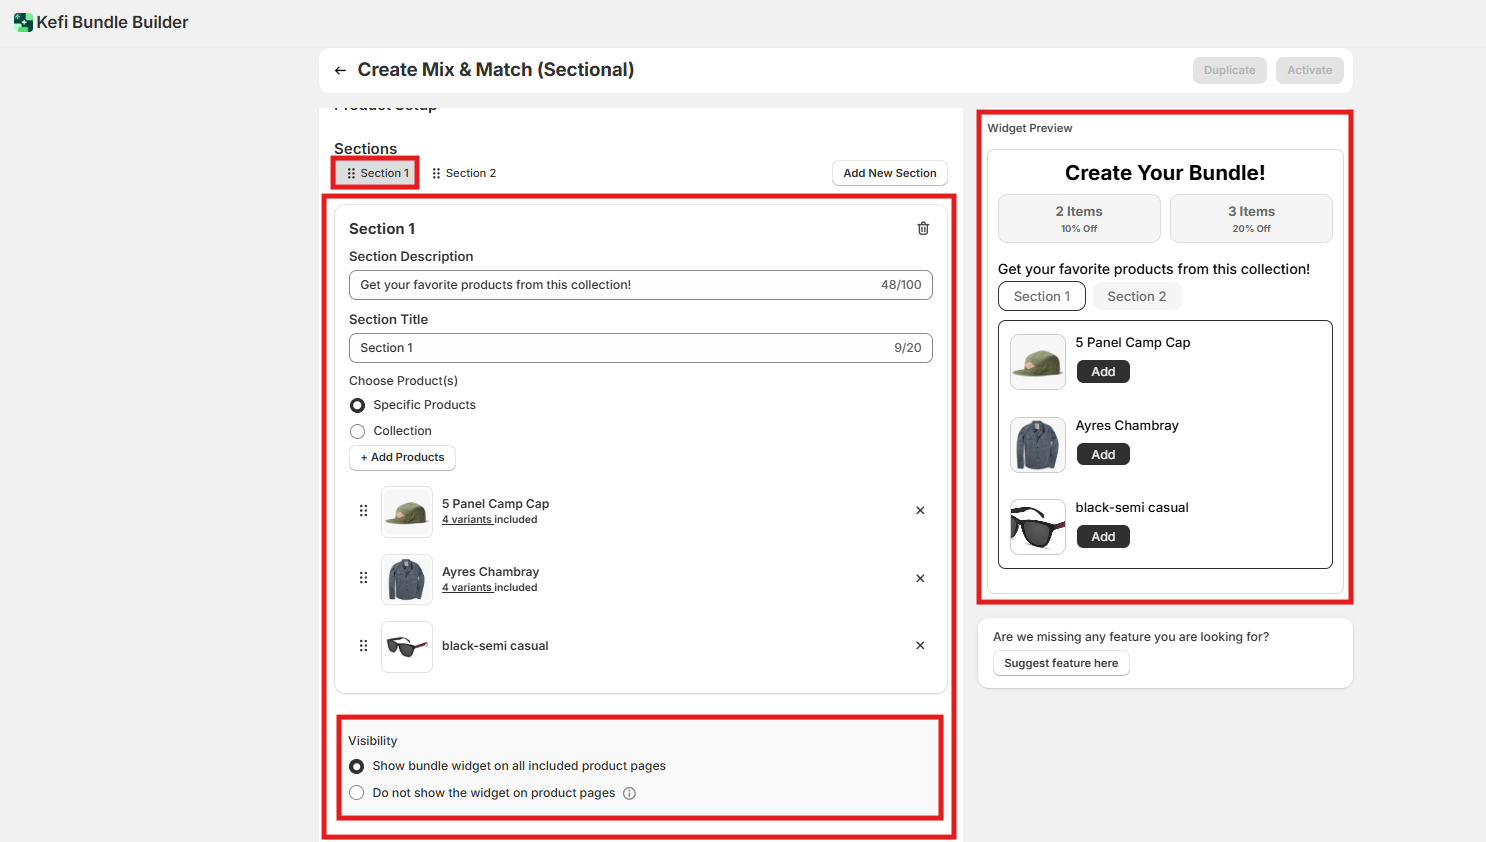
In this guide, we've created two sections, but you can add more using the “Add New Section” button.
Section 1: Example Setup
In Section 1, we selected the Specific Products option and manually added three different products to this section. This gives you full control over which individual items are available for selection.
You’ll also see a Visibility setting, which determines where the bundle widget will appear:
For this example, we chose the first visibility option, so the bundle widget will be visible on the product pages of the items included in Section 1. This helps increase visibility and discoverability of the bundle as customers browse those product pages.
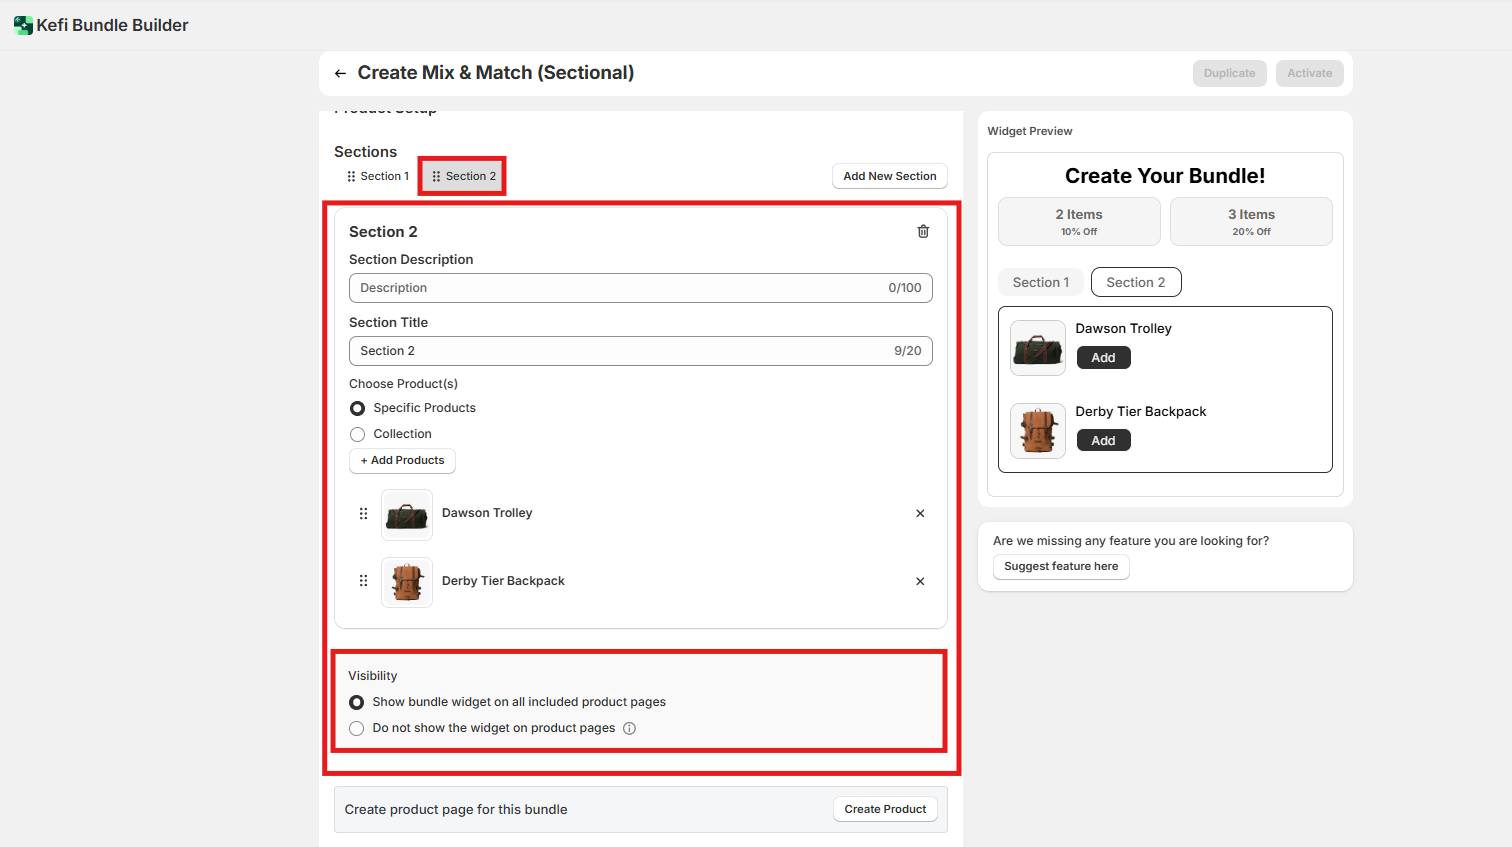
Section 2: Example Setup
In Section 2, we selected two specific products to include in the bundle. Like Section 1, we used the Specific Products option to manually choose which items appear in this section.
The Visibility setting for Section 2 is the same as Section 1:
This ensures the bundle widget is also displayed on the product pages of the two selected items in Section 2, providing consistent visibility across your bundle setup.
Create a Dedicated Product Page (Optional)
Once you've created your sections, you’ll also have the option to generate a dedicated product page for your Mix & Match (Sectional) Bundle.
This page serves as a central location where customers can view and complete the entire bundle experience—ideal for directing traffic via email campaigns, ads, or navigation menus.
With this option, you can:
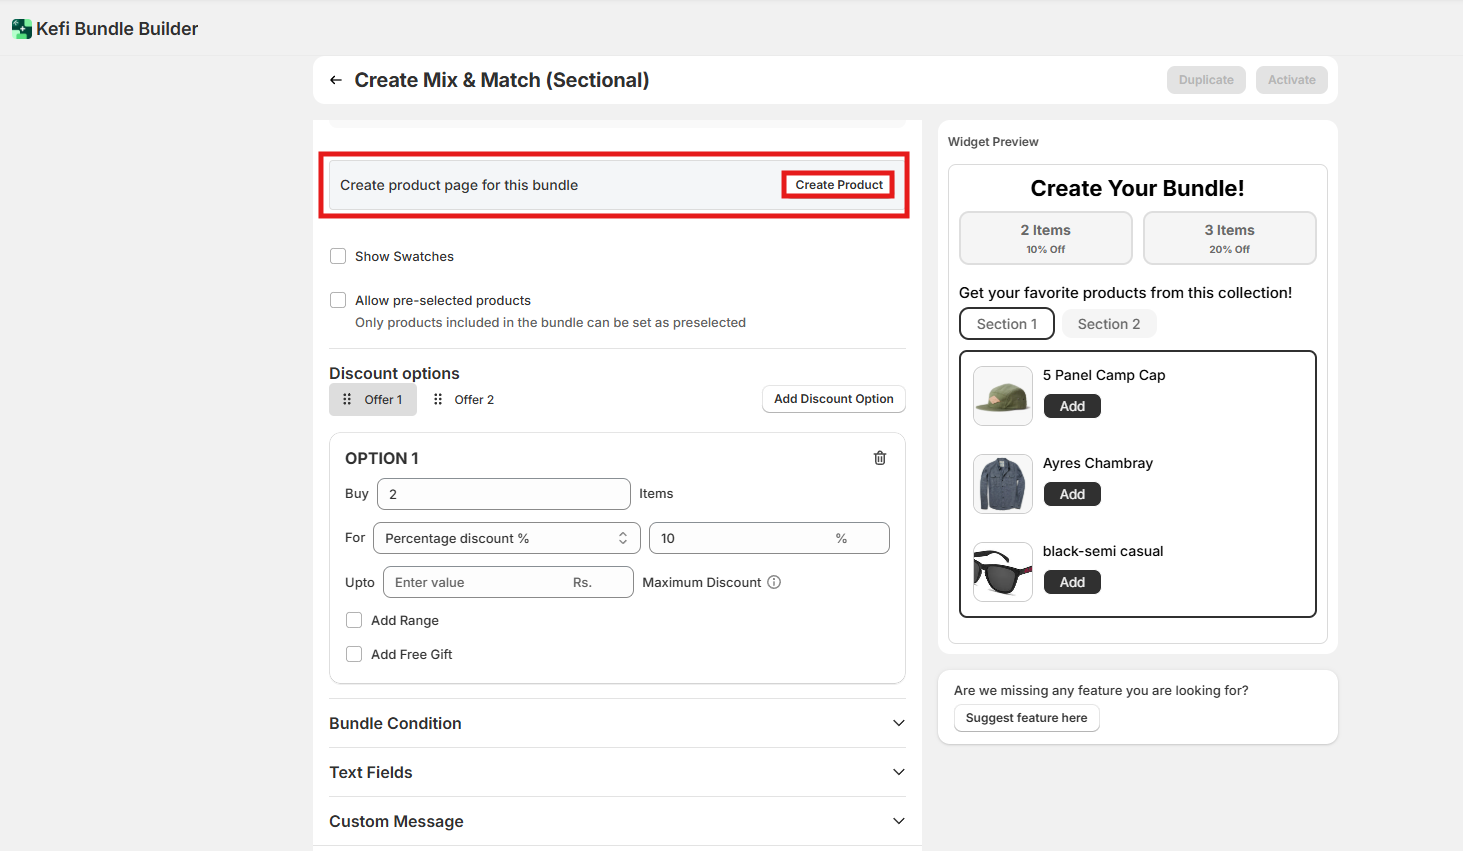
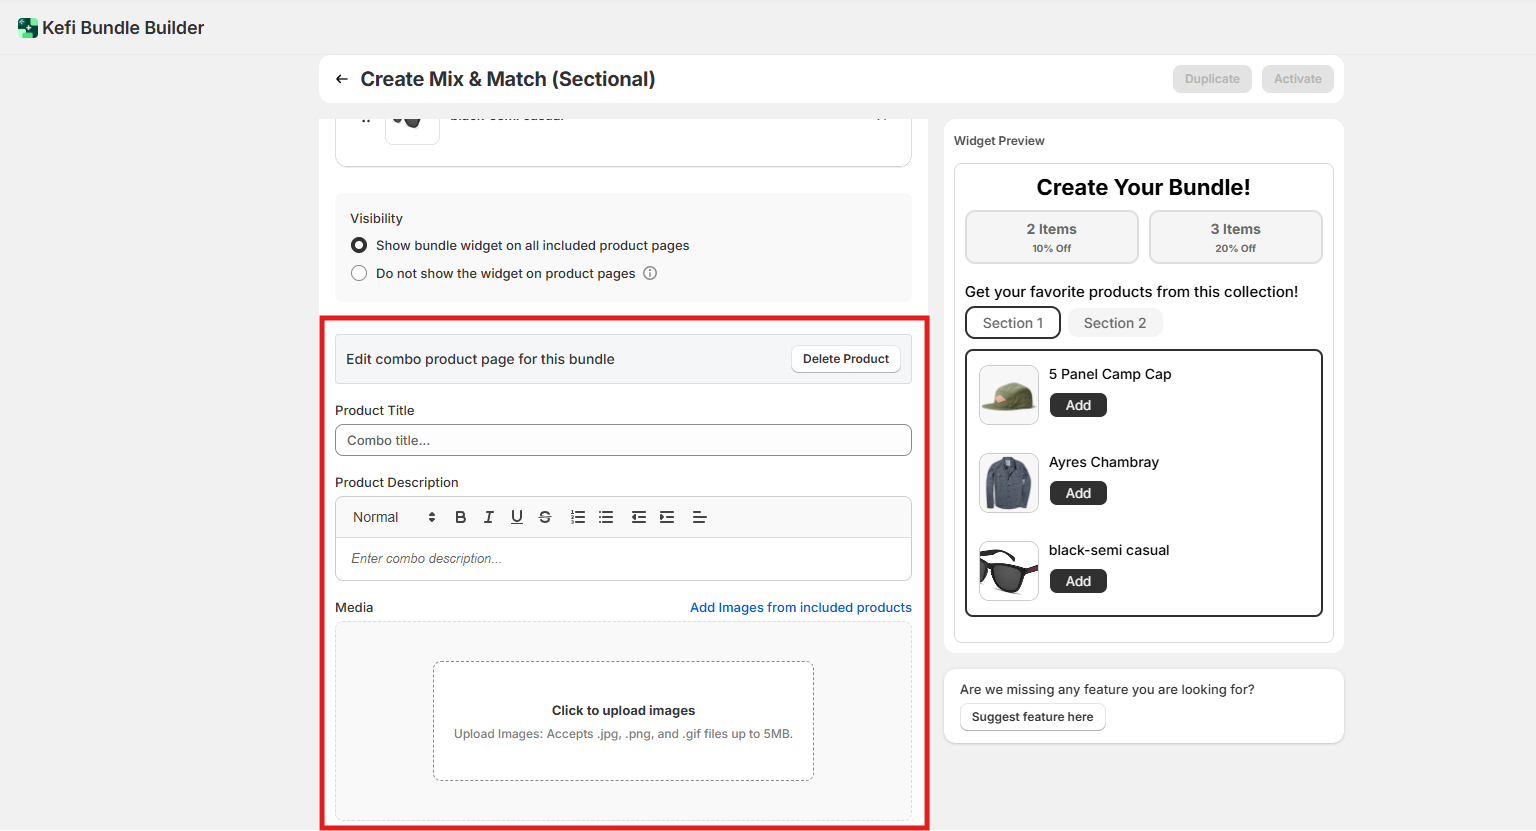
When you click “Create Product”, you’ll be prompted to set up the key details for your Mix & Match (Sectional) Bundle product page. This allows you to fully customize how the bundle appears in your storefront.
You’ll be able to configure the following:
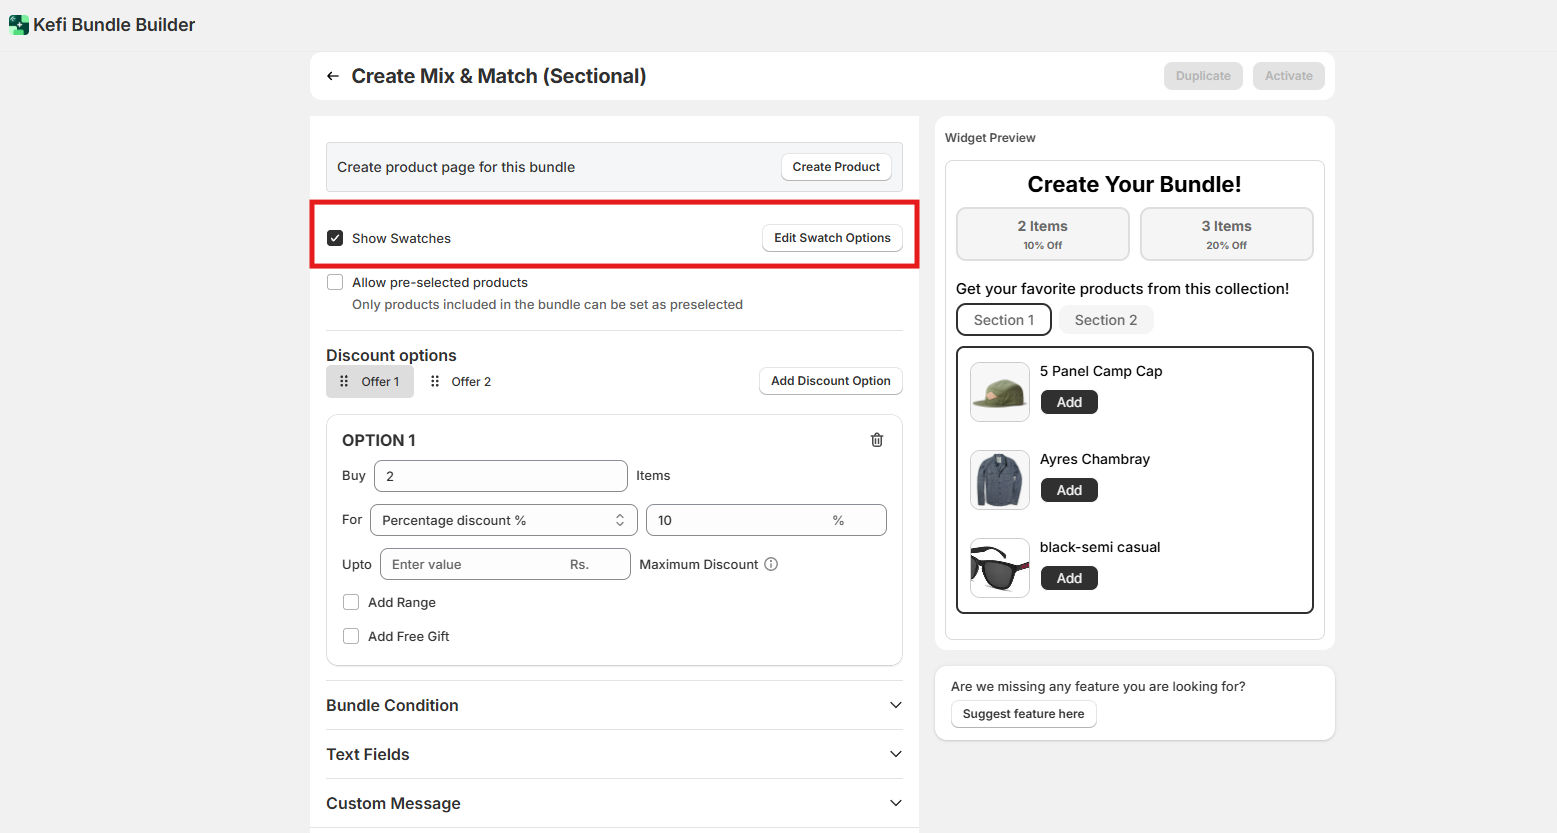
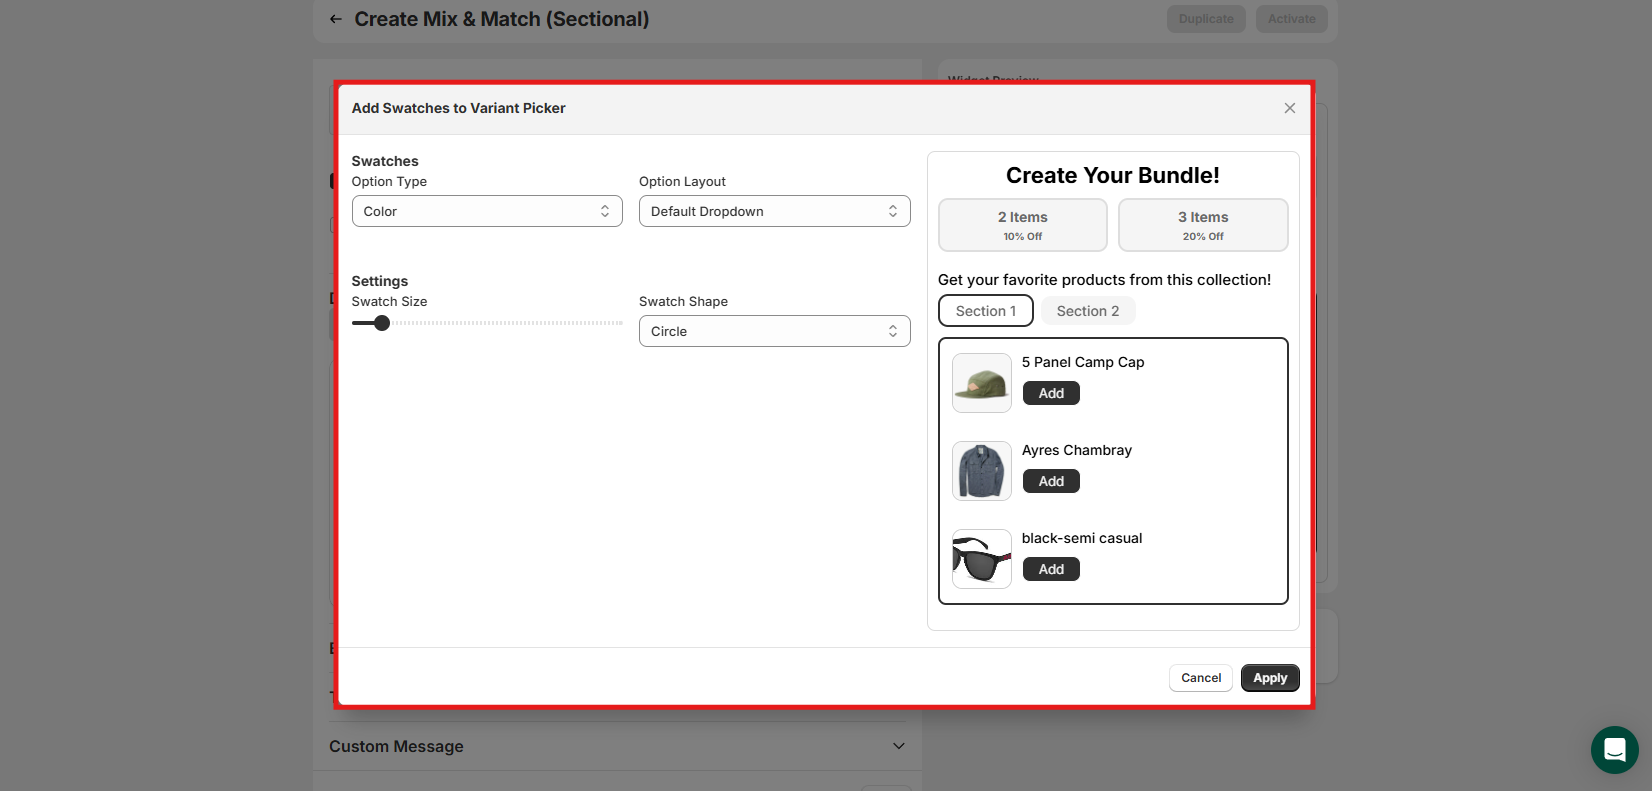
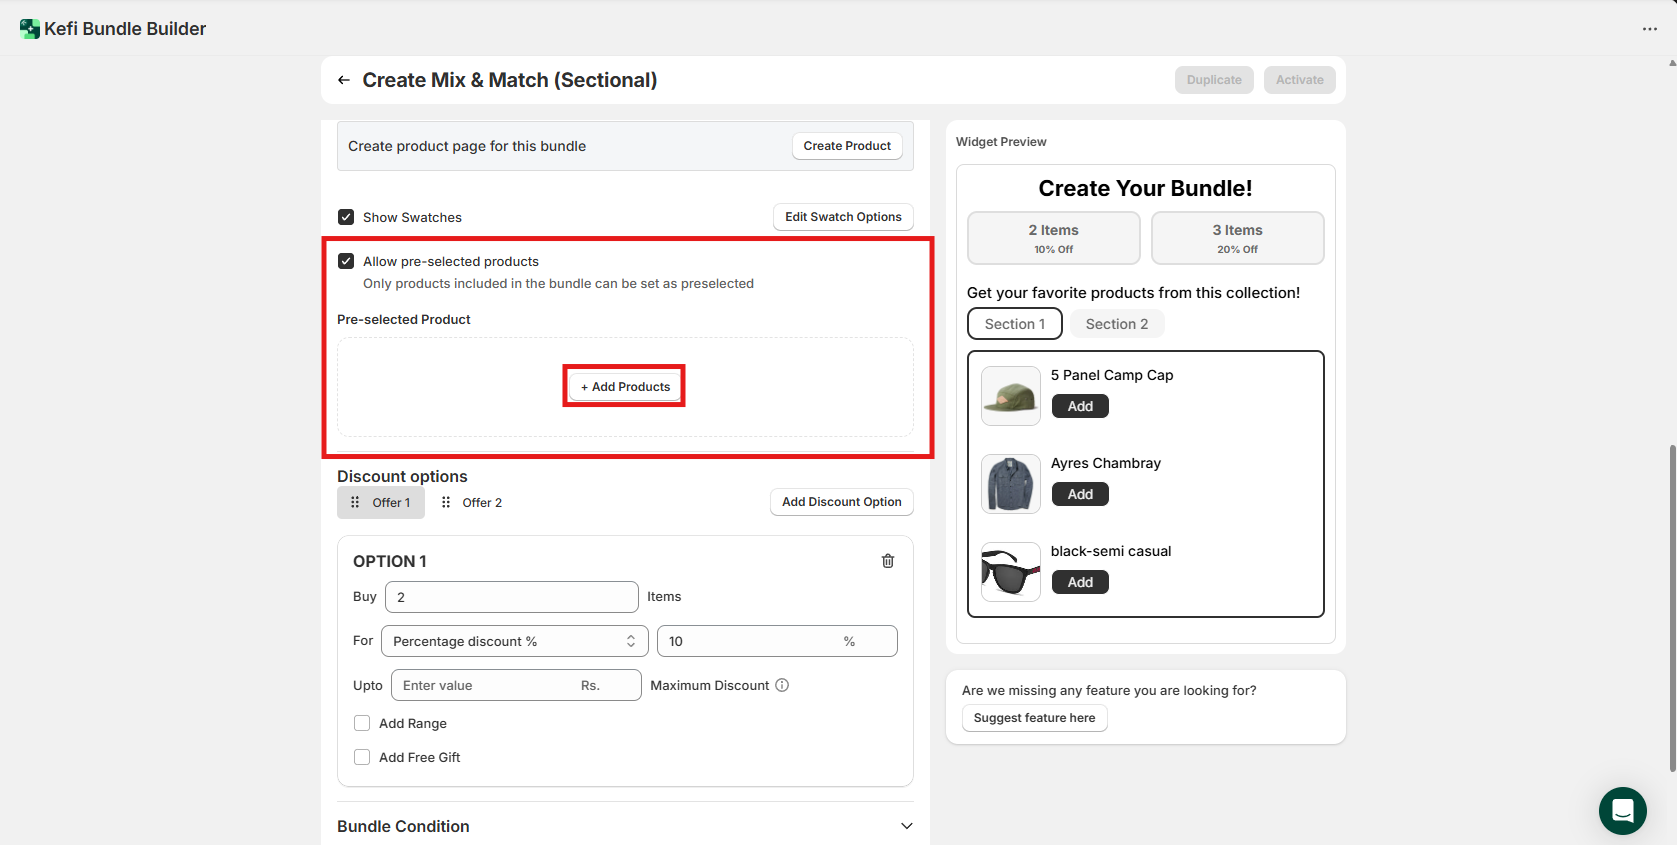
Variant Swatches and Preselected Products
You have additional customization options to further enhance the shopping experience:
3. Discount Option
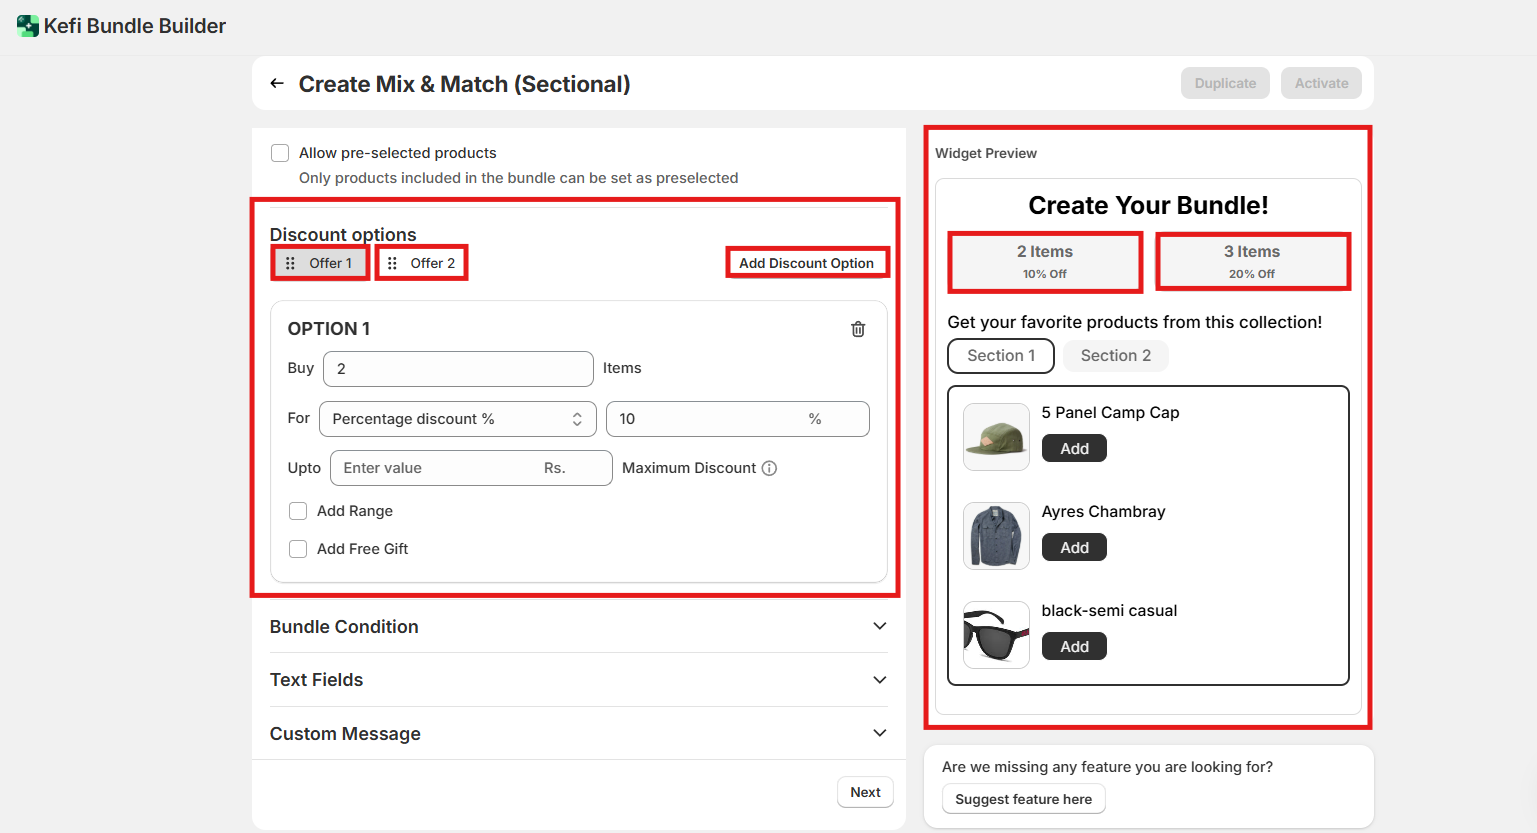
This section allows you to set up the discount for your Bundle. Choose the discount type that best suits your promotion strategy:
For this guide, we’ve created 2 percentage-based discount offers for both sections to demonstrate how tiered pricing works:
Offer 1: Buy 2 items – 10% Discount
Offer 2: Buy 3 items – 20% Discount
You can add additional discount tiers by clicking the “Add Discount Offer” button.
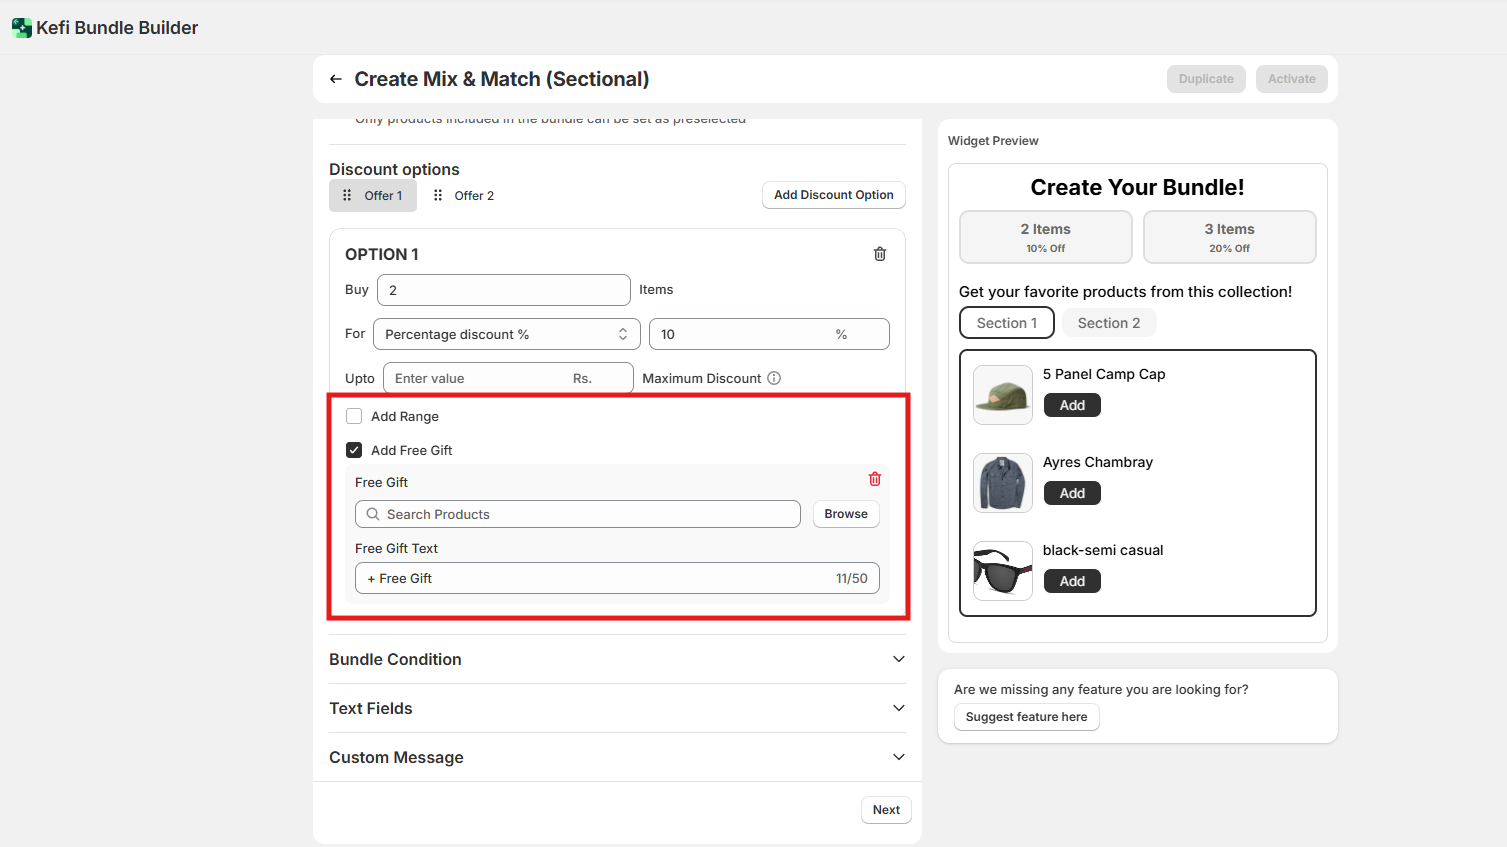
Additional Discount Features:
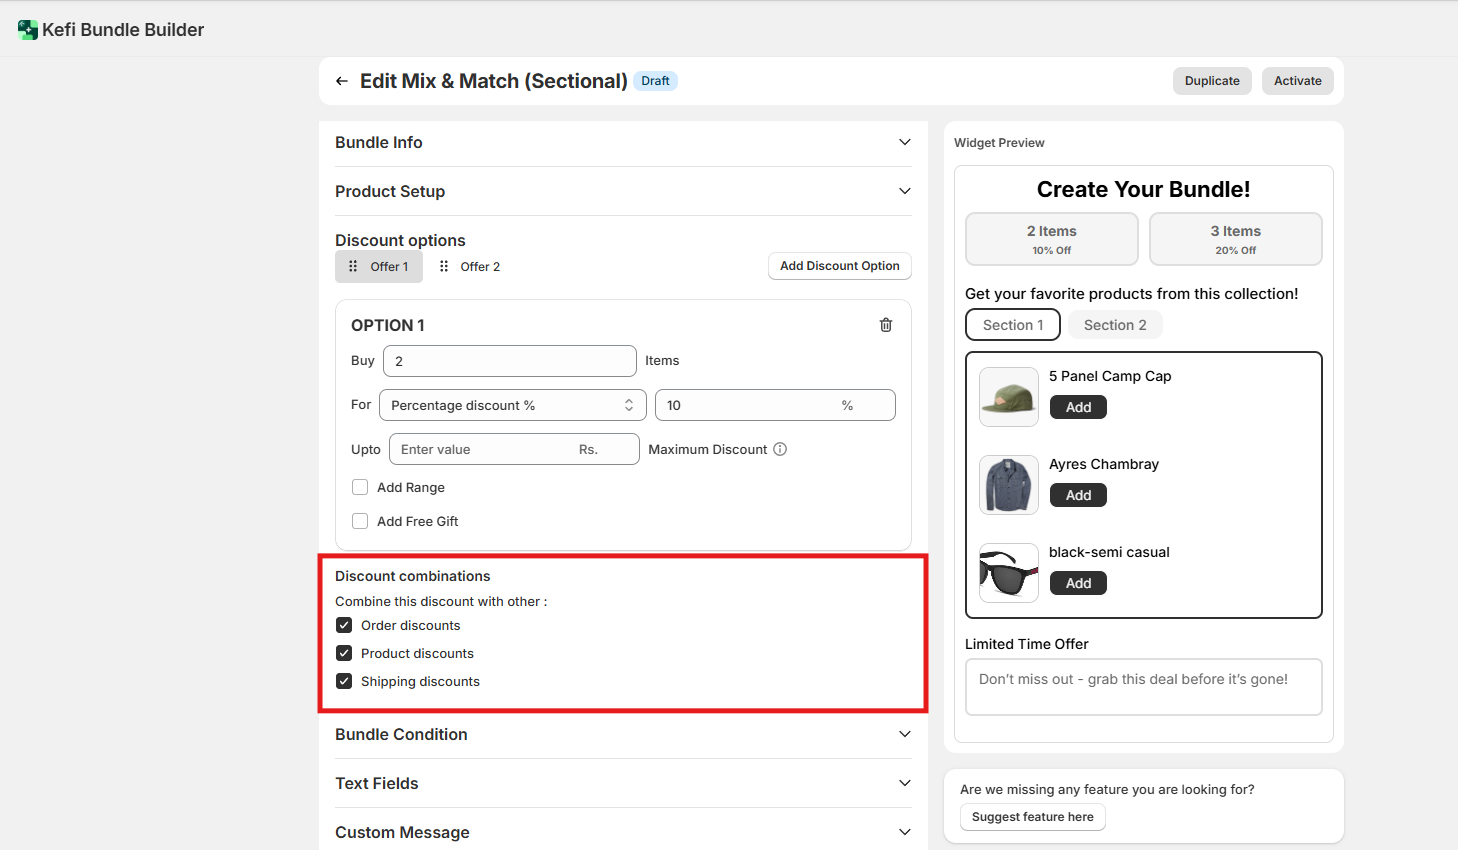
Combine this discount with other:
You can choose to combine your add-on discount with other types of discounts active in your store, including:
This allows you to create more compelling promotions by layering multiple incentives for your customers.
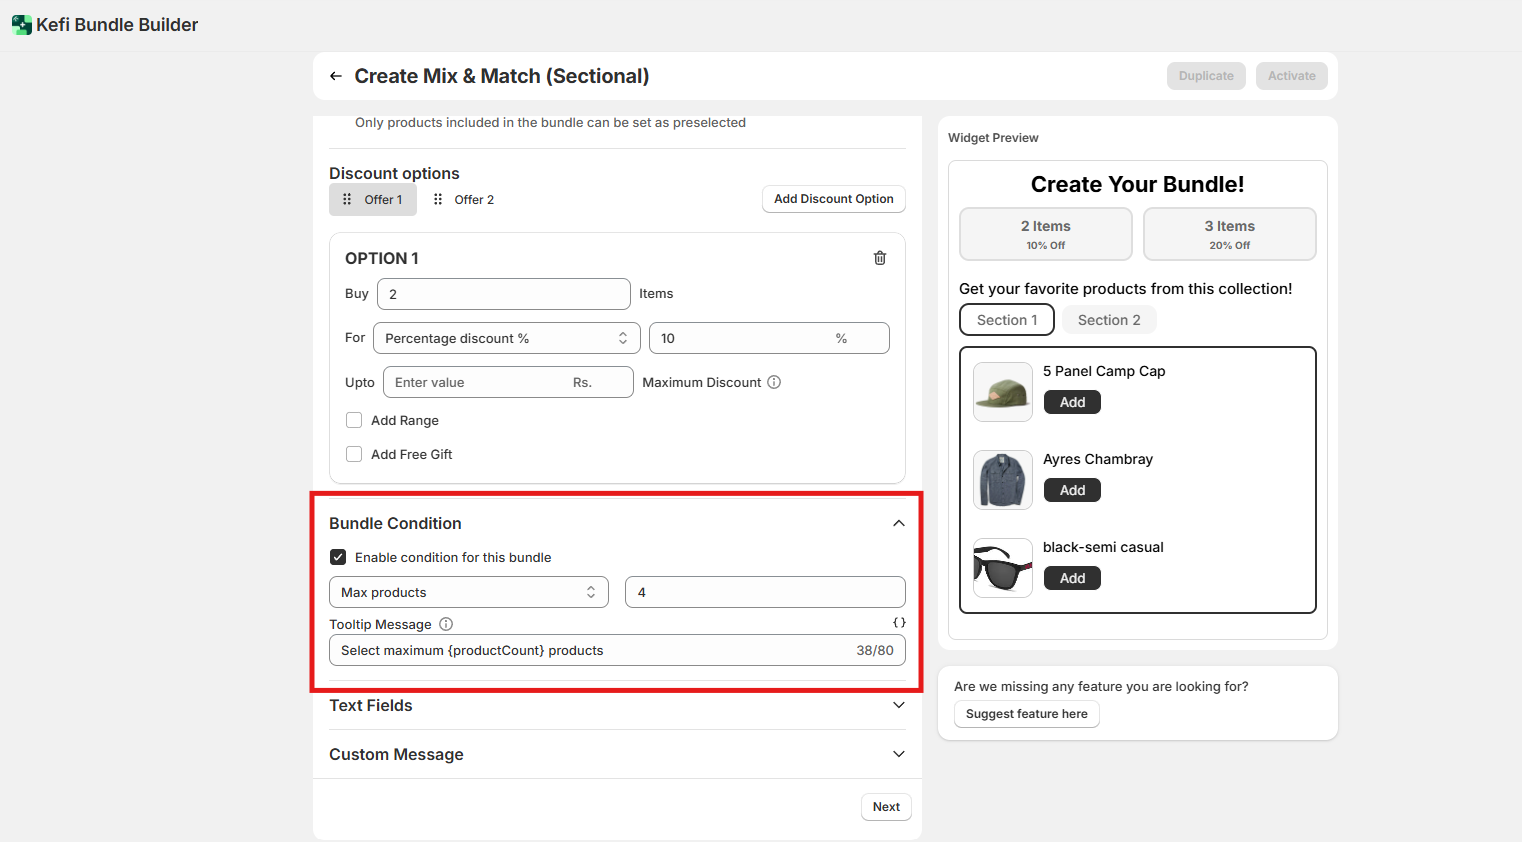
4. Bundle Condition
Enable this option to set specific conditions that must be met before the bundle can be added to the cart.
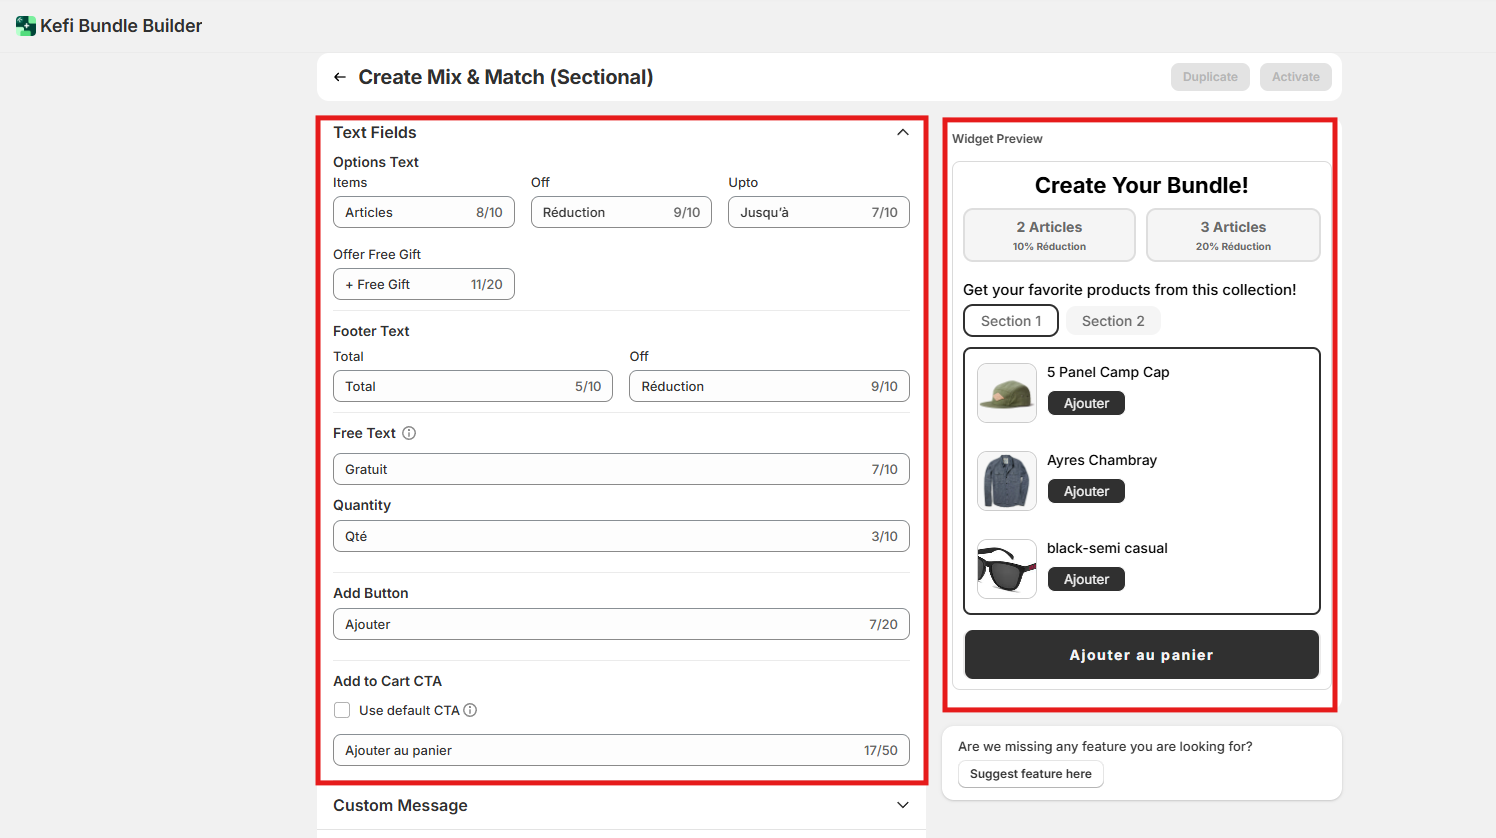
5. Text Fields
This section allows you to customize all the text shown on the Mix and Match (Sectional) bundle widget. It’s perfect for aligning the language with your brand tone or translating content for different markets.
You can easily update key elements such as:
6. Custom Message
Add any additional note or promotional message (e.g., “Get a free pouch with every 3-piece set!”). This appears within the bundle widget and can be a great call-to-action.
How to Add a Custom Message:

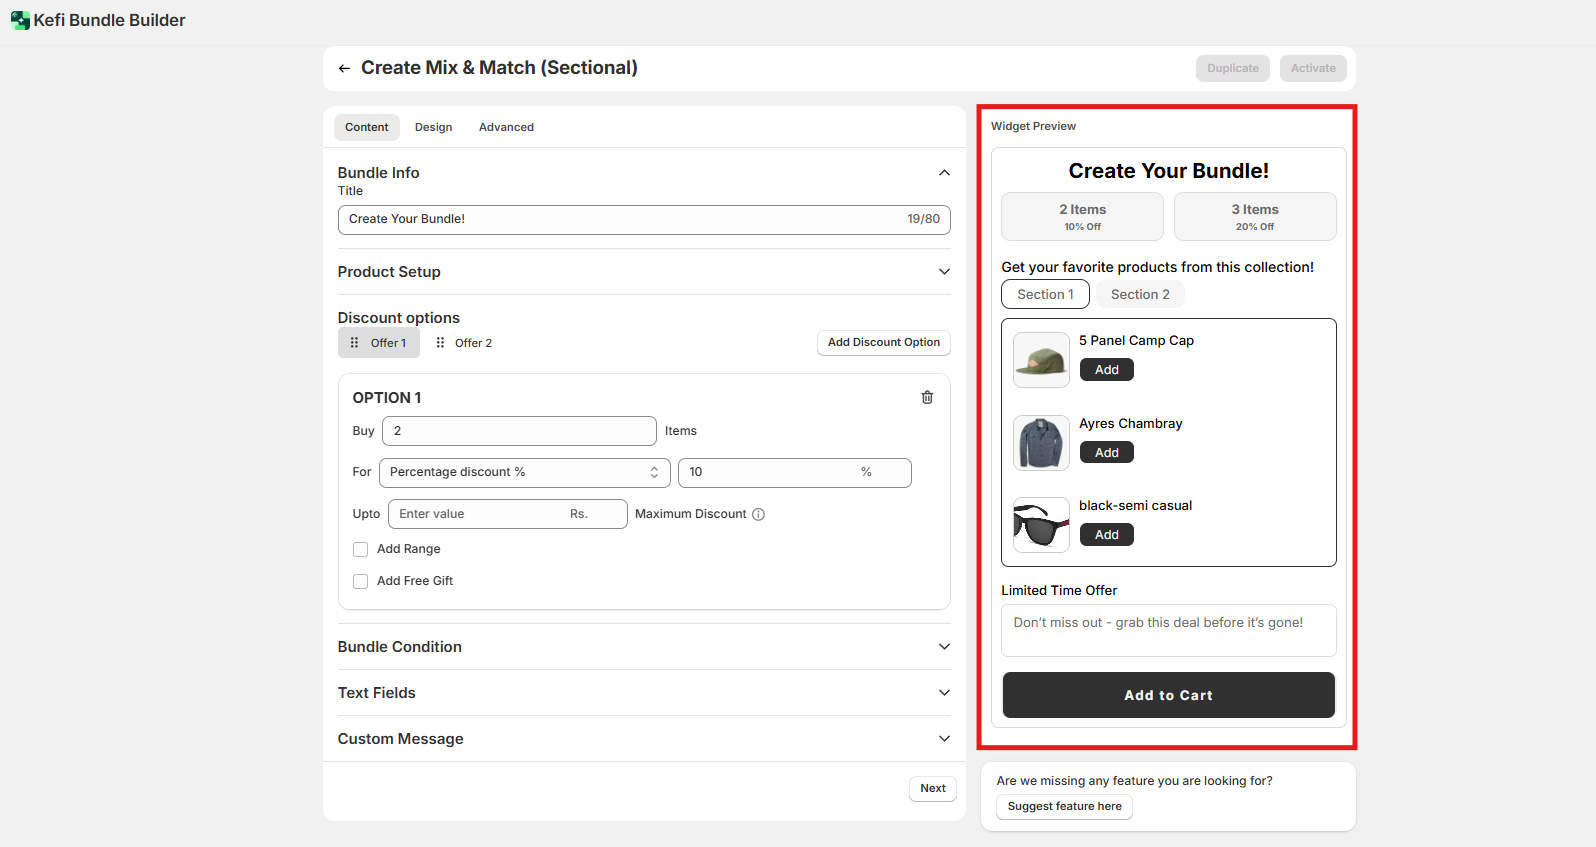
7. Widget Preview
On the right-hand side, you’ll see a live preview of your bundle as you build it. This helps you:
Now , click on the “Next” button to proceed to the next section .
After clicking the next you would be redirected to the next section that is Design
Step 3:
The Design section allows you to customize the appearance of your bundle widget, ensuring it aligns with your store’s branding and layout. This section includes multiple styling options, grouped into categories for easier navigation.
Let’s explore the first category: General.
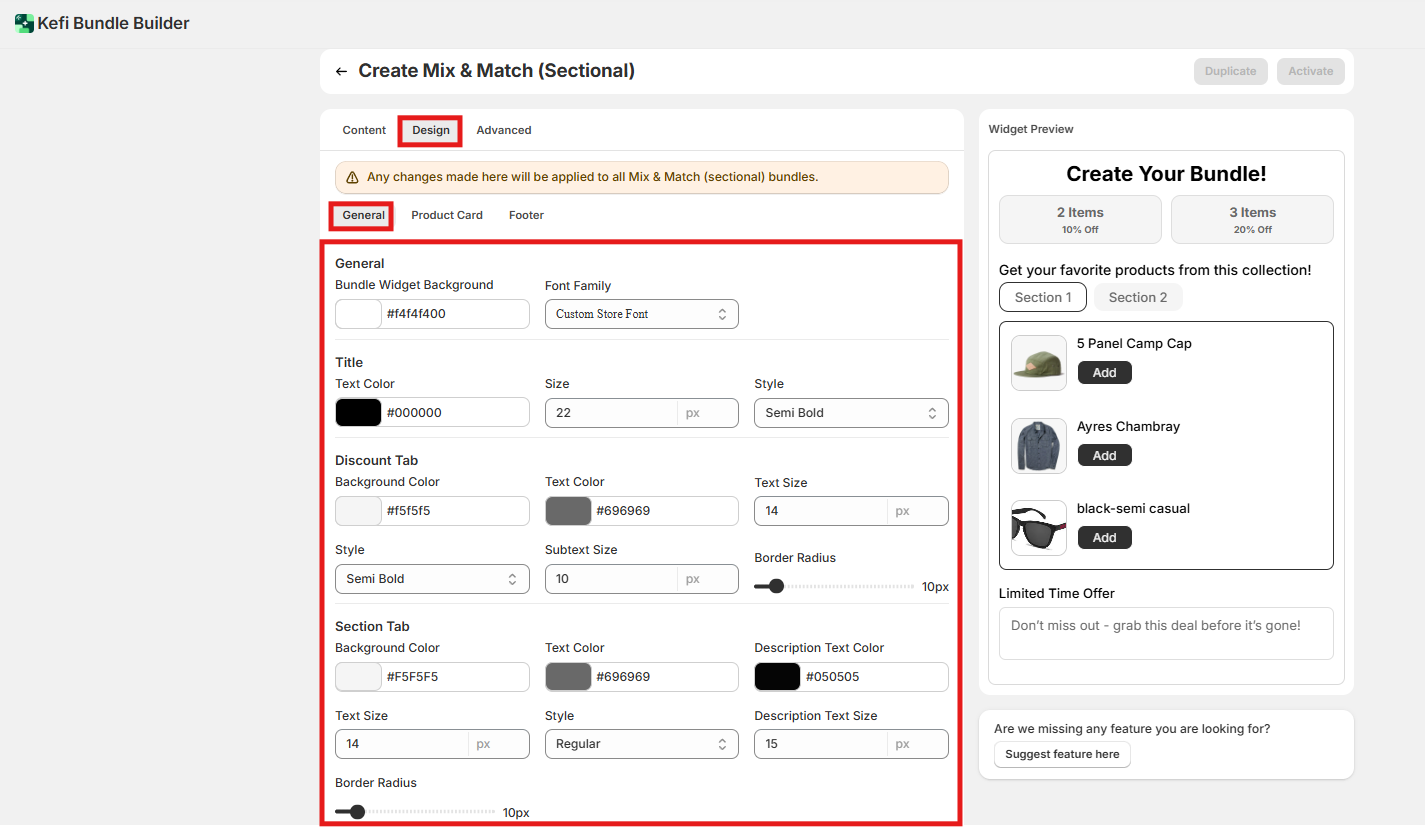
1. General
Use the General settings to define the overall look and feel of the bundle widget. These settings affect the background, fonts, and styles for various sections.
Bundle Widget Background
Font Family
Title
Discount Tab
Customize how the discount information appears:
Section Tab
Control the styling of each bundle section’s tab:
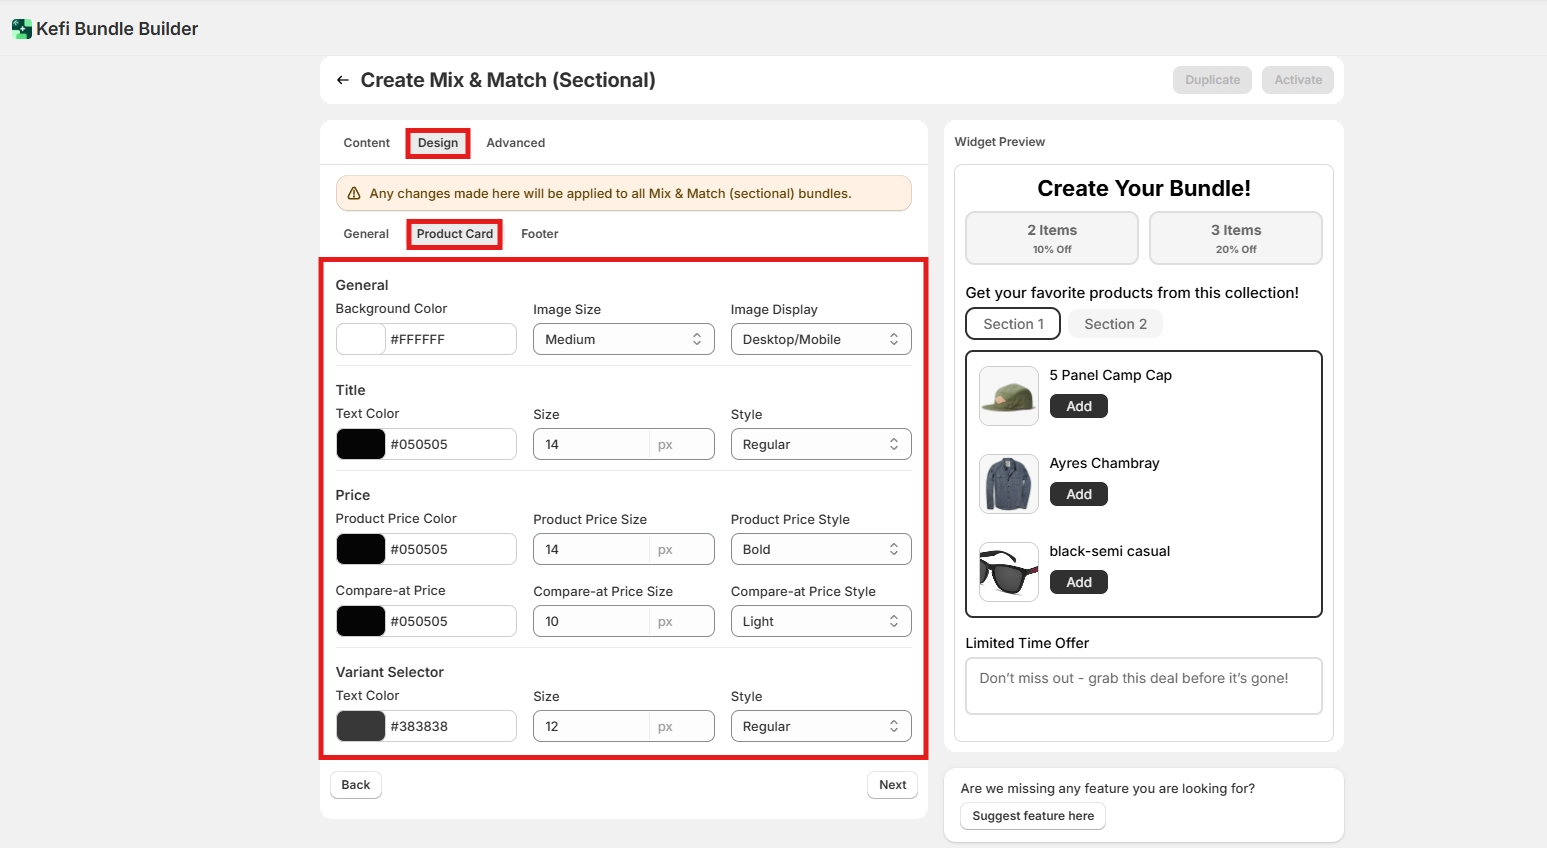
2. Product Card
The Product Card settings allow you to customize how each individual product within the bundle is displayed. This includes the product image, title, pricing details, and variant selection options.
General
Customize the overall appearance of the product block:
Title
Control how the product name is styled:
Price
Customize how the product pricing appears:
Compare-at Price – Useful for showing original prices before a discount:
Variant Selector
Style the dropdown or swatches used for variant selection:
3. Footer
The Footer section lets you customize the final portion of your bundle widget—where key information like custom messages and total pricing is displayed. This is an important area for reinforcing clarity and encouraging conversions.
Custom Field Section
This area typically displays any custom messages or additional fields you want to show at the bottom of the widget.
Total Section
This section highlights the total price of the selected bundle. There appear to be two Total Section blocks, so I’ve listed both for clarity. You may want to consolidate or rename if these refer to different elements.

Now , click on the “Next” button to proceed to the next section .
After clicking the next you would be redirected to the next section that is “Advance”
Step 4:
Advanced Settings - The Advanced section gives you greater control over when, where, and to whom the bundle widget is shown. These settings are useful for precise targeting and scheduling. Let’s dive into each option:
1. Widget Position
By default, the widget will appear below the Add to Cart button.
To change its position, open the Shopify Theme Editor, and simply drag the app block to your preferred location on the product page—no coding required.
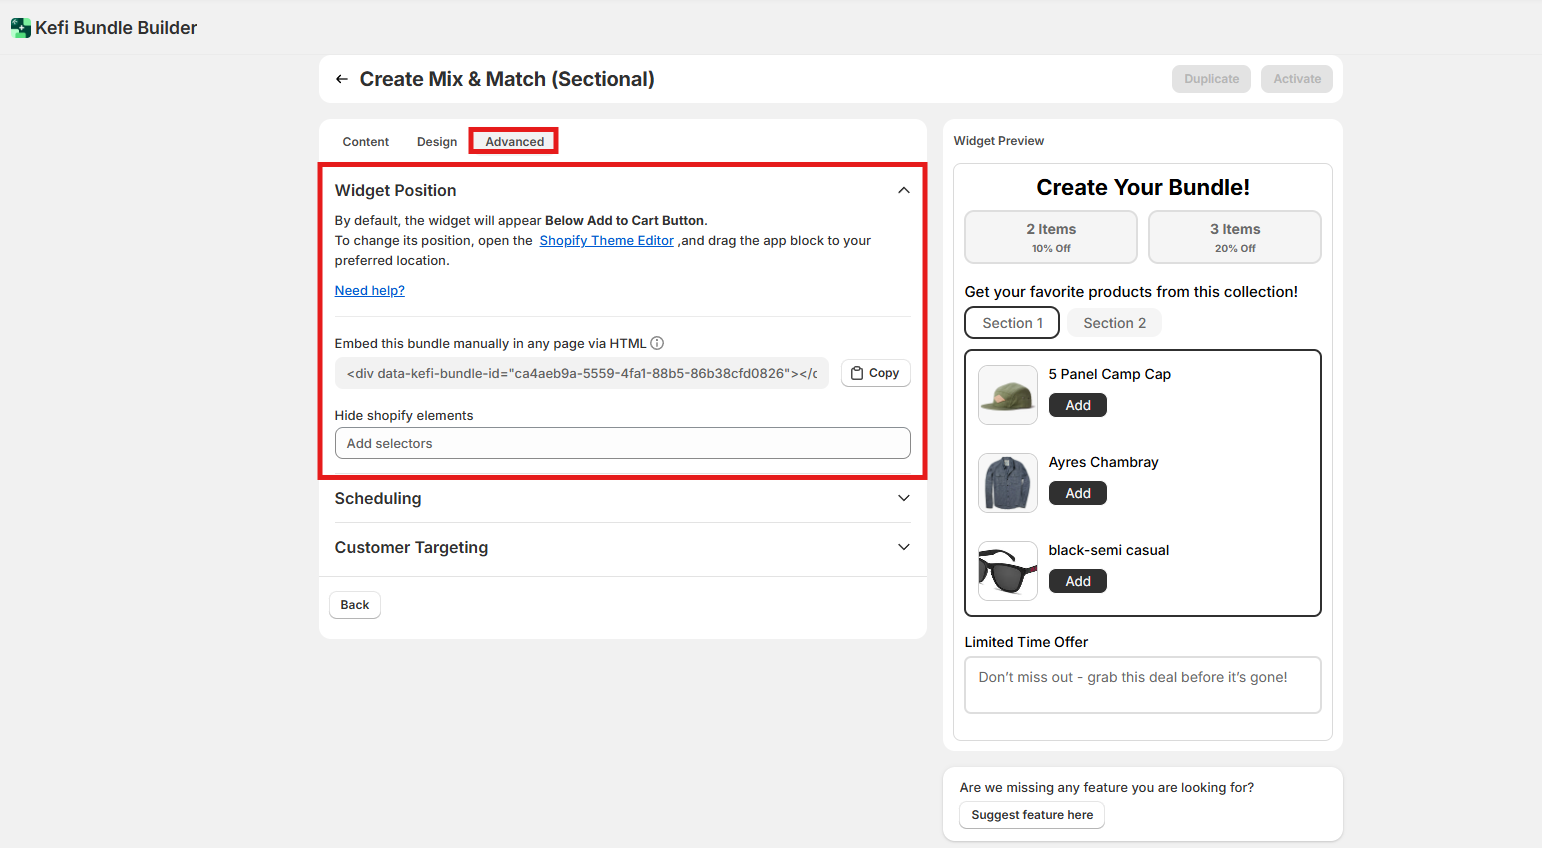
Embed Bundle via HTML
You can also embed this bundle manually on any page using HTML.
Display the bundle wherever you like by placing the provided HTML tag directly into your theme file.
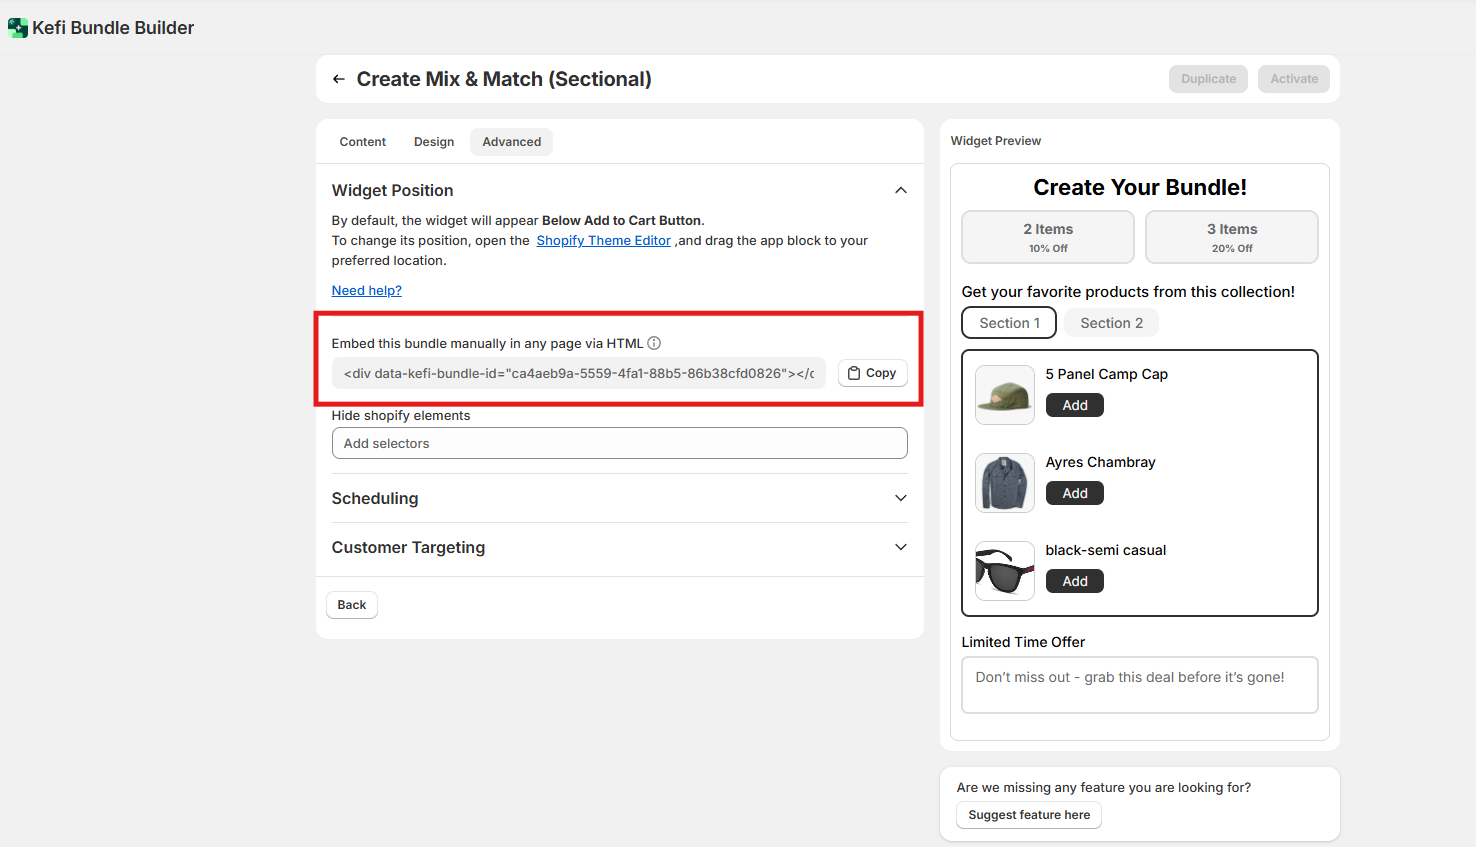
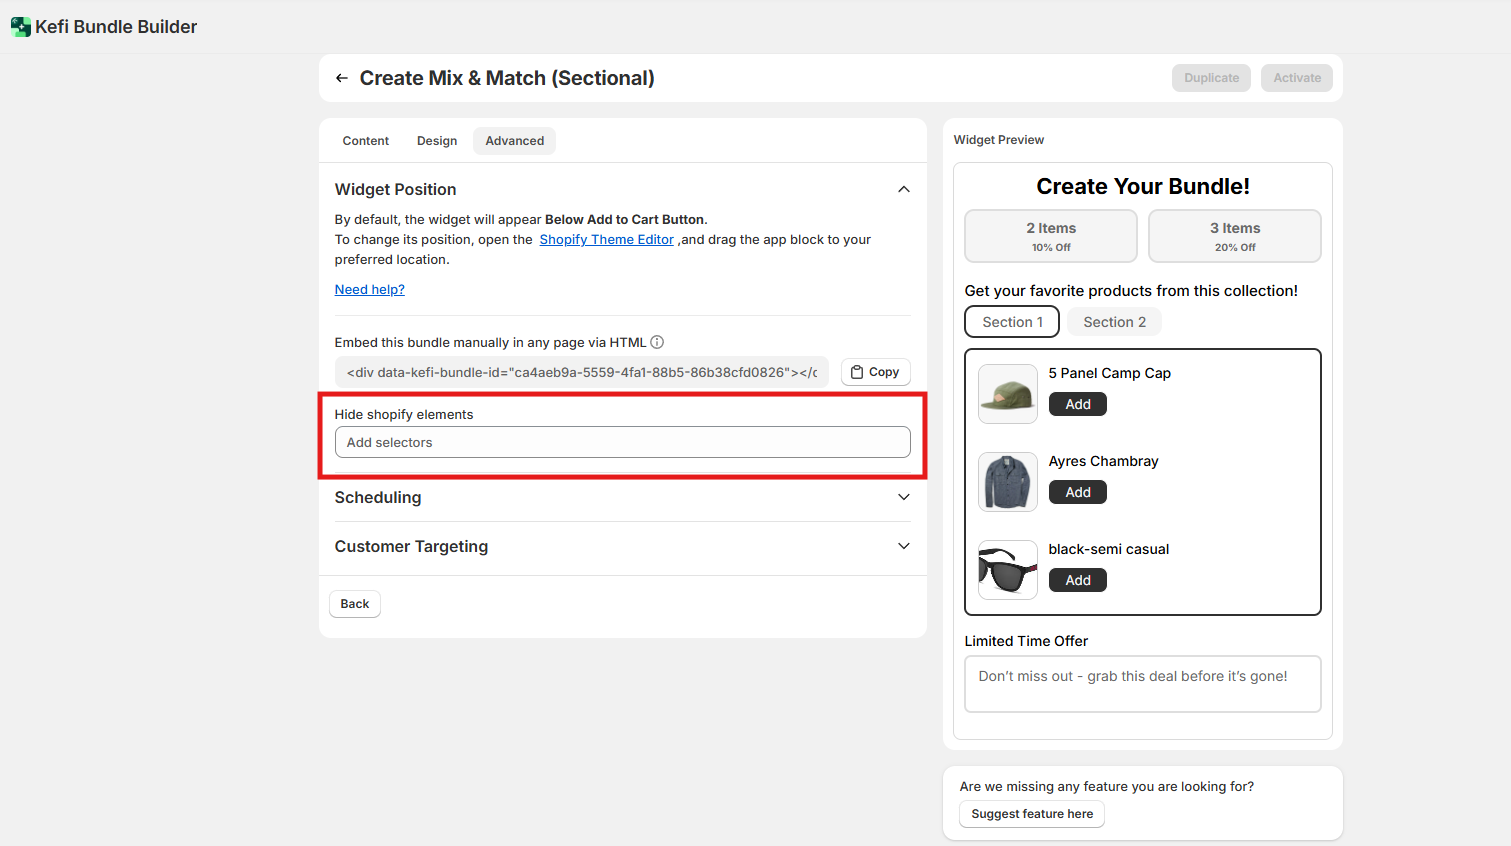
Hide Shopify Elements
You have the option to hide specific Shopify elements (like the default Add to Cart button or product price) to reduce redundancy when showing bundles.
Simply enter the CSS selectors of the elements you'd like to hide.
For example:
.product__price
.product-form__buttons
This helps create a cleaner, more focused layout around your bundle widget.
For a detailed step-by-step guide, refer to this help article:
How to Position Bundles on Your Product Page
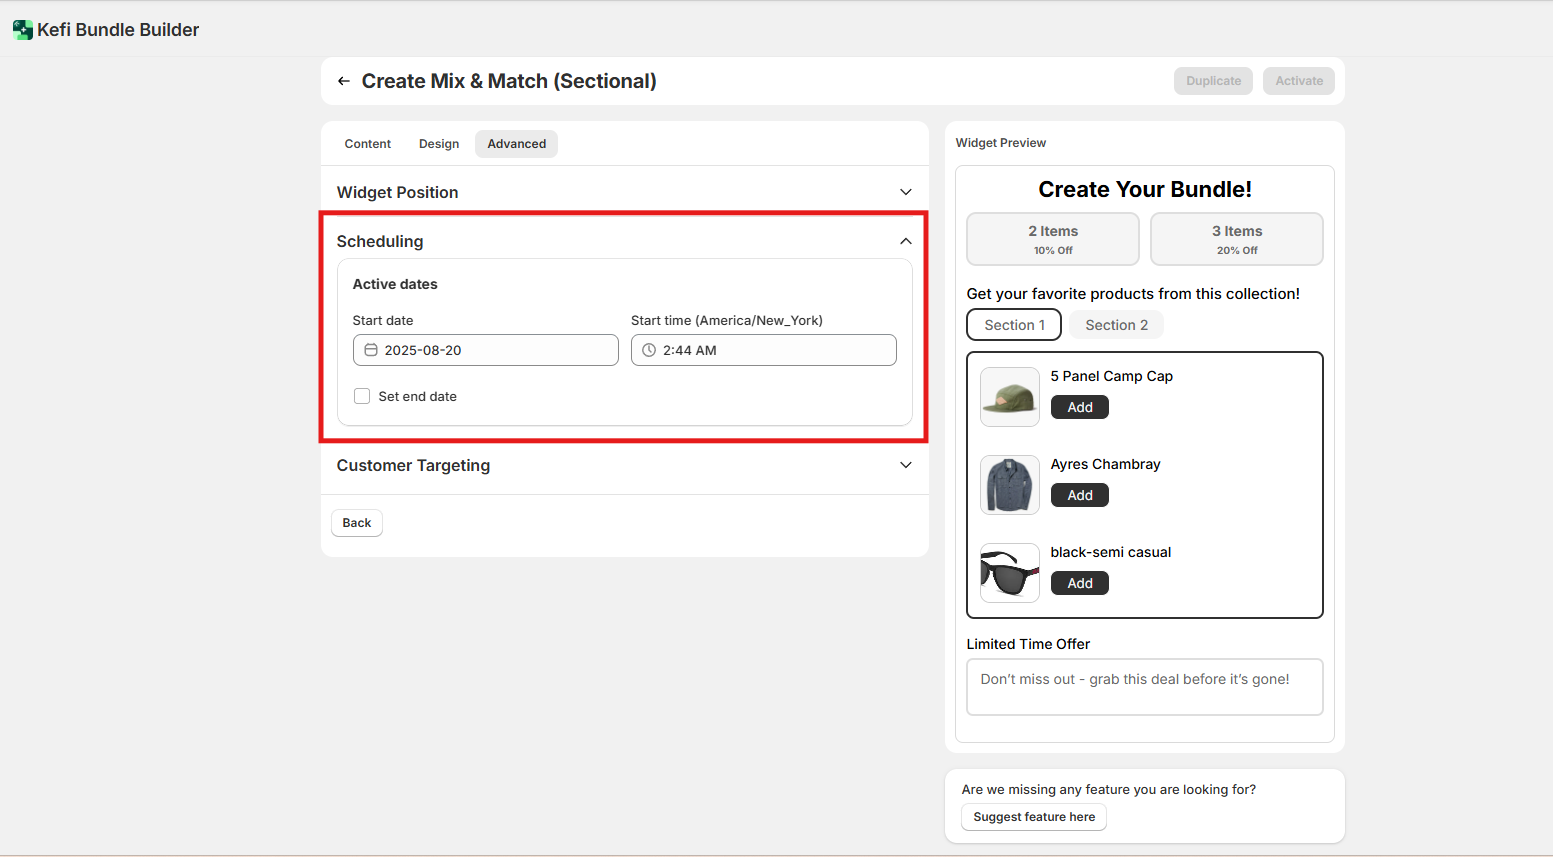
2. Scheduling
Set a start and end date for your bundle campaign. This is perfect for time-sensitive promotions, seasonal offers, or flash sales. The widget will only display during the defined period.
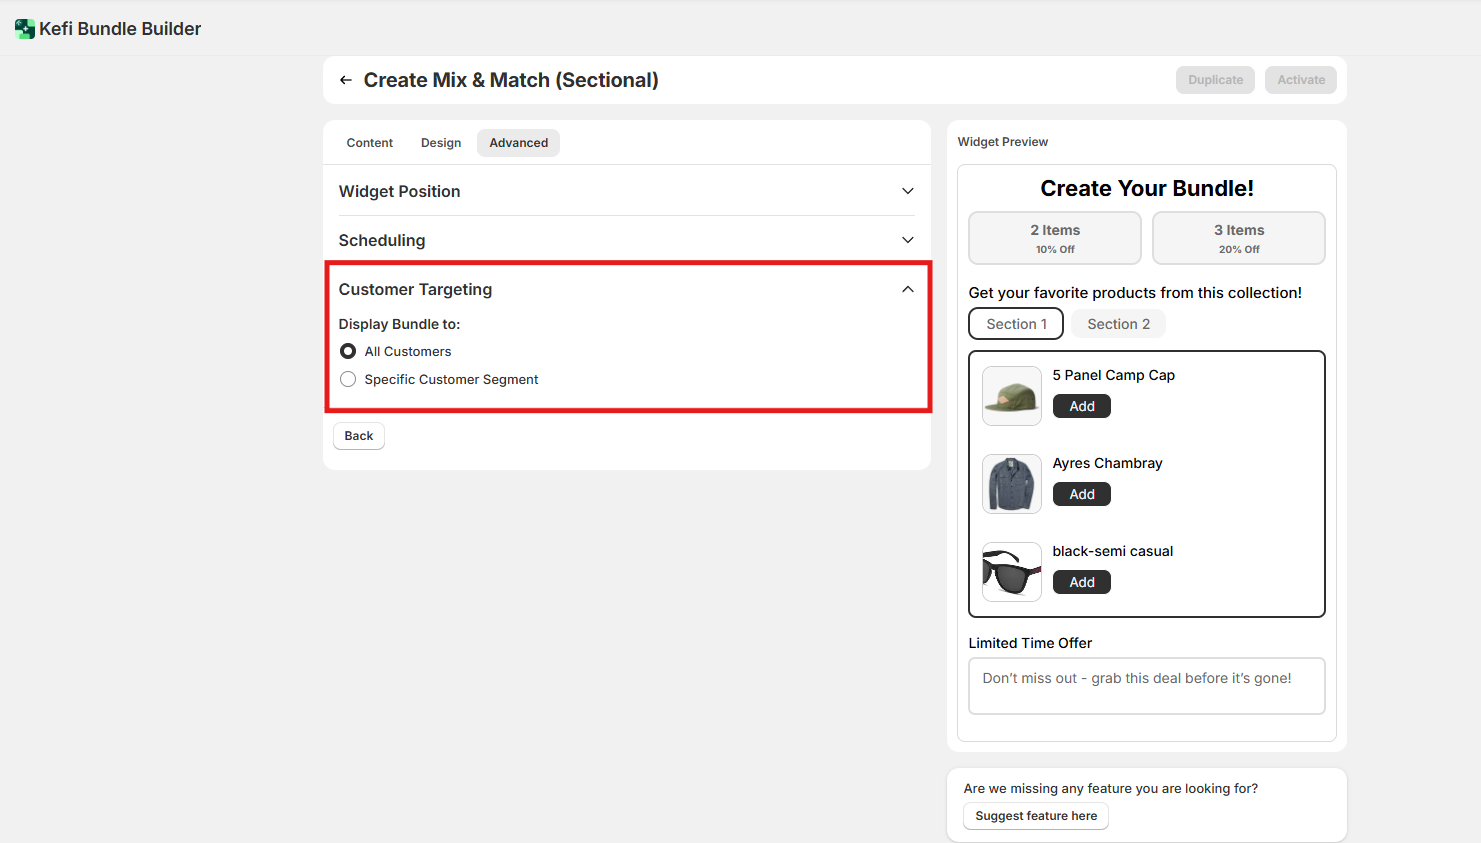
3. Customer Targeting
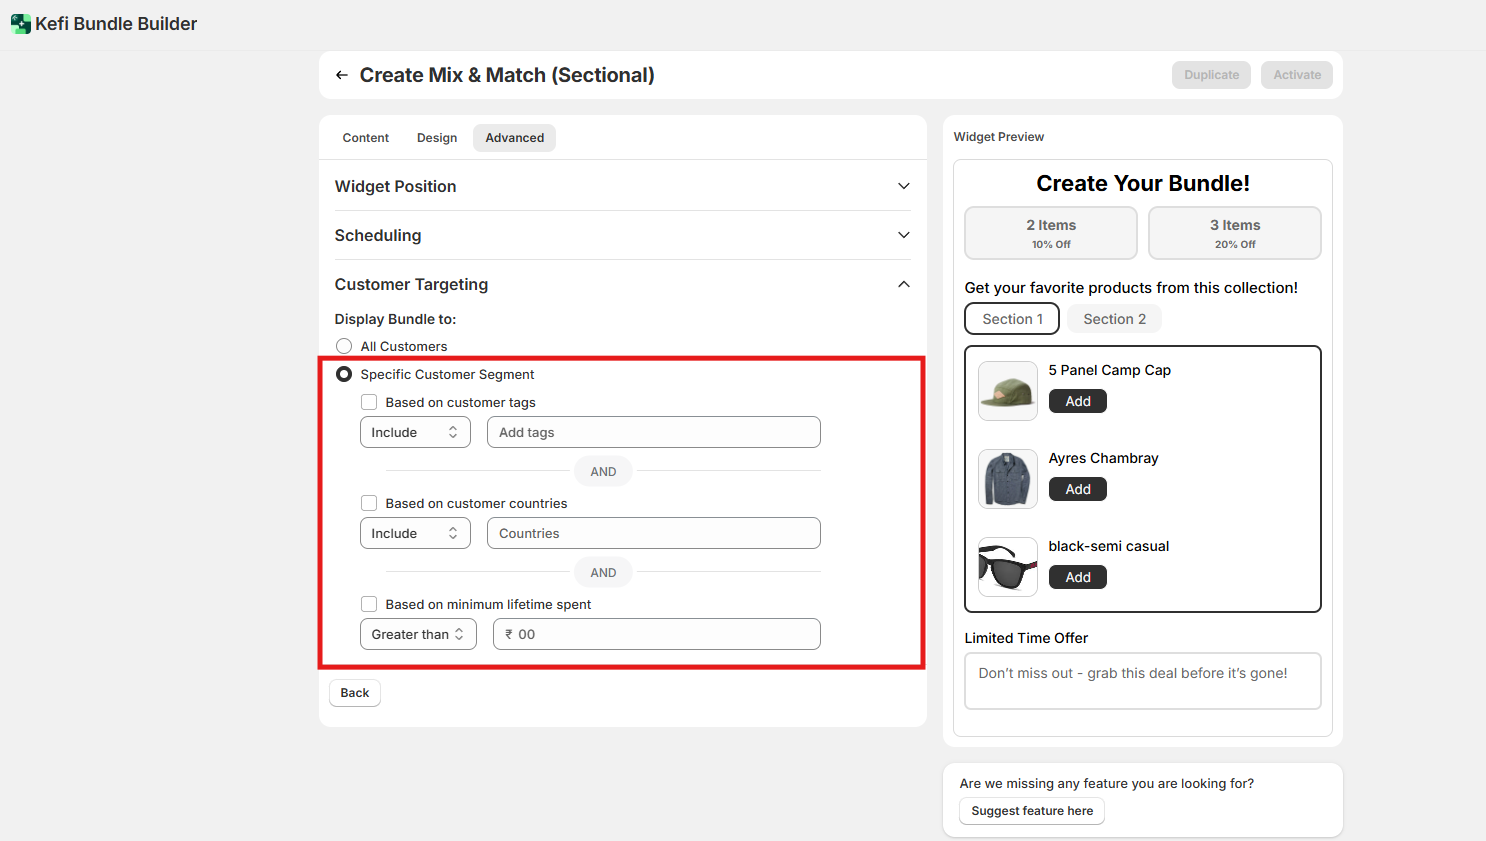
Control who sees the bundle by targeting:
In case of Specific Customer Segment -
STEP 5
Click on “Save” button to save all the changes

STEP 6:
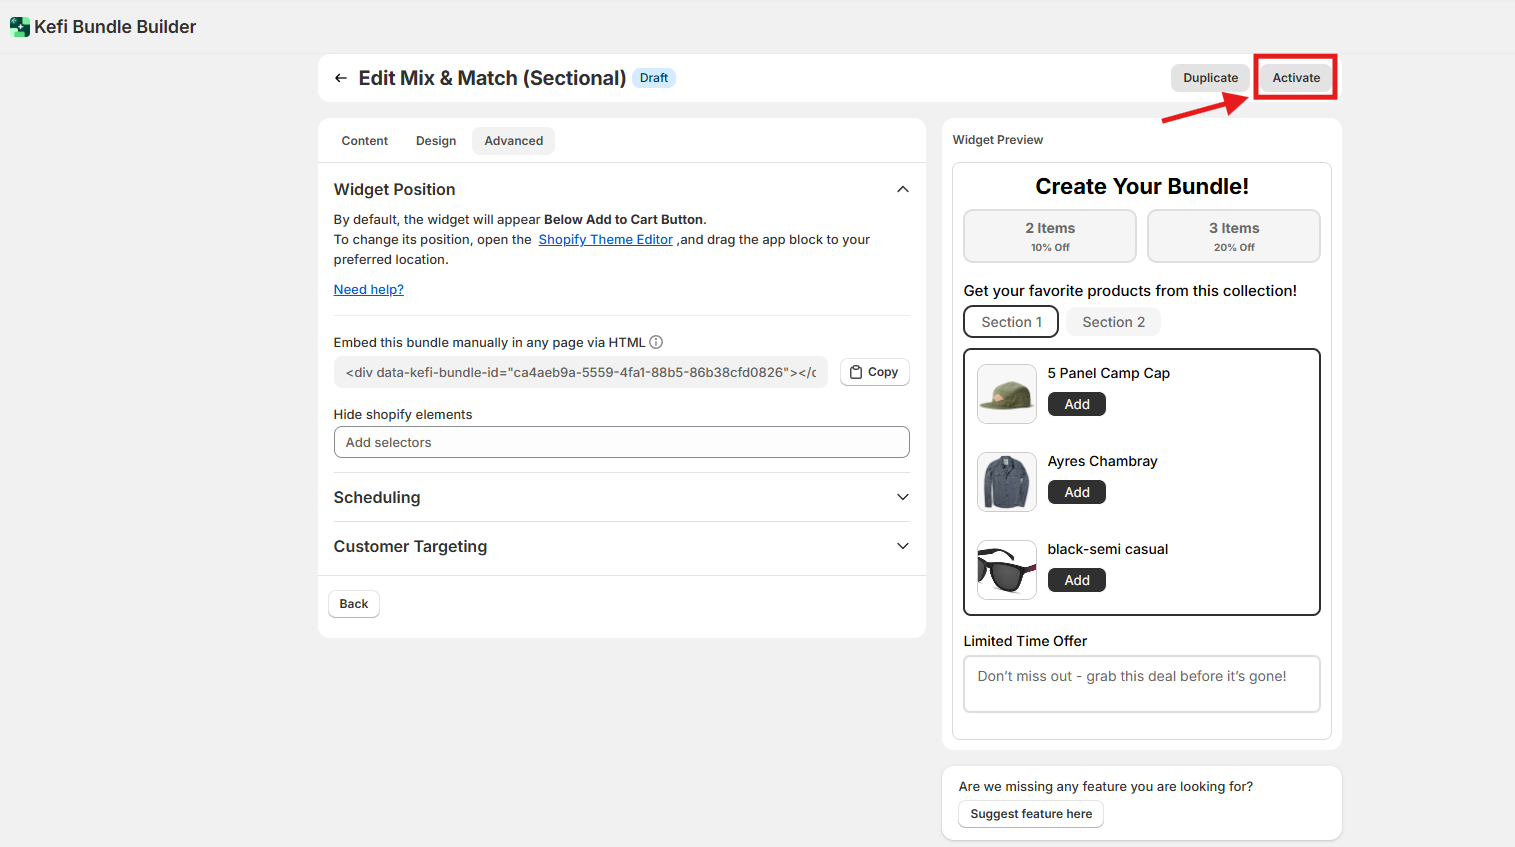
Click on “Activate” to activate the widget on your shopify store(make sure you have enabled the core snippet button in order to see the bundles on your store).
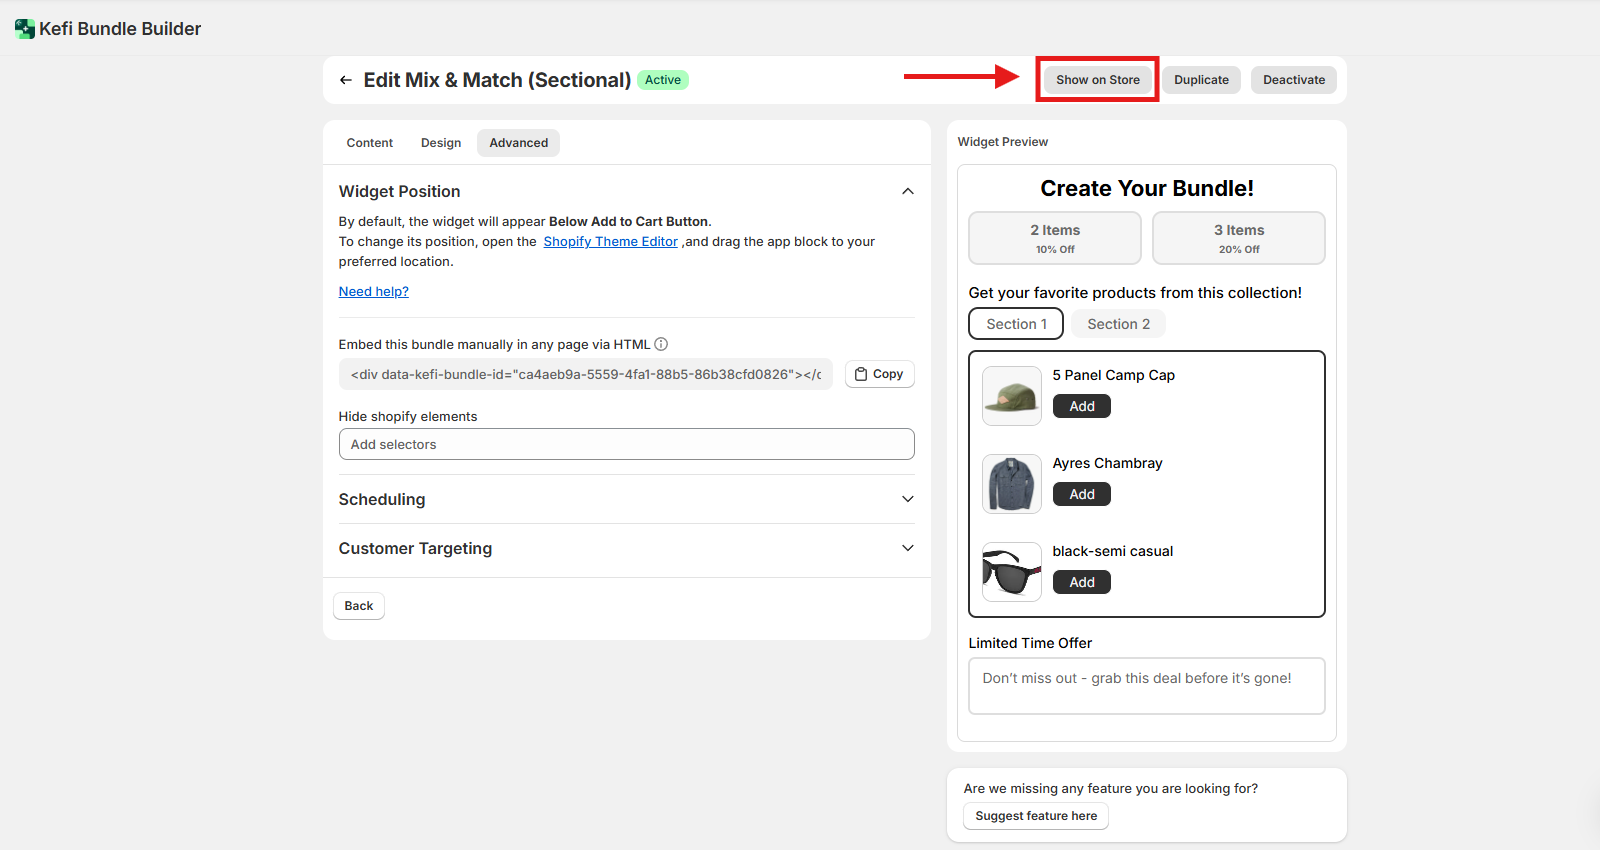
Your Mix and Match Bundle (Sectional) is Now Live! Click the “Show on Store” button to Preview the bundle as it appears to your customers
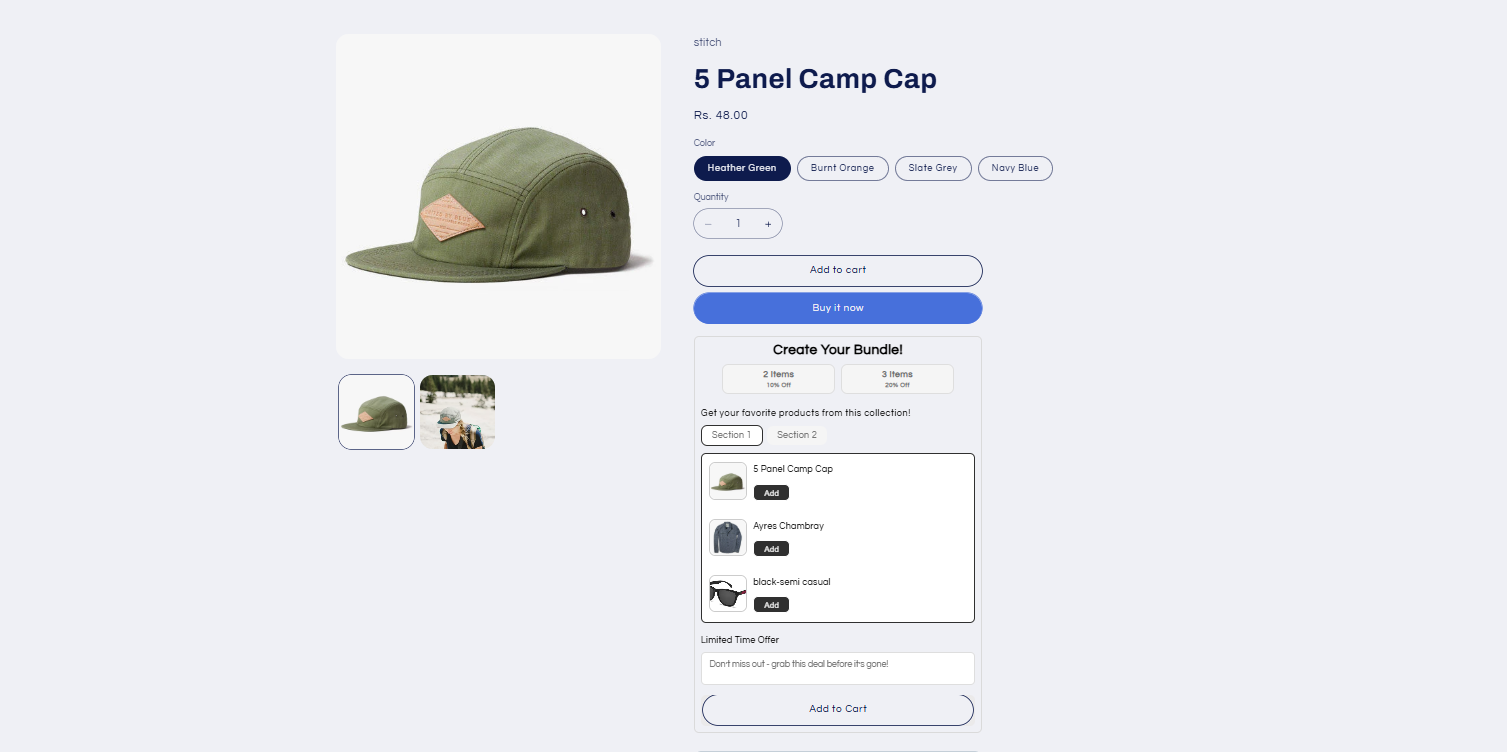
Now, head over to your storefront to see the Mix and Match (sectional) Bundle live in action.
If you have any questions or need assistance, feel free to contact us:
.svg)
