A Standard Bundle in Kefi lets you create a custom product combo and offer it at a special price to encourage bigger purchases. It’s a simple and effective way to promote related items together, drive more sales, and enhance the overall shopping experience.
These bundles are shown directly on product pages, making them highly visible and easy for customers to explore and add to their cart.
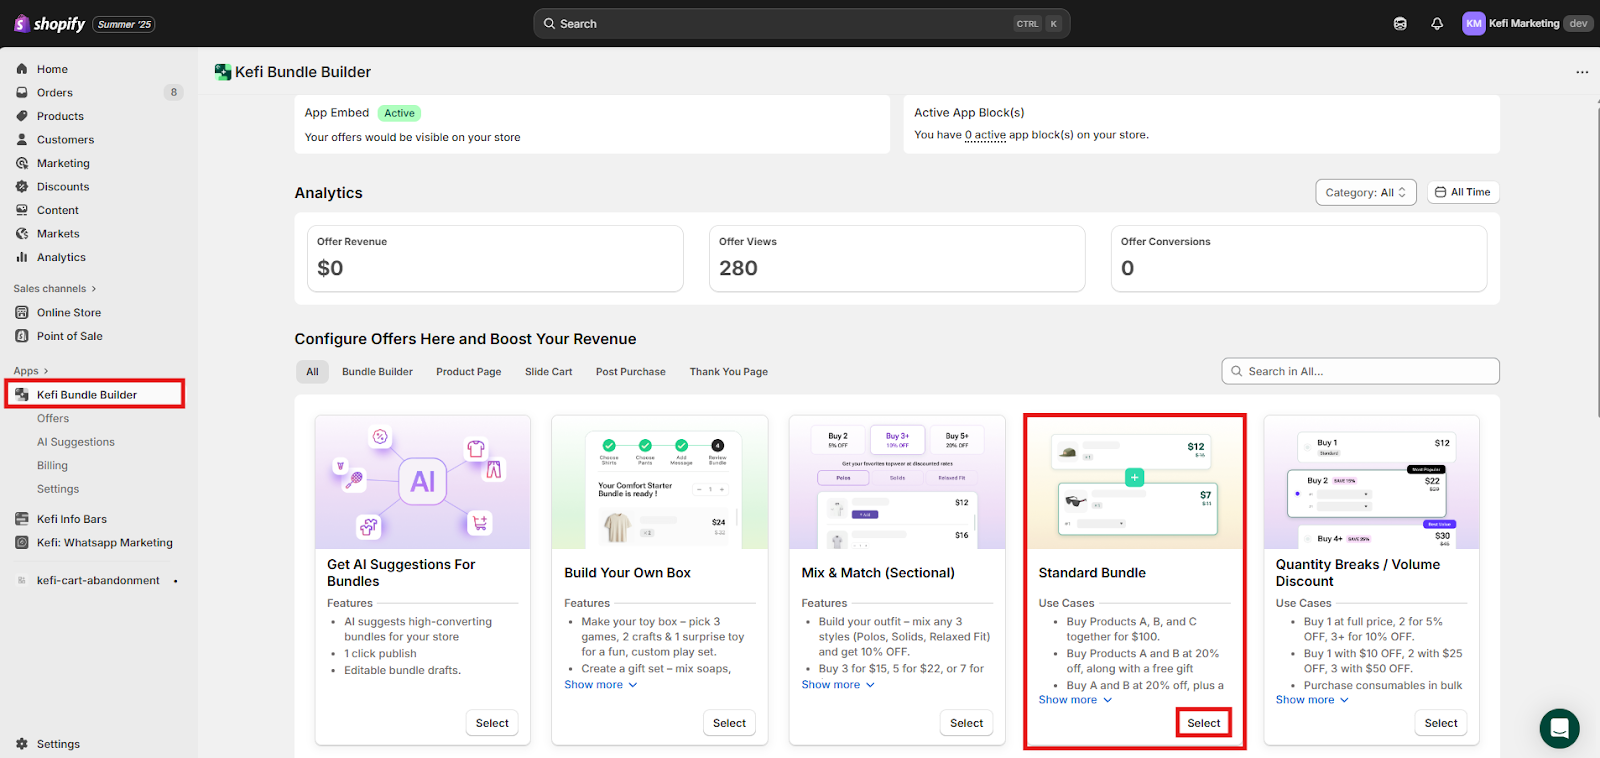
Create a Standard Bundle
Go to the Kefi Bundle Builder homepage and select the Standard Bundle. Click ‘Select’.
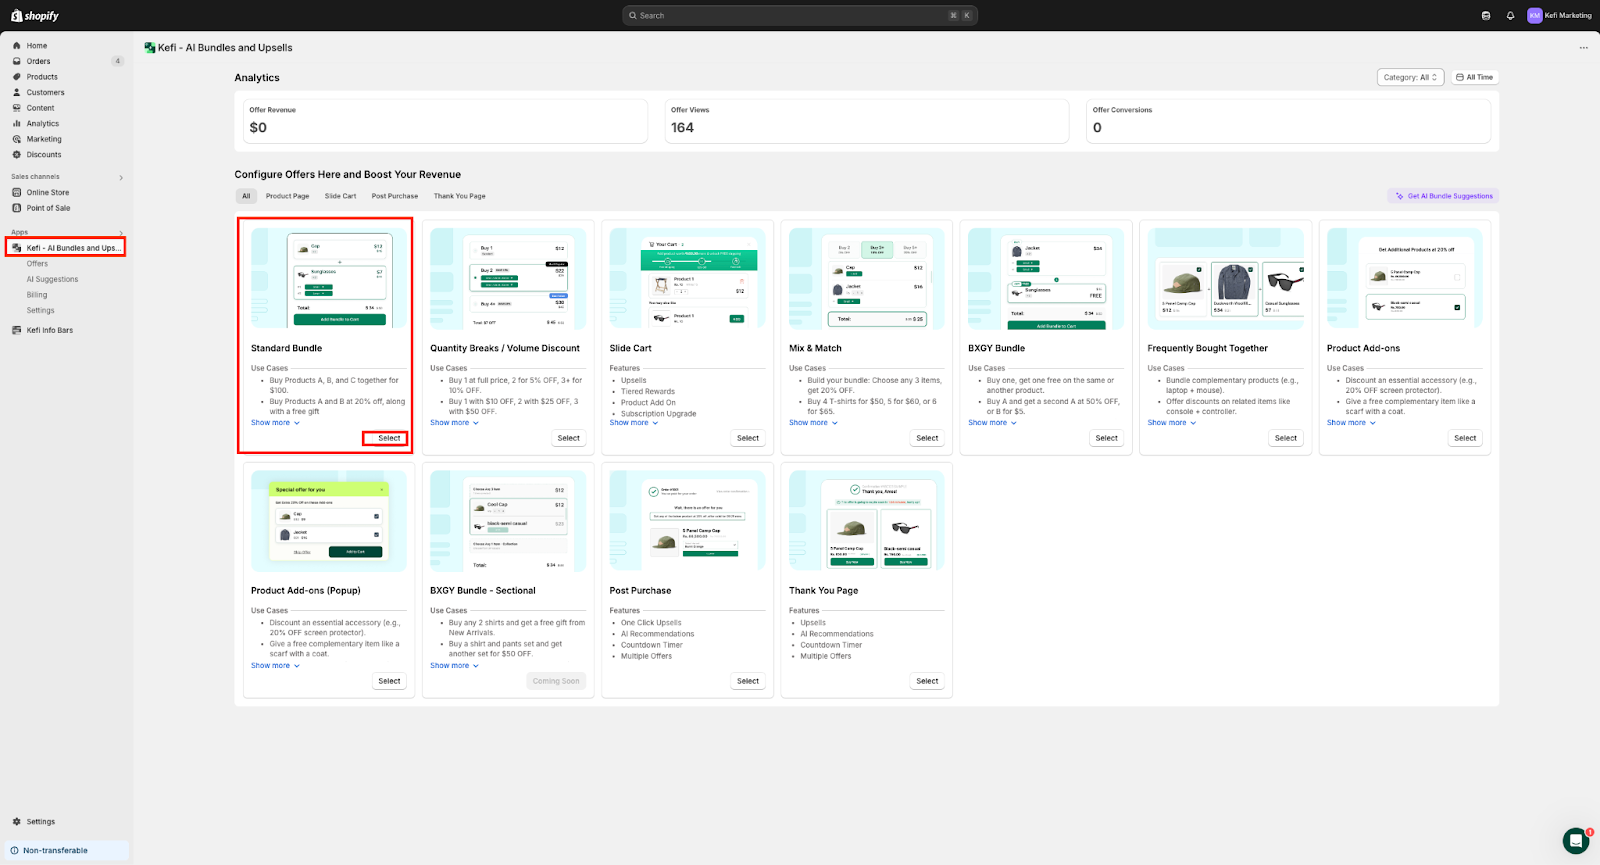
Choose the Template Design
Select one of the available template options for your bundle:

There are 3 sections available: Content, Design and Advanced.
The Widget Preview is available on the right side.

Let’s begin with the Content section.
The Content section is where you define the core structure and behavior of your bundle.
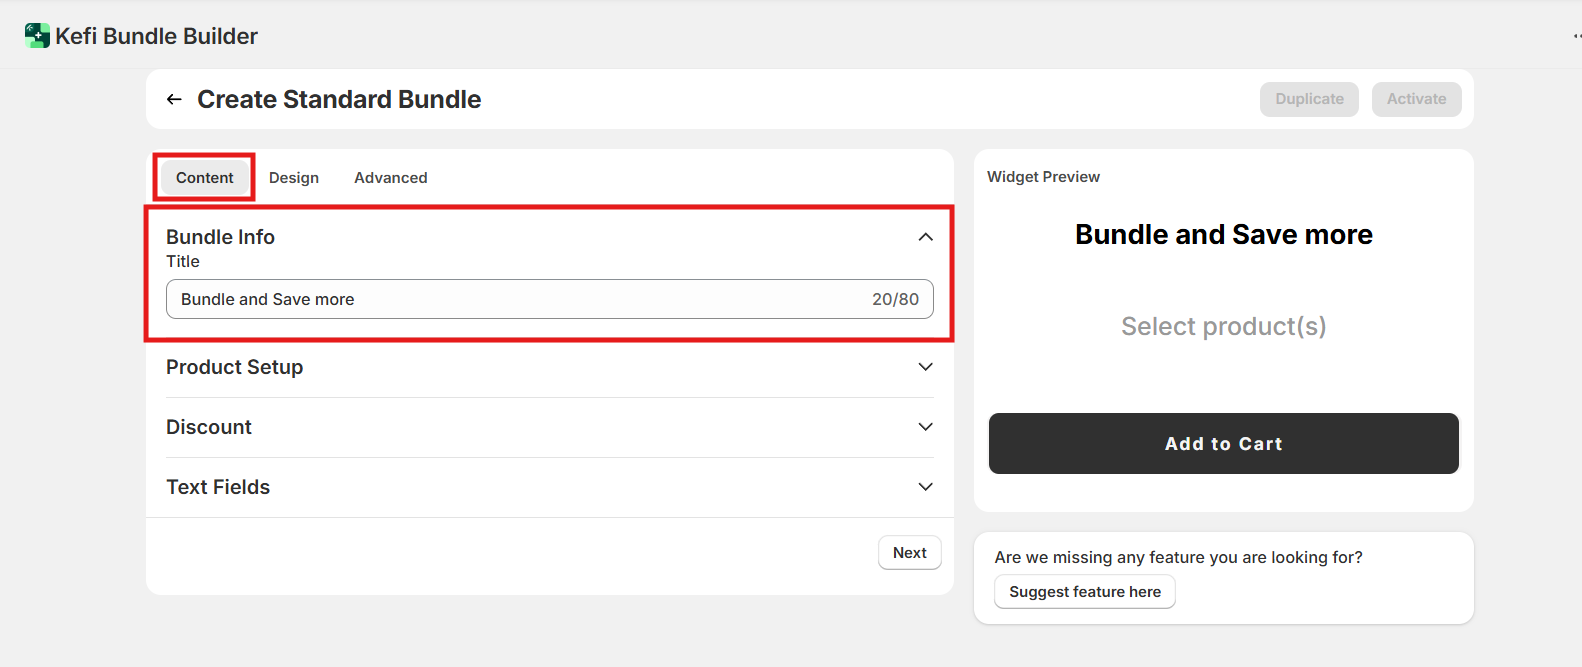
1. Bundle Info
Title: Enter a custom name for your bundle (e.g., “Bundle and Save More”).
This title is customer-facing and should be compelling yet clear. The maximum character limit set is 80.
2. Product Setup - Here, you can include the products you want as a part of the bundle.
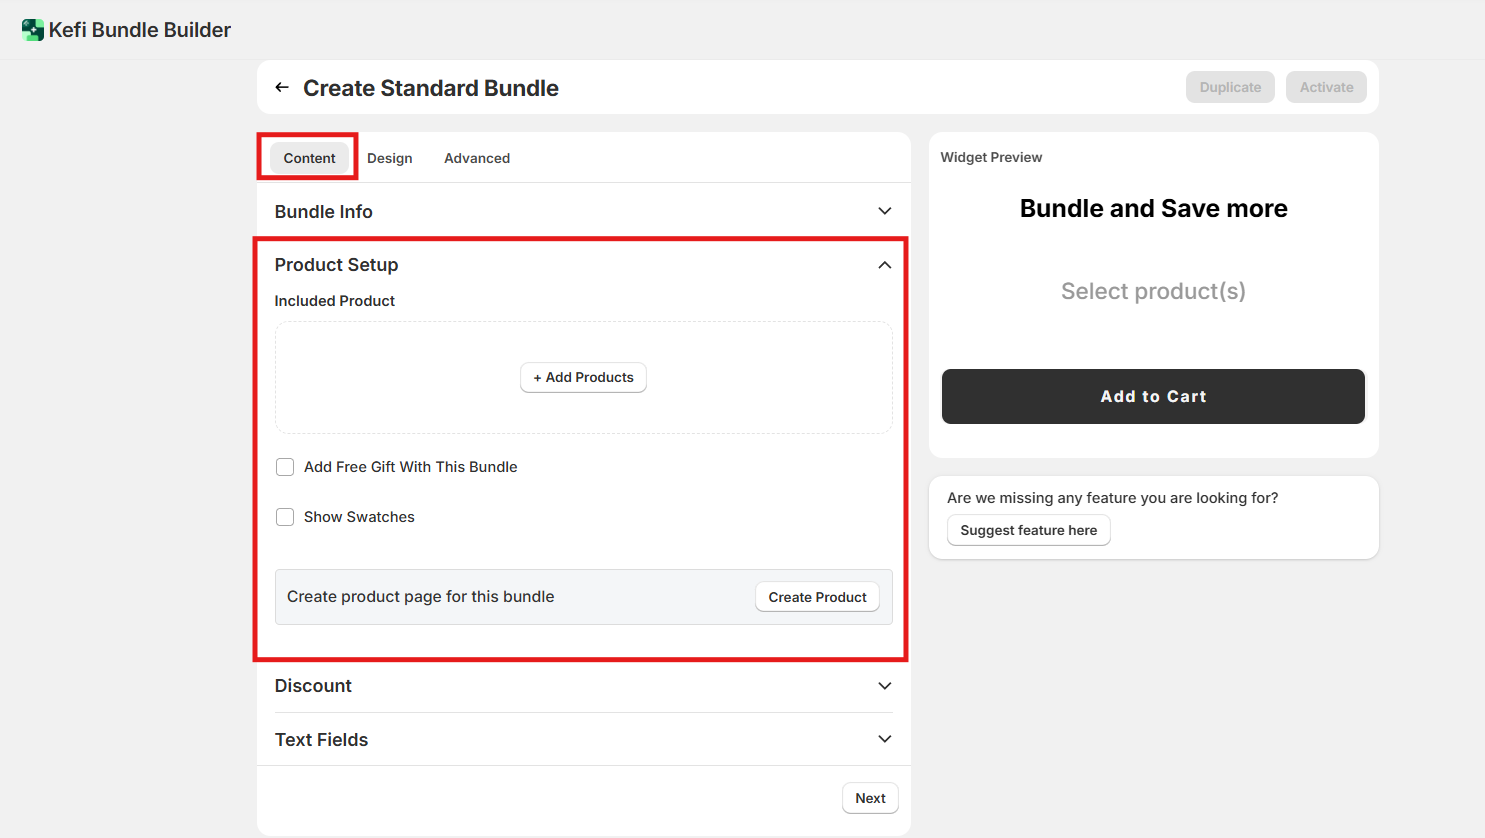
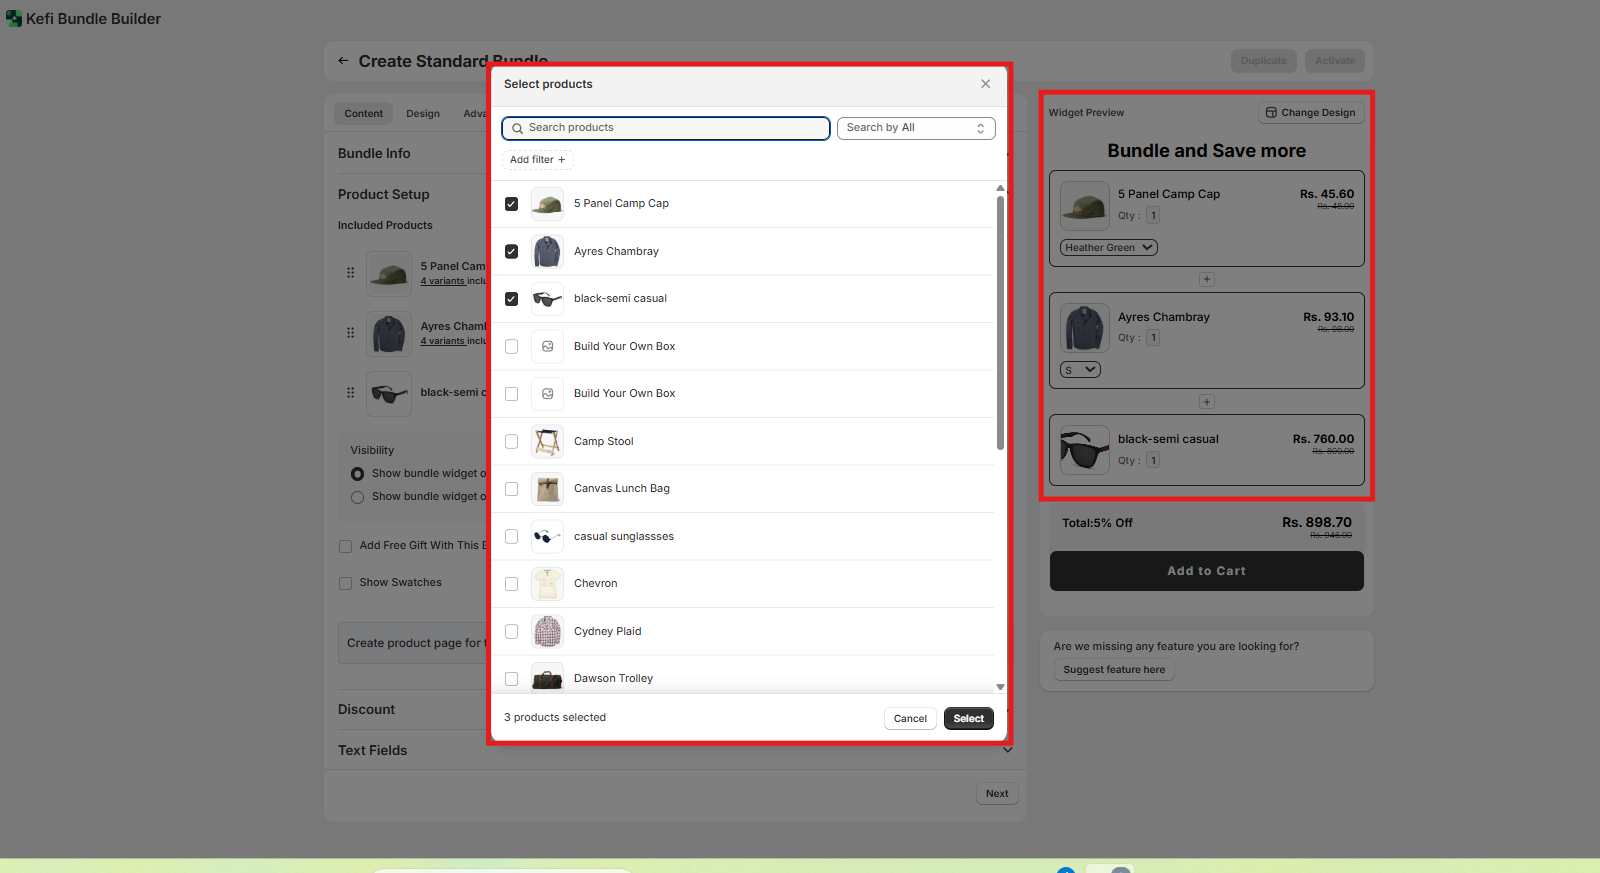
On clicking ‘Add Products’, your entire product list will be visible. Select the boxes beside the product you wish to add. Once done, click ‘Select’.
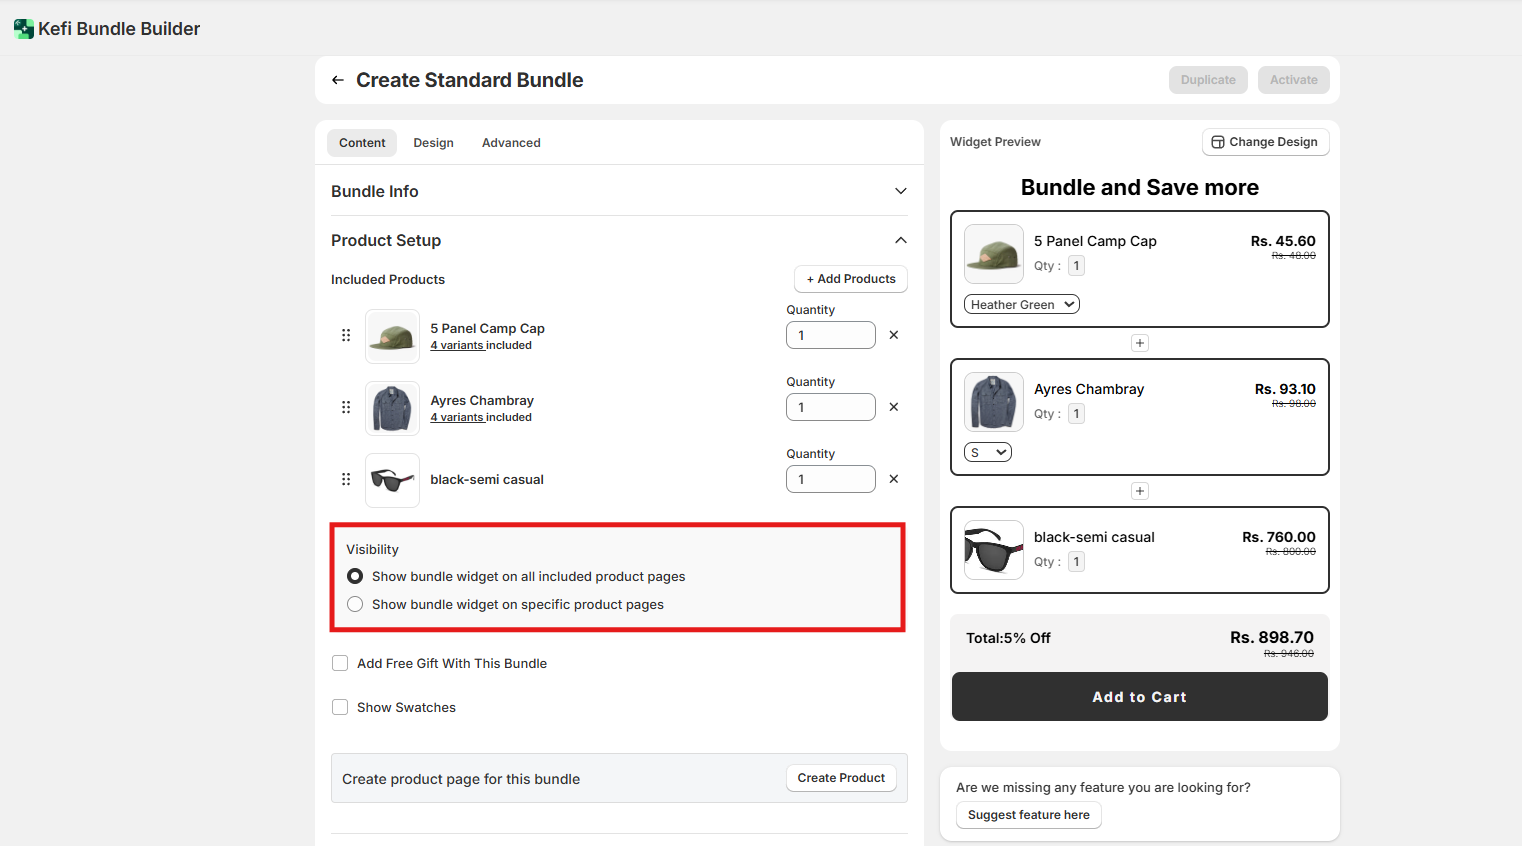
You can then choose Visibility.
This setting determines where your bundle widget will appear across your product pages. You can control where bundles are shown to match your marketing goals and customer journey.
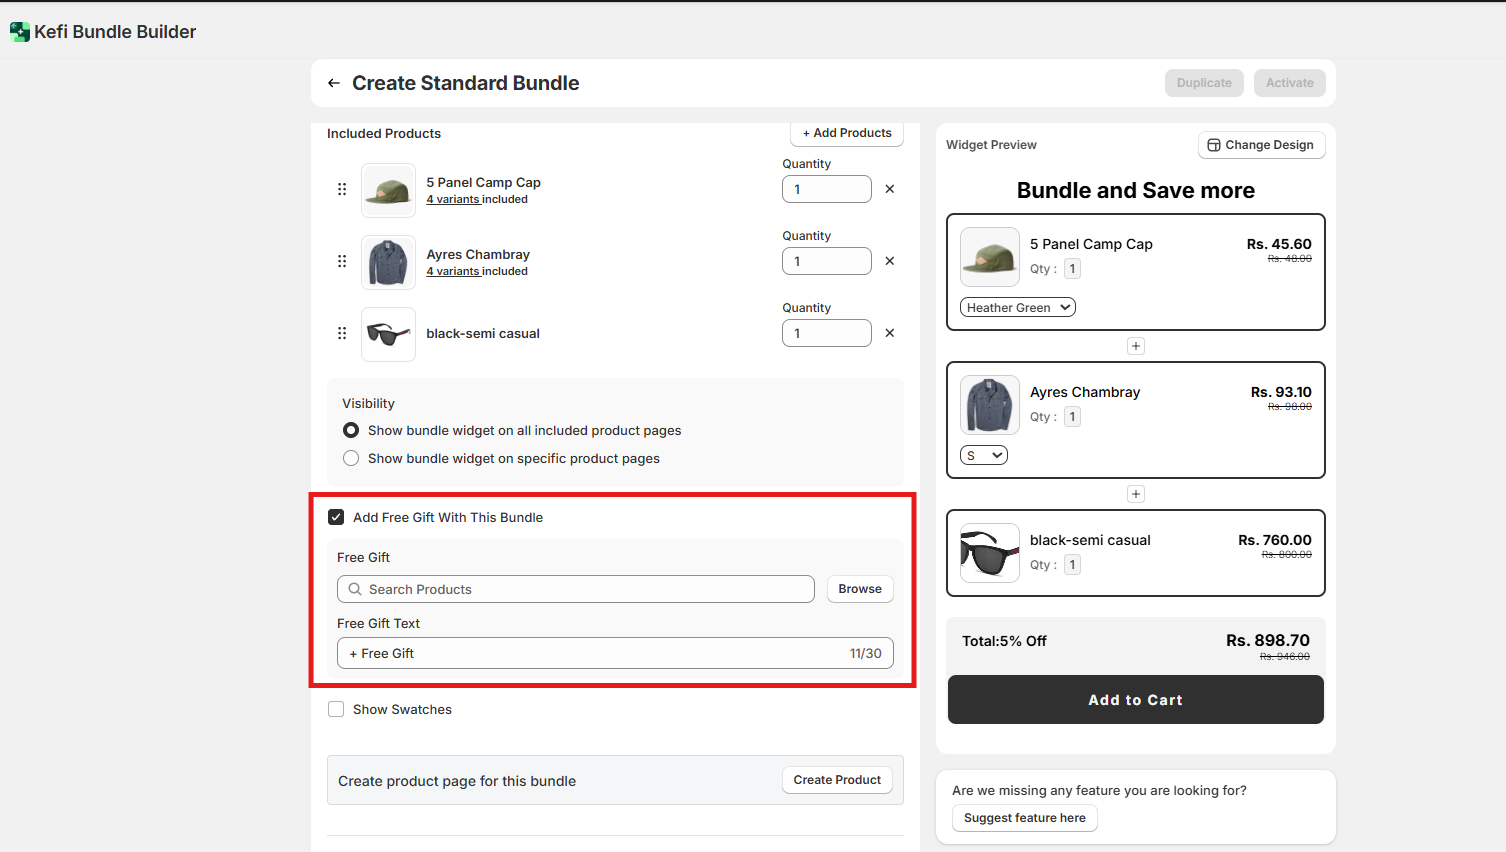
If you want, you can also ‘Add Free Gift with the Bundle’.
Simply click on the check box and browse to add the free product.
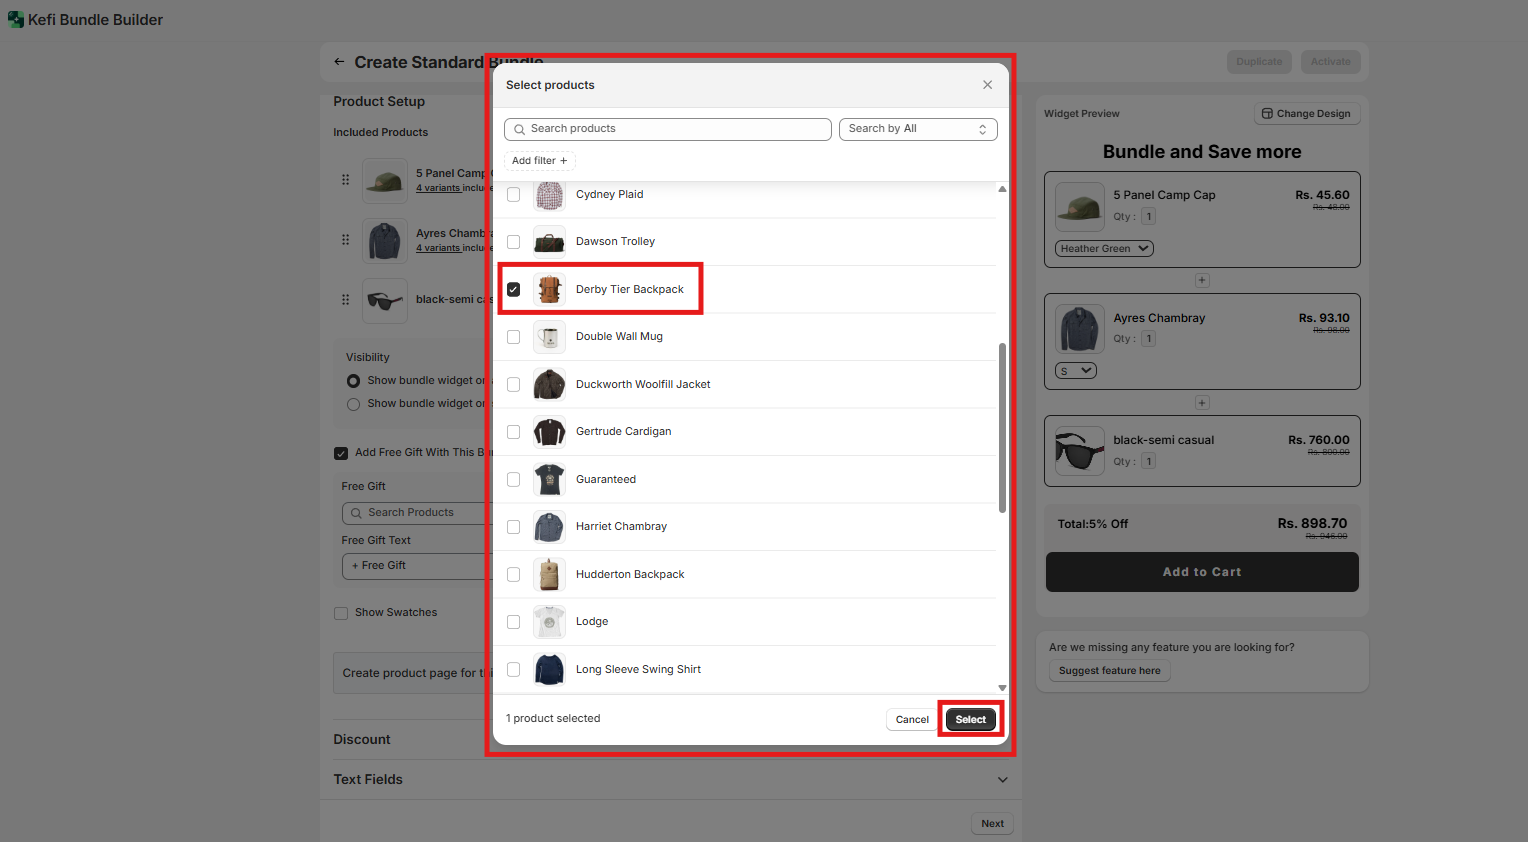
Select the product, and click on ‘Select’ to set it as a free product. You can also add a Free Gift Text for the same.
Show Swatches - You can also display product variants—such as different colors, sizes, or styles-by enabling the Show swatches option.
This allows customers to view and select from the available variants directly within the bundle widget, improving the shopping experience.
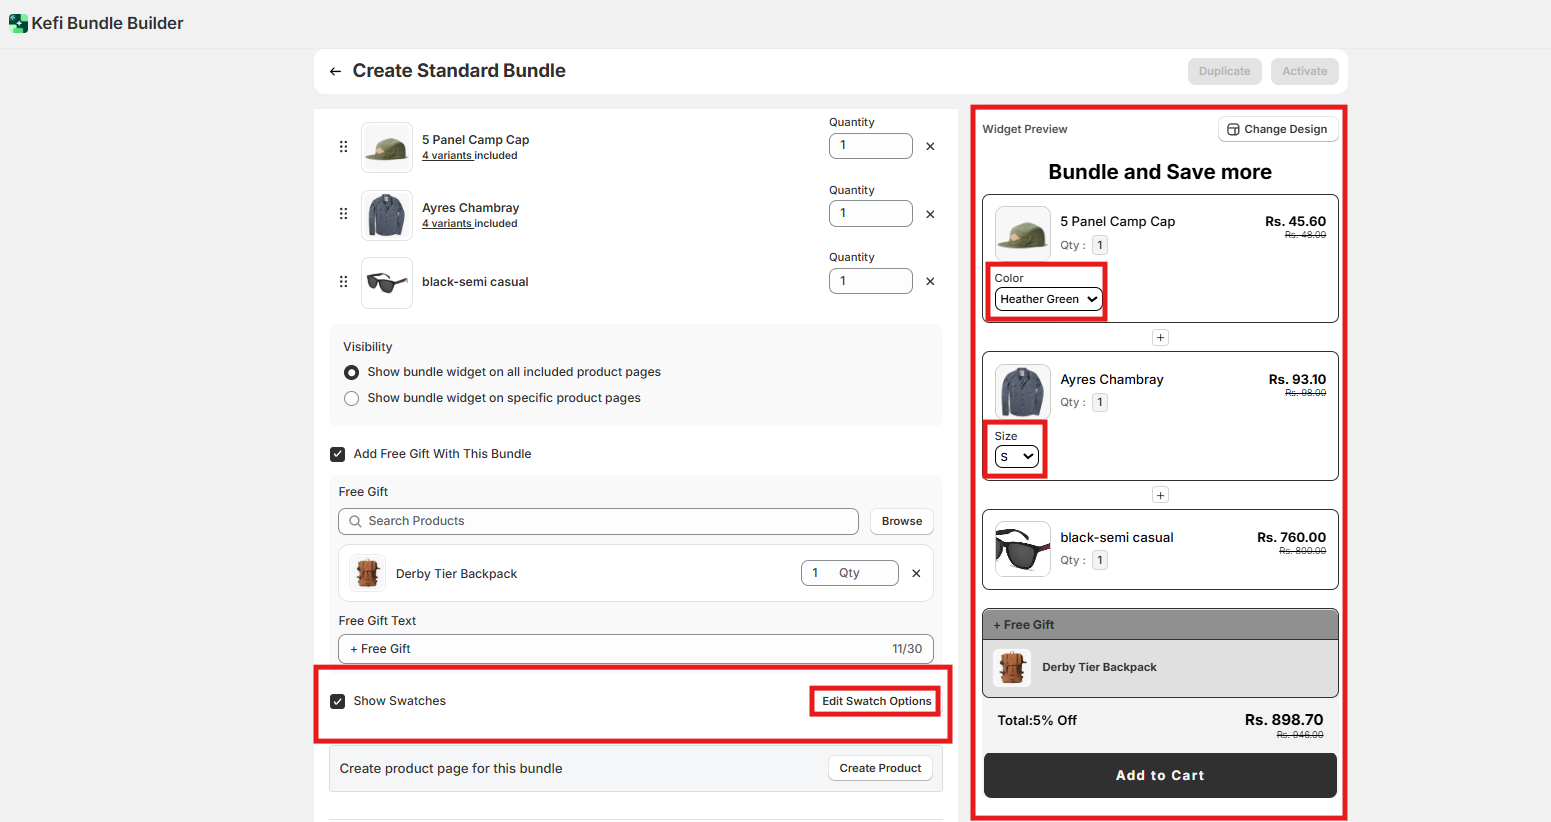
To further personalize how these options appear, click on Edit swatches. Here, you can customize the swatch layout, labels, and appearance—for example:

If you want, you can also Create a Product Page for the Bundle.
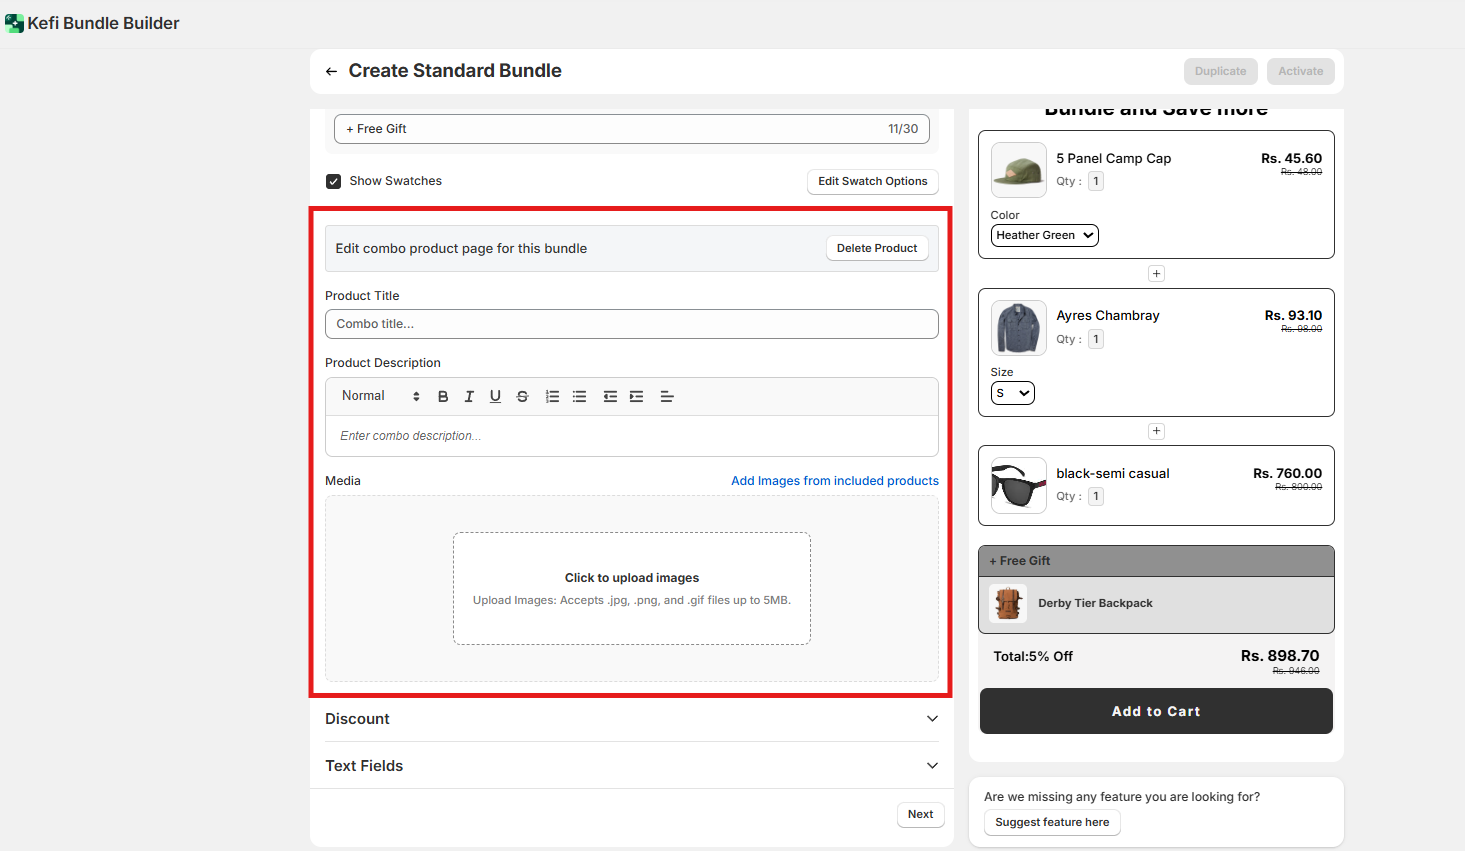
This section allows you to generate a dedicated product page for your bundle, giving it a unique listing within your Shopify store, just like any other standalone product.
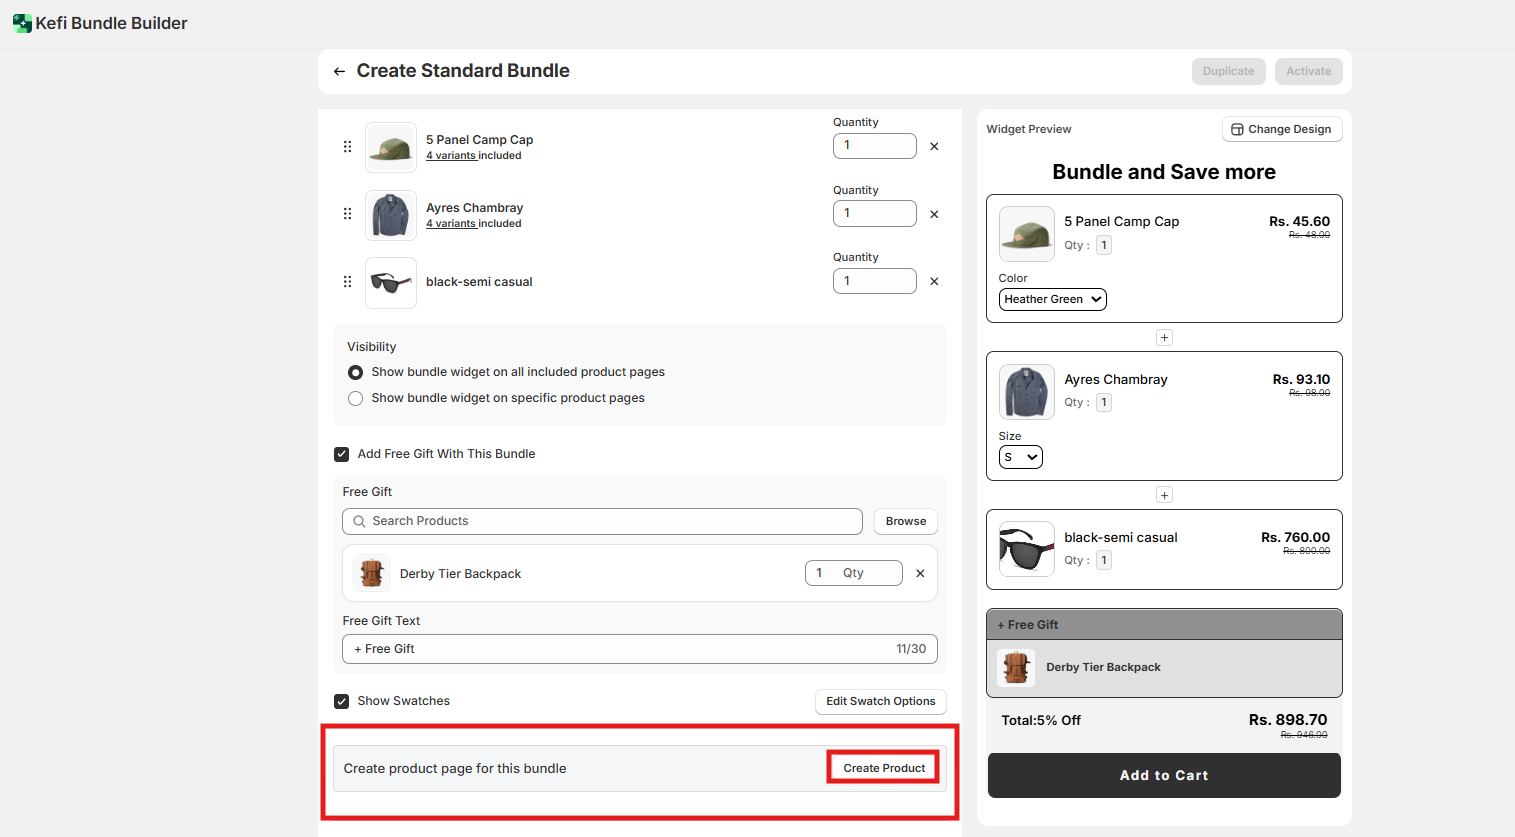
Click on ‘Create Product’.
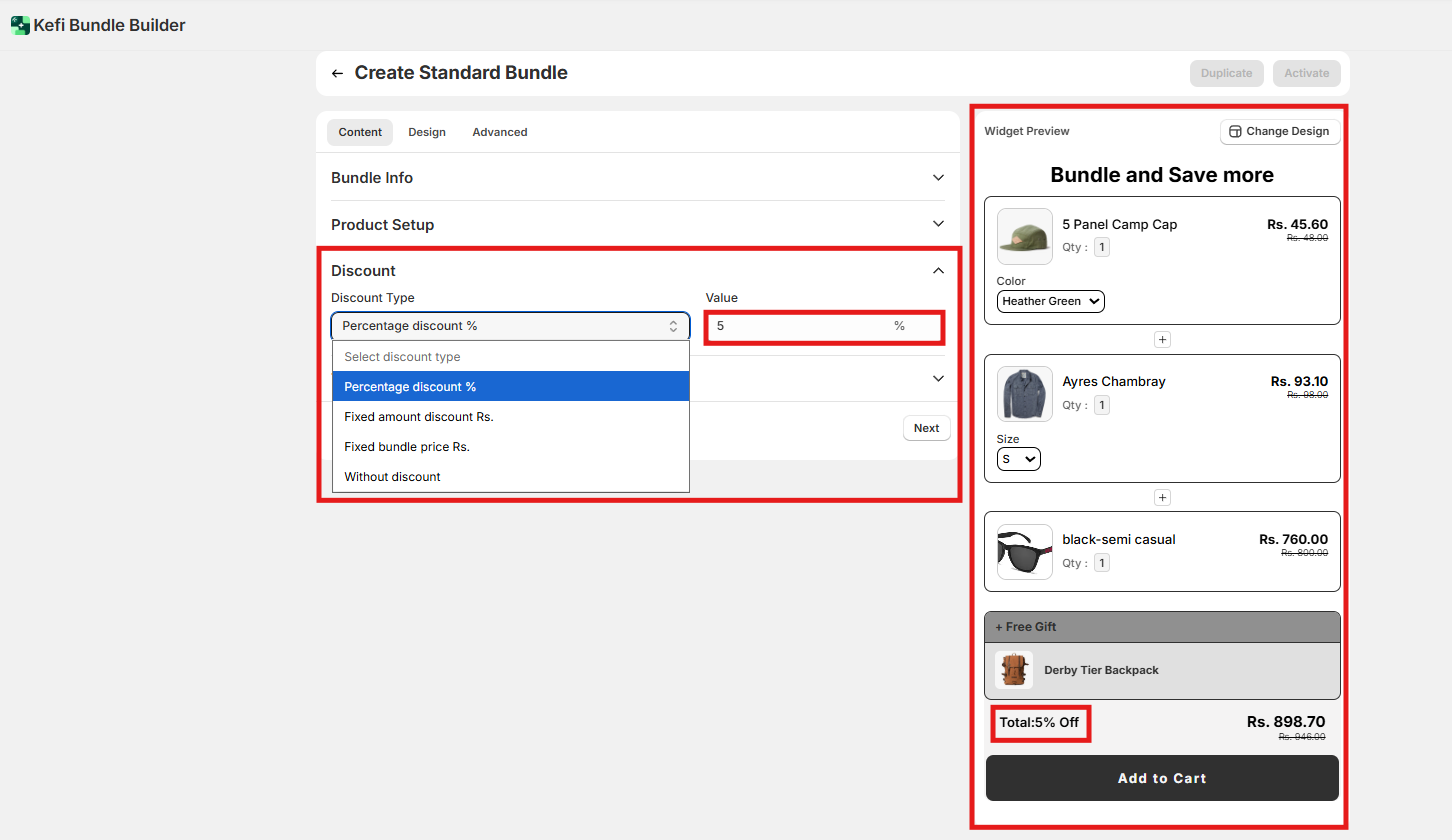
Next, set the Discount -
Discount Type: Choose between percentage, fixed discount or no discount.
Value: Define the discount amount, e.g., 5% off.
Finally, work on the Text Fields - This section allows you to customize all the text shown on the Mix and Match (Sectional) bundle widget. It’s perfect for aligning the language with your brand tone or translating content for different markets.
You can easily update key elements such as:
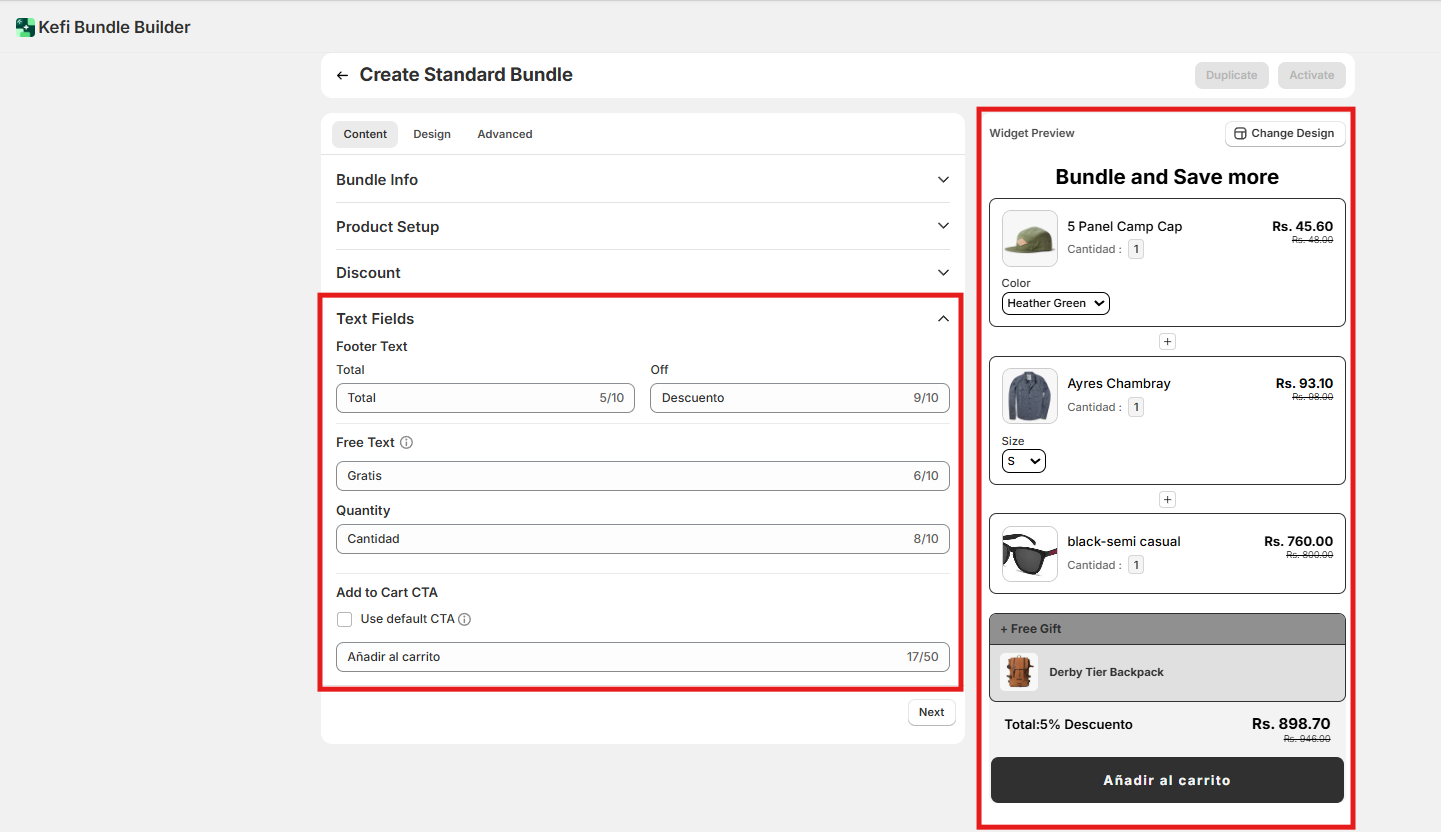
Once done, click ‘Next’.
1. General
Adjust general design settings for the widget:
Title
Style the bundle title to stand out clearly:

2. Product Card
Customize the look and feel of each product card within the bundle to enhance visual appeal and match your store's design.
General
Title
Price
Variant Selector

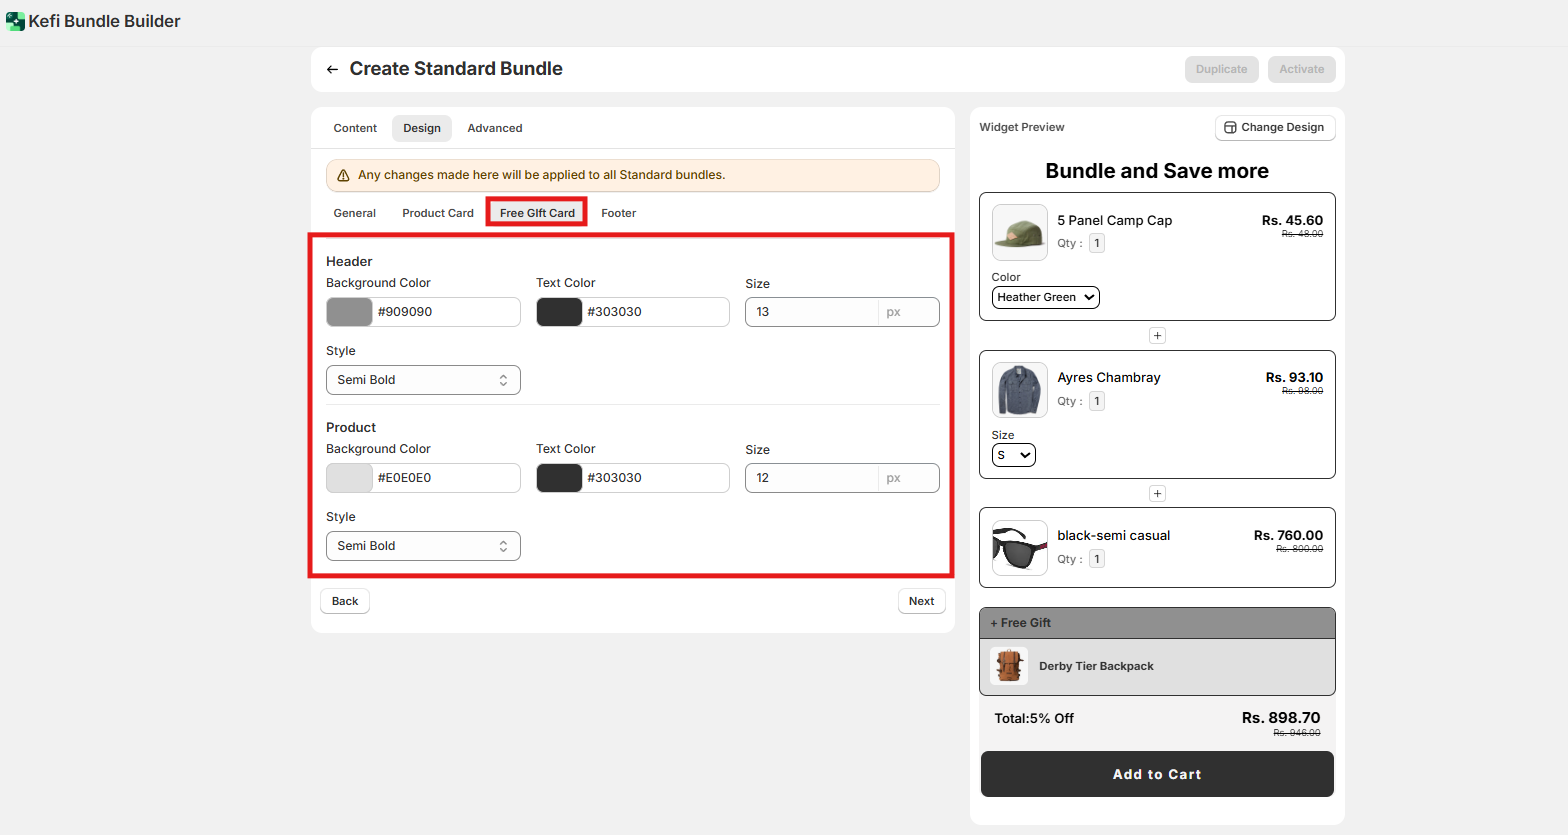
3. Free Gift Card
Style the appearance of the free gift section within your bundle to make it visually distinct and aligned with your overall design.
Header
Customize the look of the free gift section header:
Product
Design the free gift product card to match or complement your product cards:
4. Footer
Customize the footer area of the bundle widget, including the total pricing display and the “Add to Cart” button, to ensure a consistent and branded checkout experience.
Total Section
Style the area displaying the total bundle price:
Add to Cart
Customize the appearance of the “Add to Cart” button:

Once done, click ‘next’,
Move on to the Advanced section.
This section gives you greater control over where, when, and to whom your bundle appears.
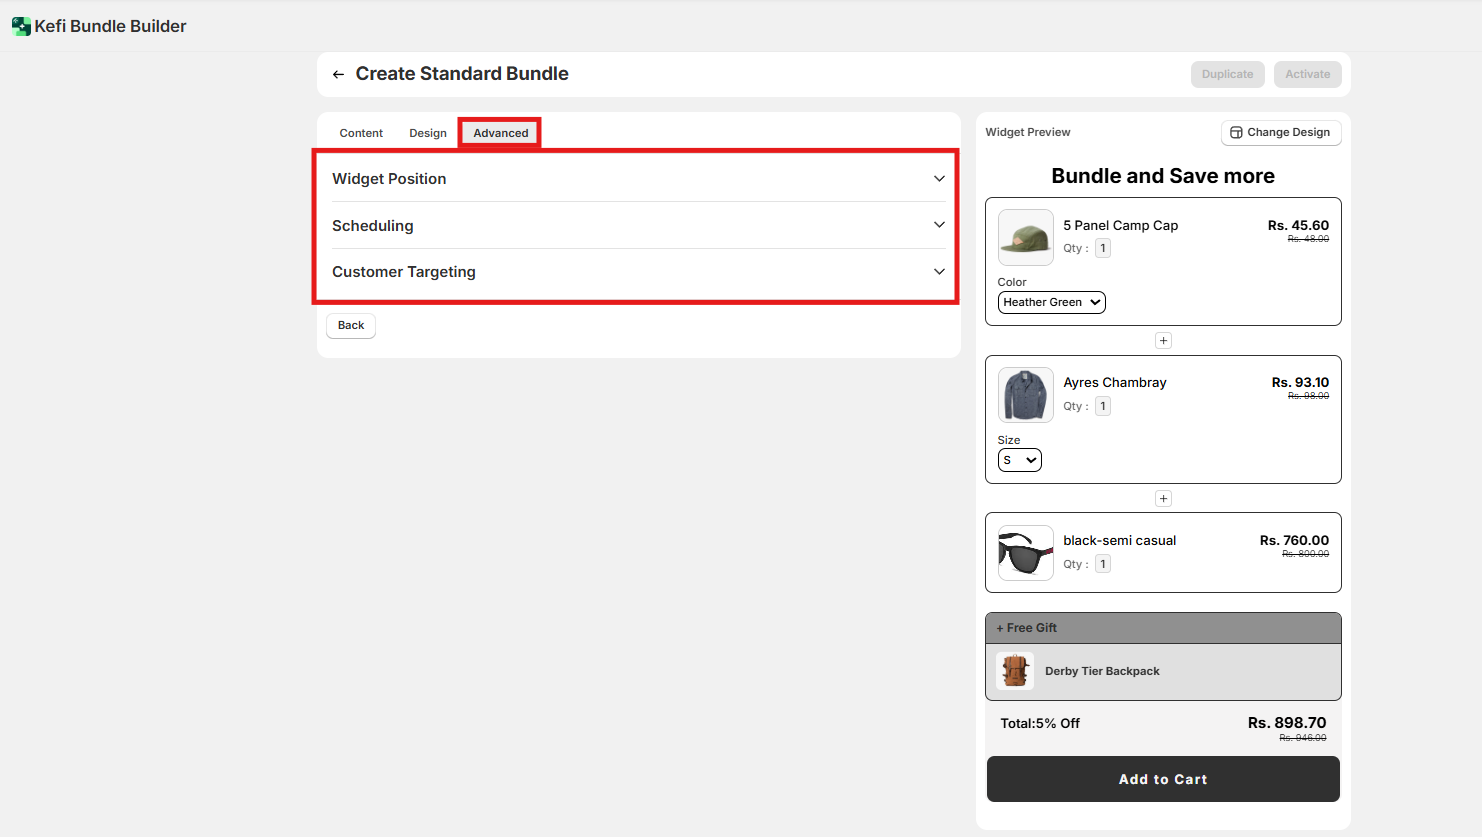
1. Widget Position
By default, the widget will appear below the Add to Cart button.
To change its position, open the Shopify Theme Editor, and simply drag the app block to your preferred location on the product page—no coding required.
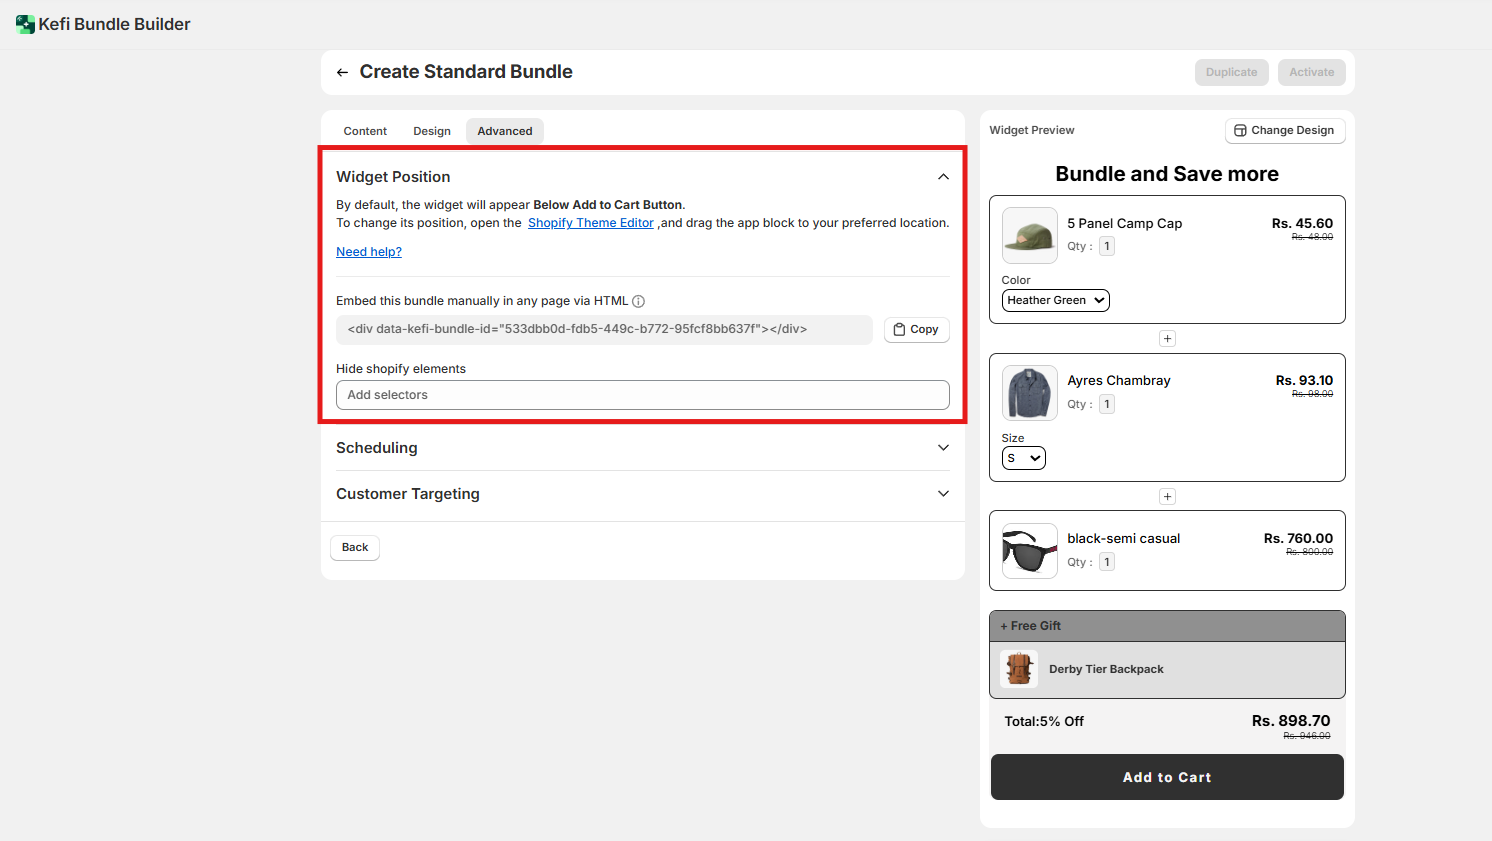
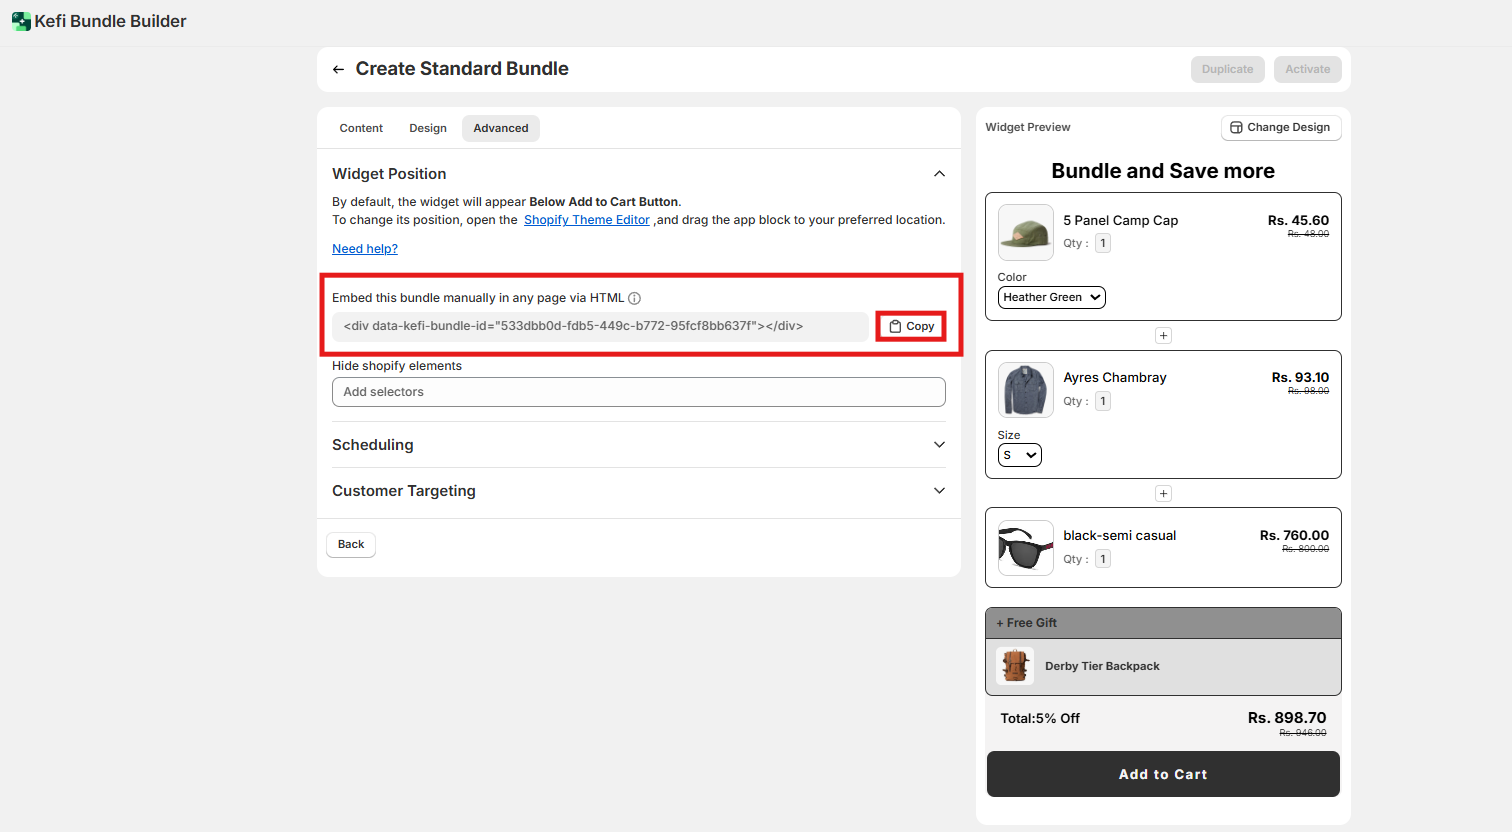
Embed Bundle via HTML
You can also embed this bundle manually on any page using HTML.
Display the bundle wherever you like by placing the provided HTML tag directly into your theme file.
Hide Shopify Elements
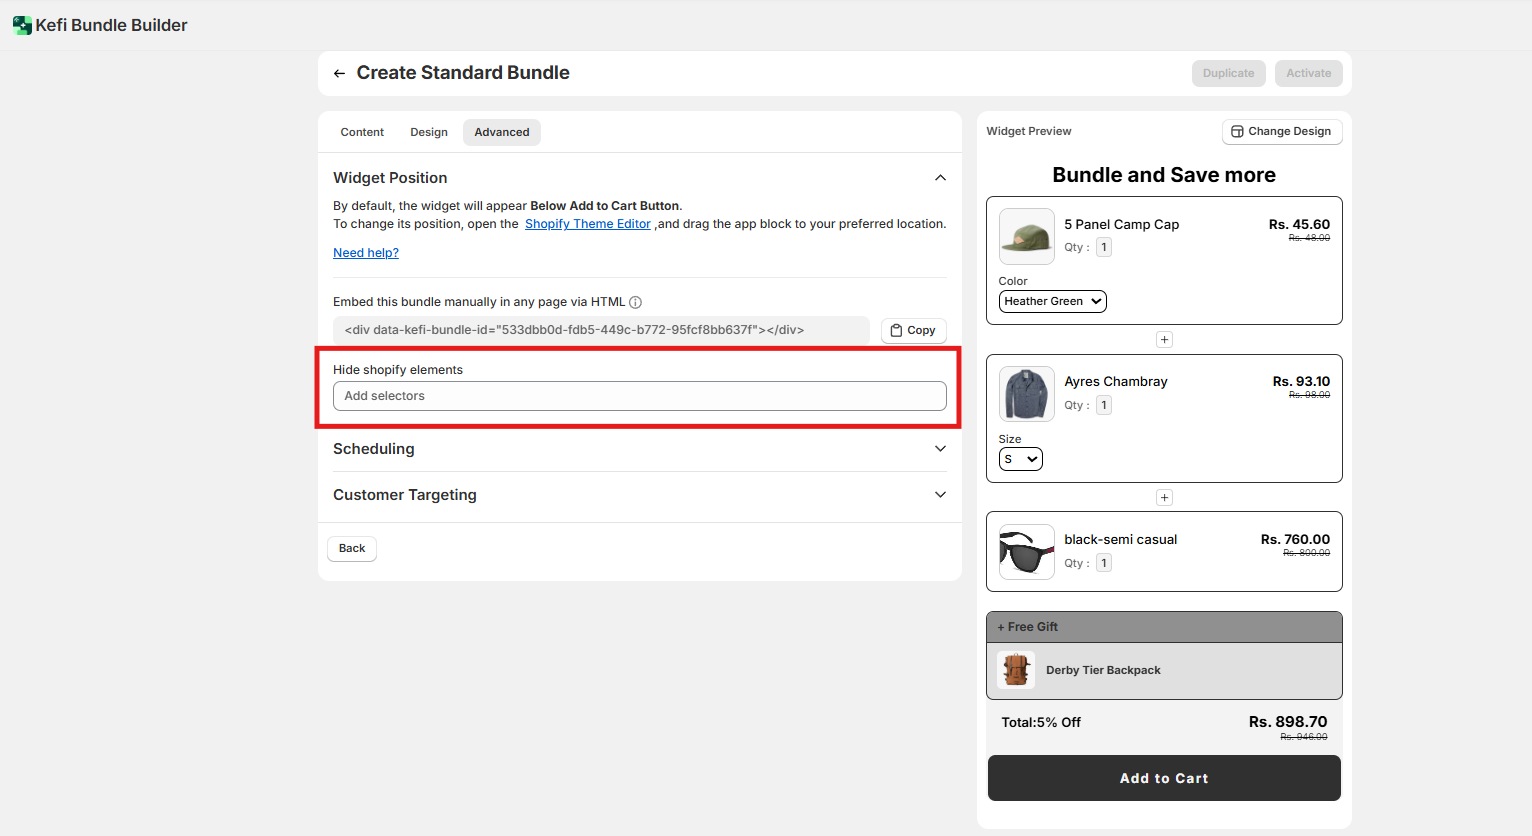
You have the option to hide specific Shopify elements (like the default Add to Cart button or product price) to reduce redundancy when showing bundles.
Simply enter the CSS selectors of the elements you'd like to hide.
For example:
.product__price
.product-form__buttons
This helps create a cleaner, more focused layout around your bundle widget.
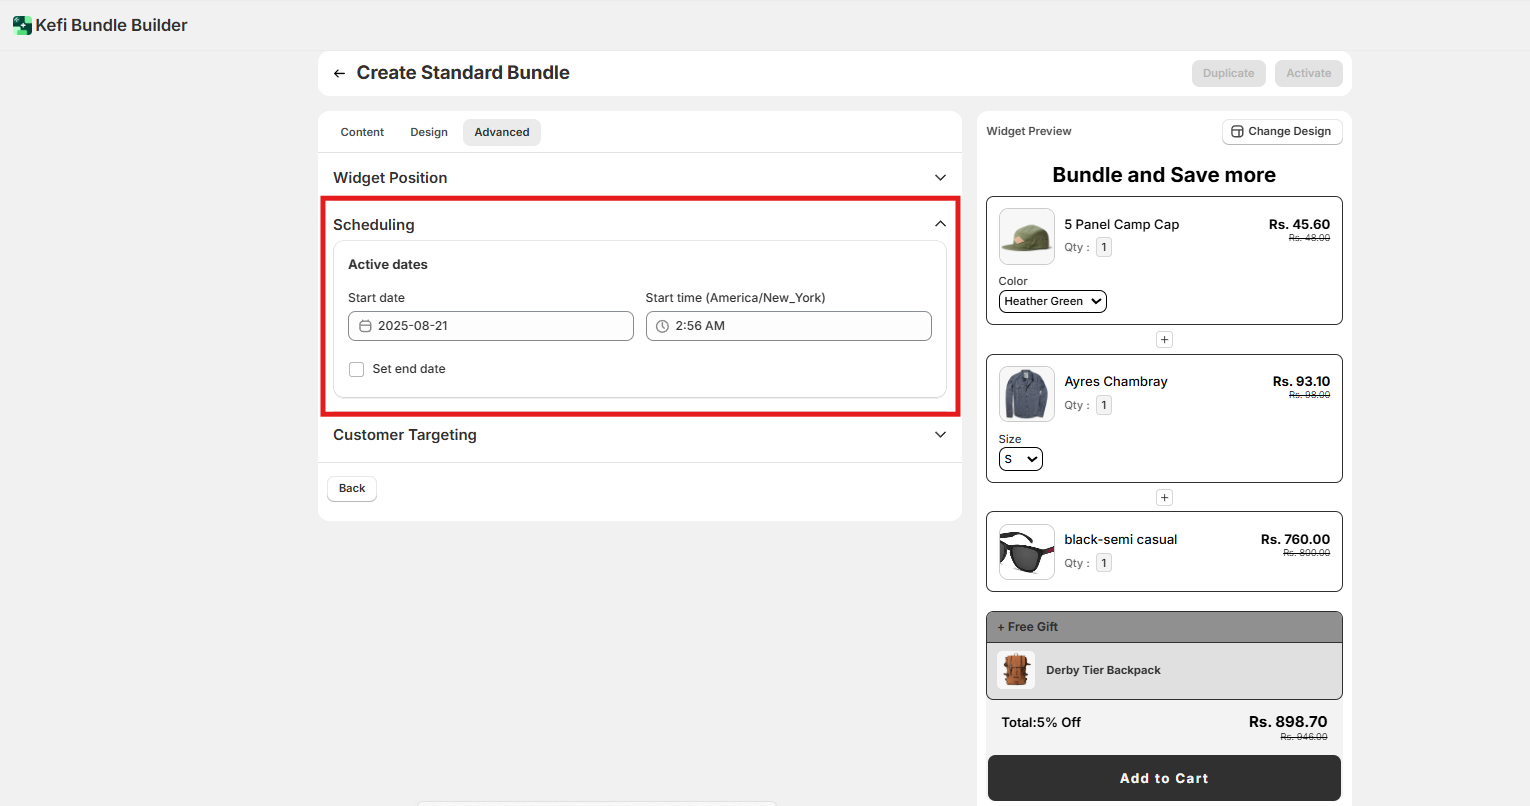
Scheduling - Set start and end dates (and time) for your bundle campaign.
Great for flash sales, limited-time offers, or seasonal bundles.
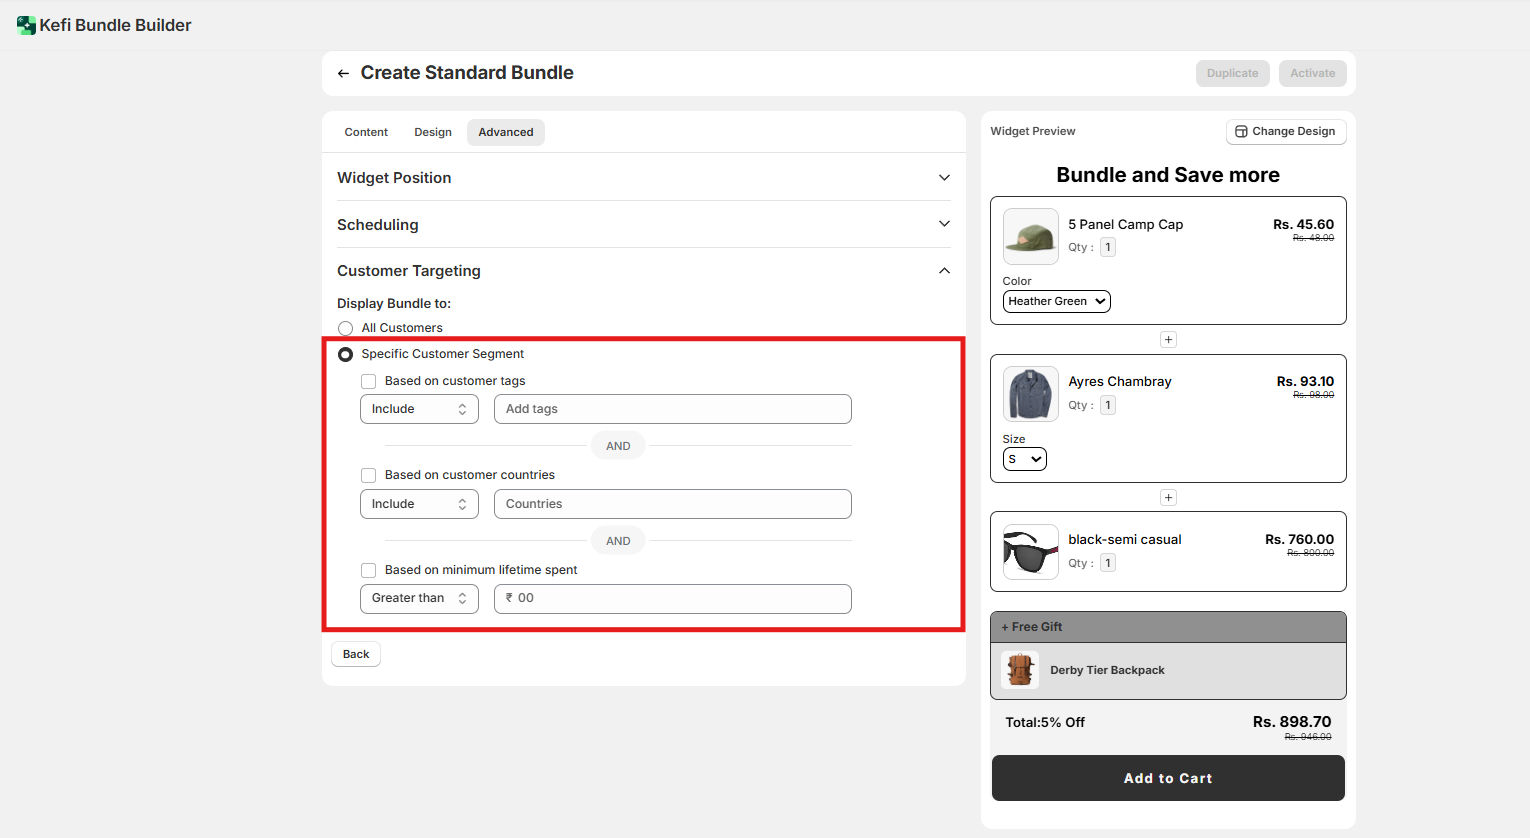
Customer Targeting - Choose who can see the bundle:
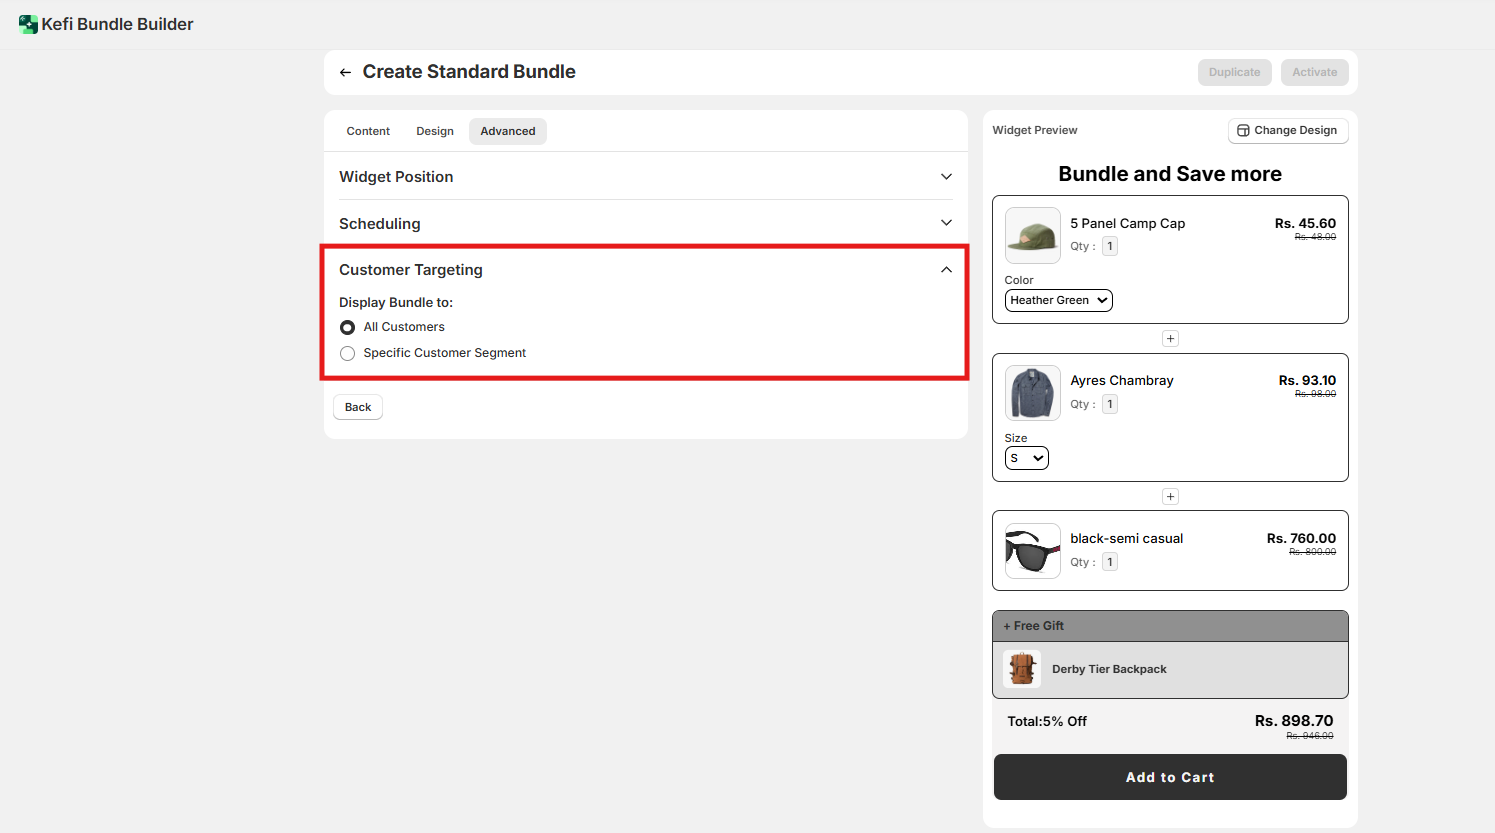
In case of Specific Customer Segment -
These filters can be combined using "AND" logic for precise control, perfect for offering exclusive deals, loyalty rewards, or regional promos.
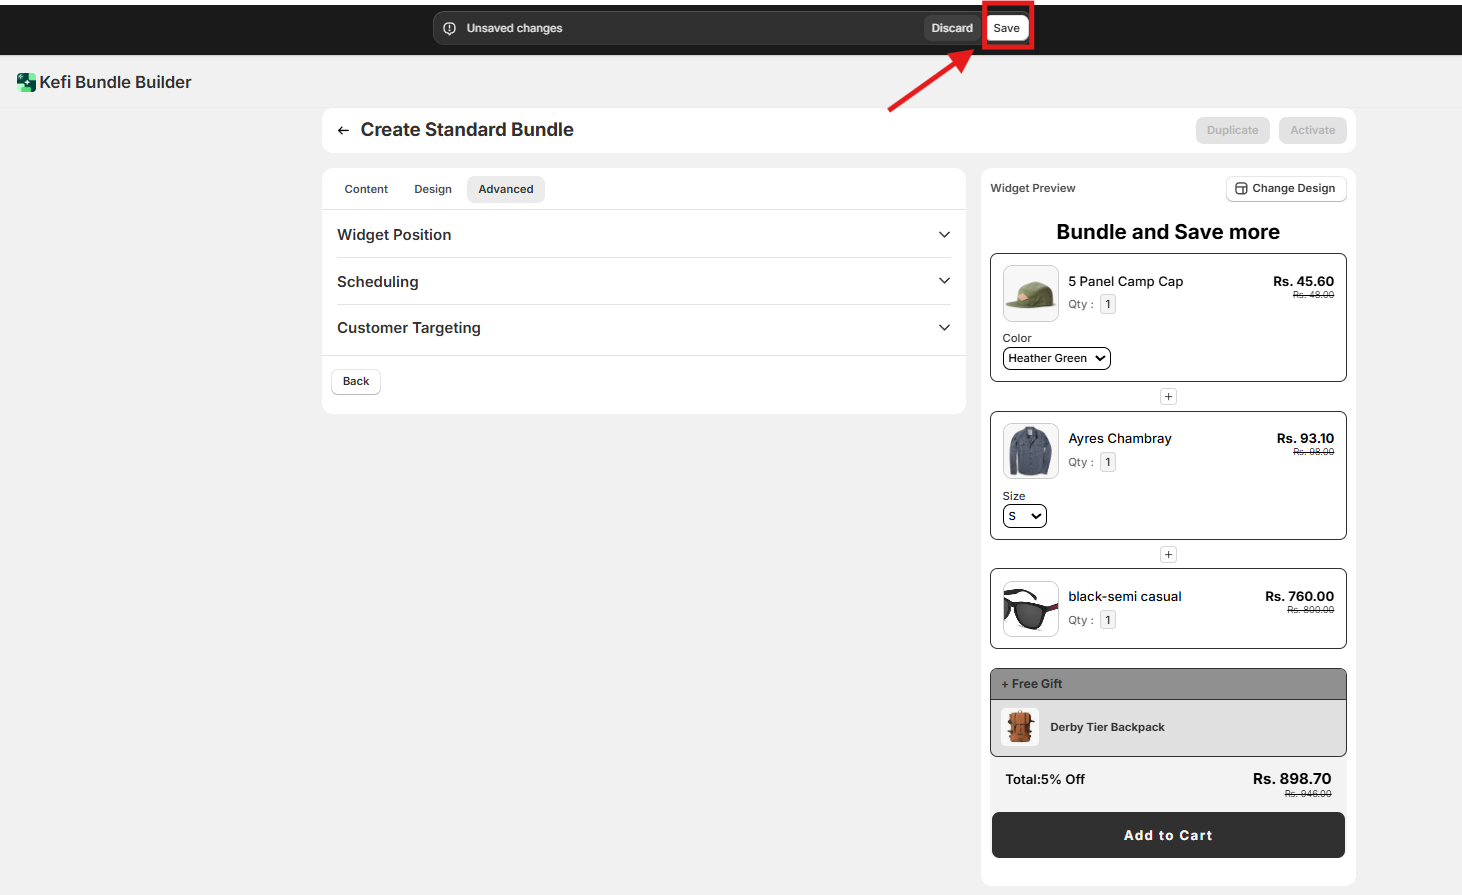
Click ‘Save’ to apply the customizations.
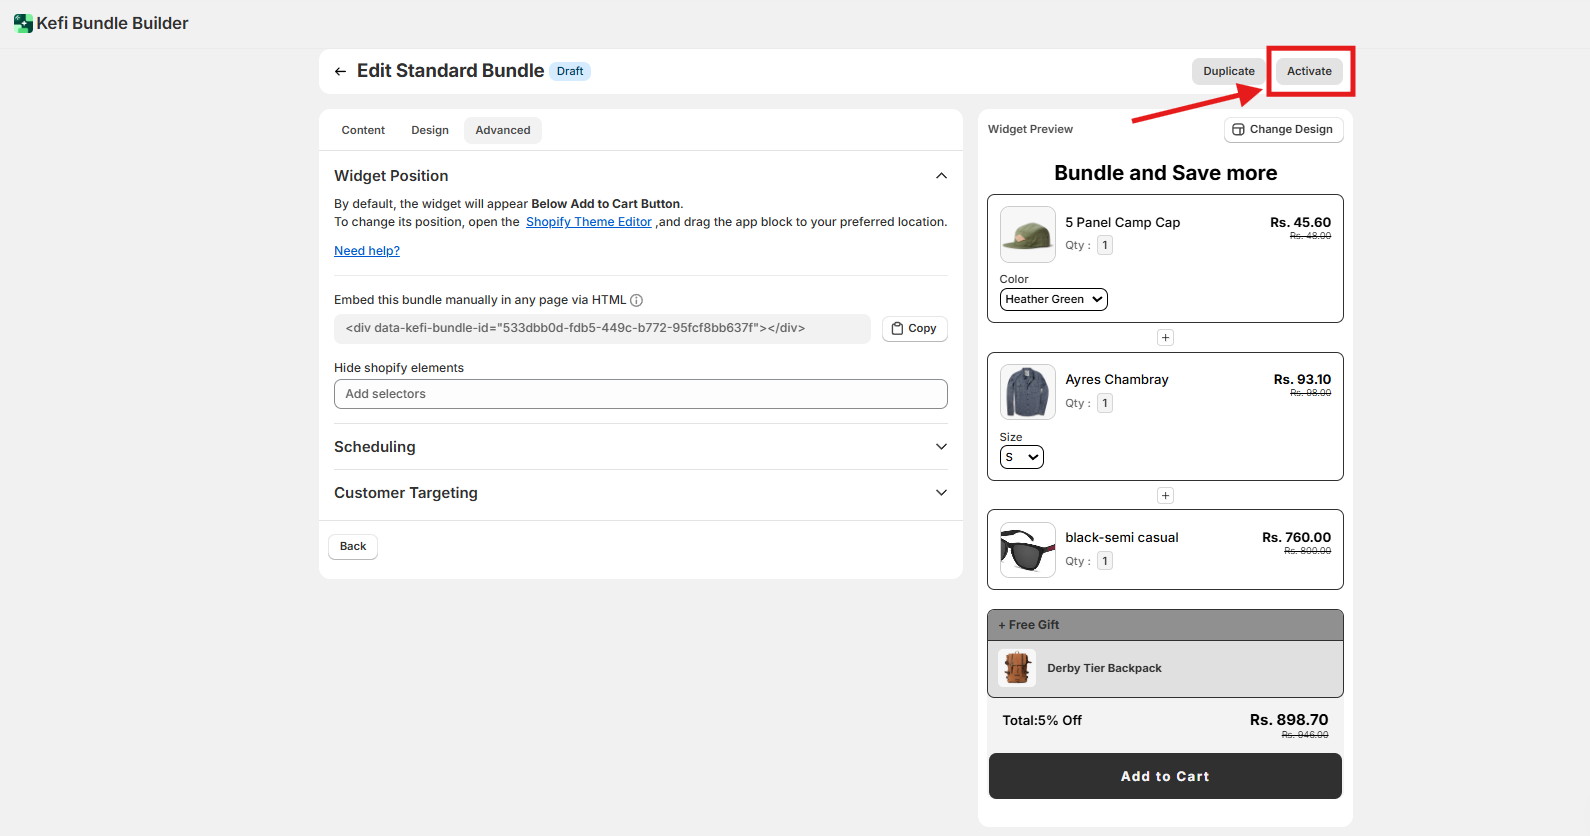
Finally, activate the Standard Bundle by simply clicking on ‘Activate’.
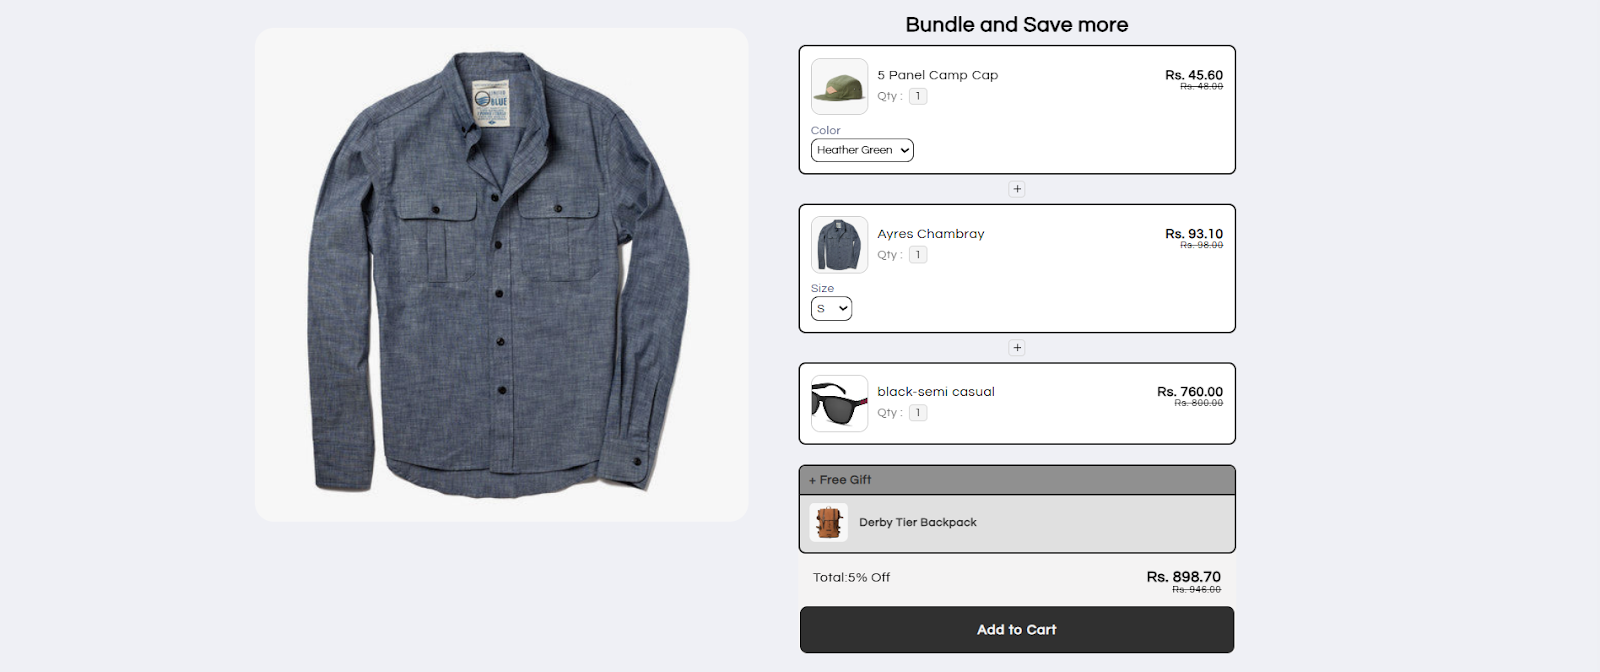
Once you’ve activated the Standard bundle, you can also view it on the store. Simply click ‘Show on Store’

For example -
If you have any questions or need assistance, feel free to contact us:
.svg)
