In today's e-commerce landscape, customers aren't just looking for products—they're looking for personalized experiences. They want to feel in control of their choices, making shopping interactive and fun.
The Product Page Bundle Builder is designed to deliver exactly this: it transforms any standard product page into a dynamic "build-your-own" experience. It empowers your shoppers to mix, match, and create their own custom product bundles directly on the page, without having to navigate anywhere else.
Whether a customer is curating a skincare set tailored to their specific routine, building a snack box filled with their favorite flavors, or assembling a themed gift bundle for a friend, this tool makes the process effortless and enjoyable.
By giving customers this high level of creative control, the Bundle Builder not only boosts satisfaction and engagement but also naturally drives a higher Average Order Value (AOV) and encourages valuable repeat purchases.
The flexibility of the Product Page Bundle Builder makes it perfect for virtually any e-commerce scenario where products can be combined. Here are a few ways merchants use it:
The core of the Product Page Bundle Builder is a seamless, guided, and interactive process. Here are the standout capabilities that make this feature so engaging and effective for your customers:
STEP 1
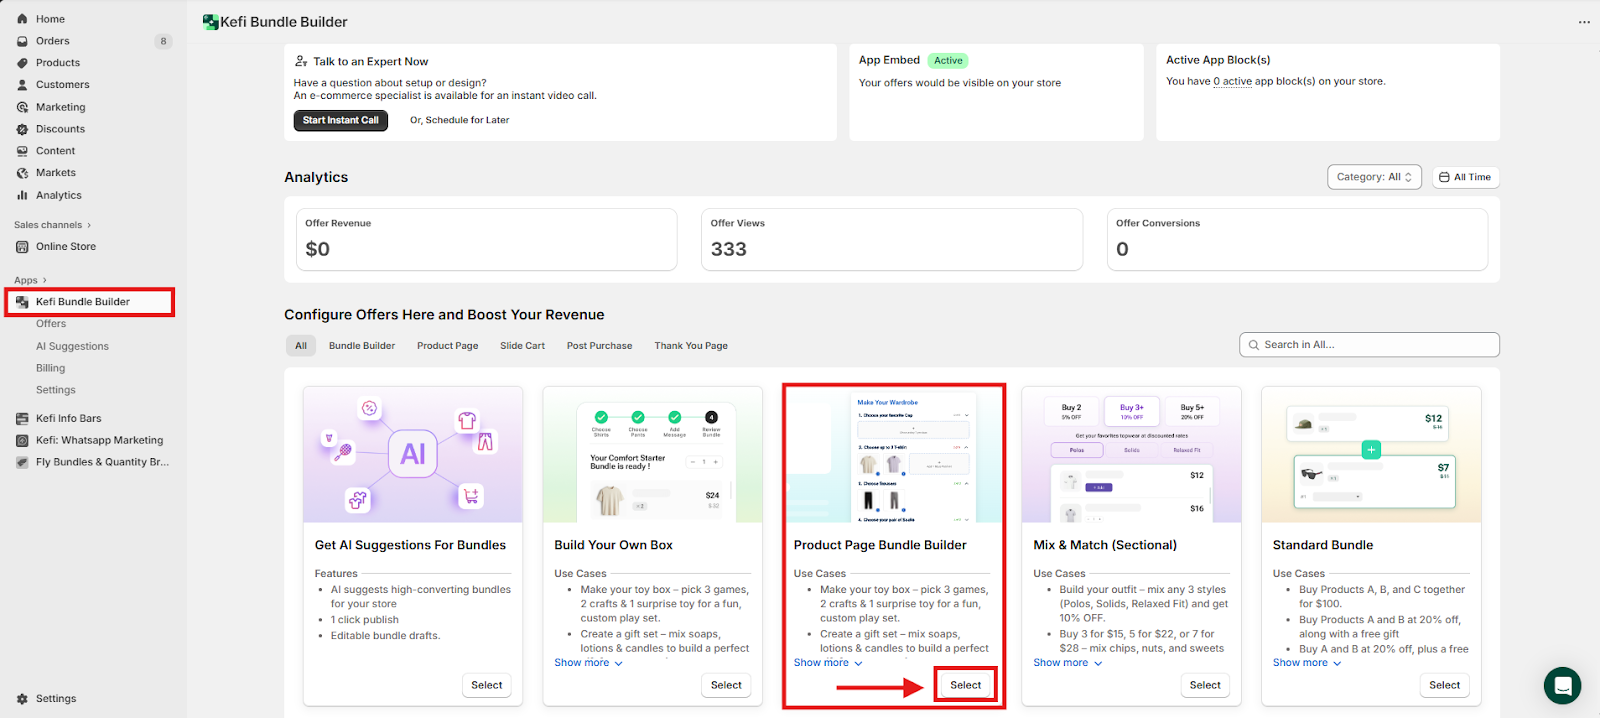
Go to the Kefi Bundle Builder homepage and select the Product Page Bundle Builder. Click ‘Select’.
STEP 2
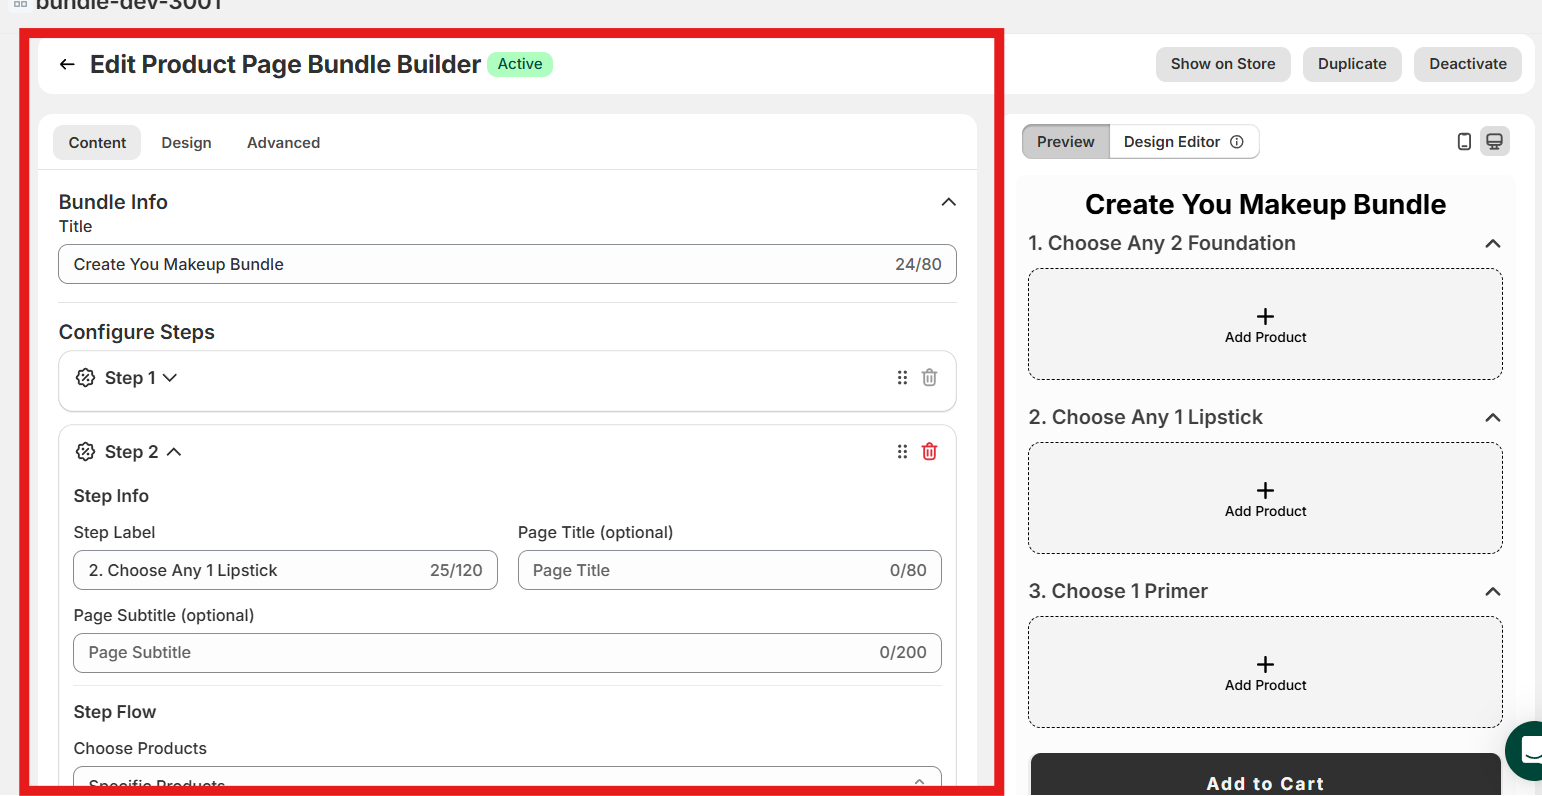
There are 3 sections available: Content, Design and Advanced.
The Widget Preview is available on the right side.
STEP 3
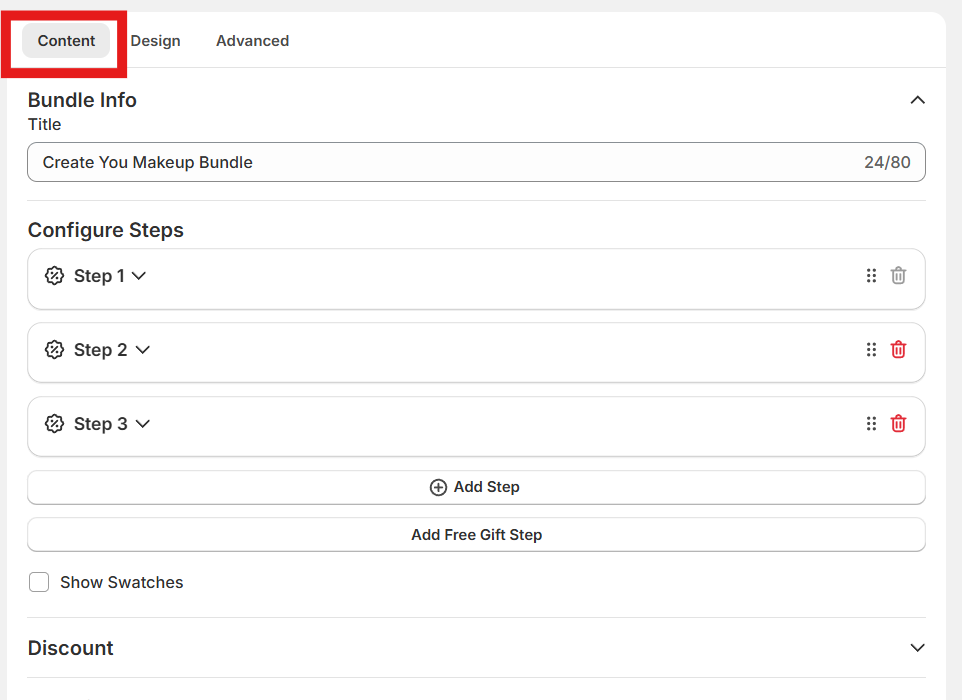
Let’s begin with the Content section.
The Content section is where you define the core structure and behavior of your bundle.
Bundle Info
Title: Enter a custom name for your bundle (e.g., “Bundle and Save More”).
This title is customer-facing and should be compelling yet clear. The maximum character limit set is 80.
STEP 4
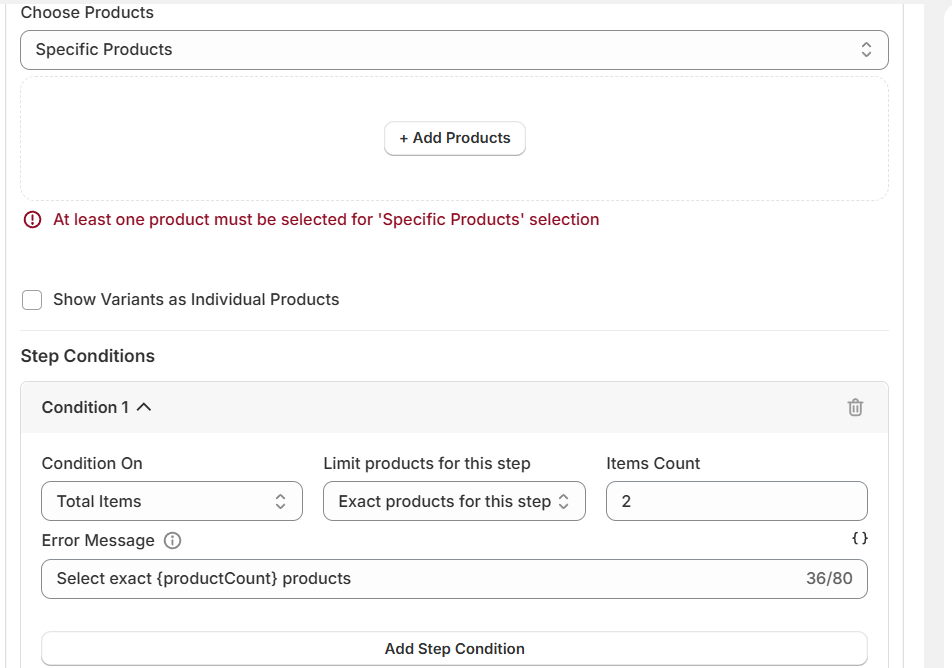
Choose Products
Optional:
Step Conditions
STEP 5
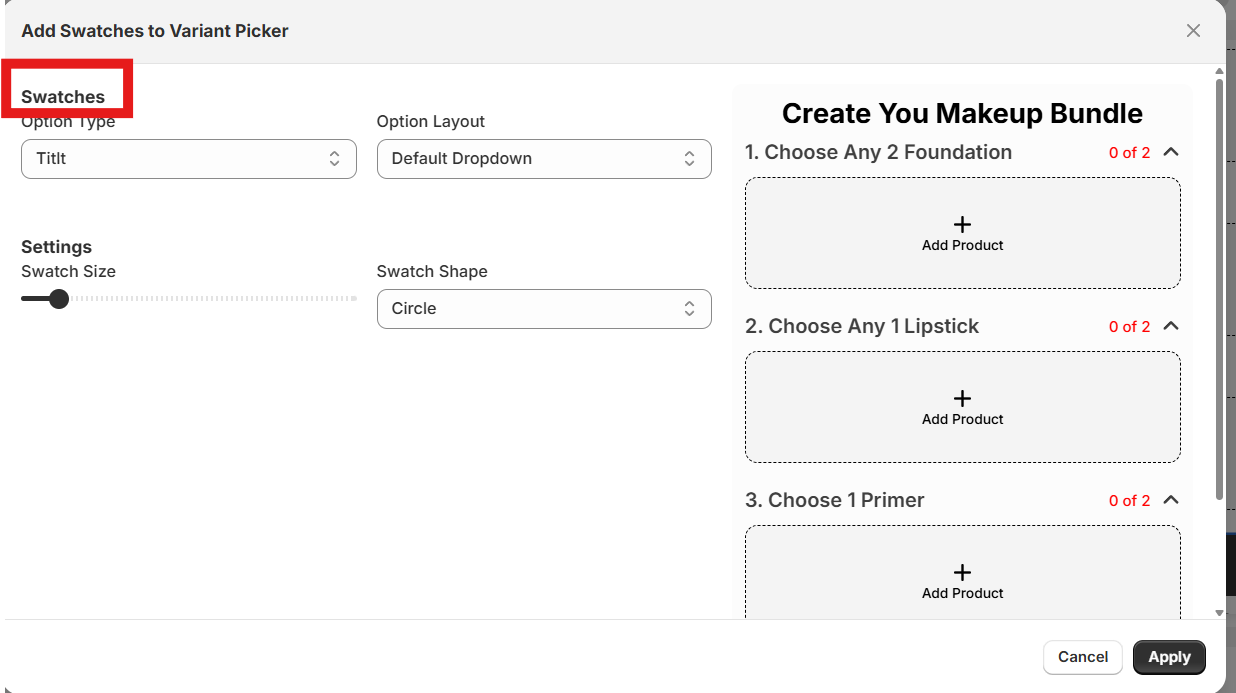
Show Swatches - You can also display product variants-such as different colors, sizes, or styles-by enabling the Show swatches option.
This allows customers to view and select from the available variants directly within the bundle widget, improving the shopping experience.
STEP 6
Setting Discounts for Your Bundle
To make your bundles even more attractive, you can apply automatic discounts directly within the builder.
In the Discount section (as shown in the screenshot), select the discount type and value you want to offer:

This flexibility lets you tailor promotions to fit your sales strategy — whether you’re running limited-time offers, incentivizing larger orders, or rewarding customers for exploring your product range.
STEP 7
Design section
Using the Design Editor
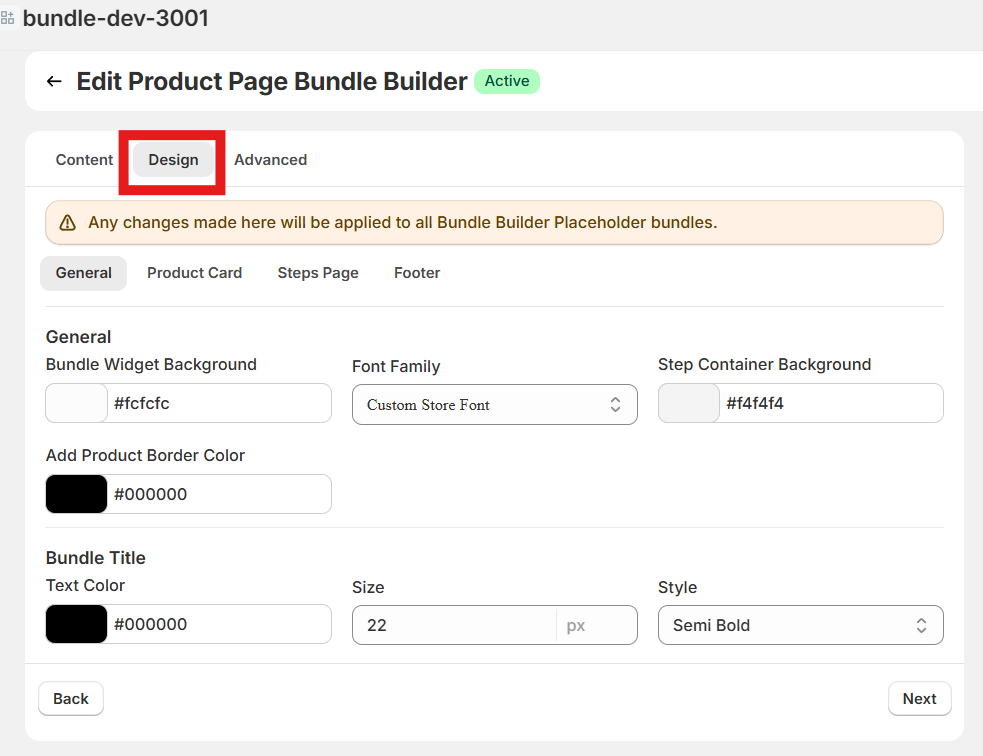
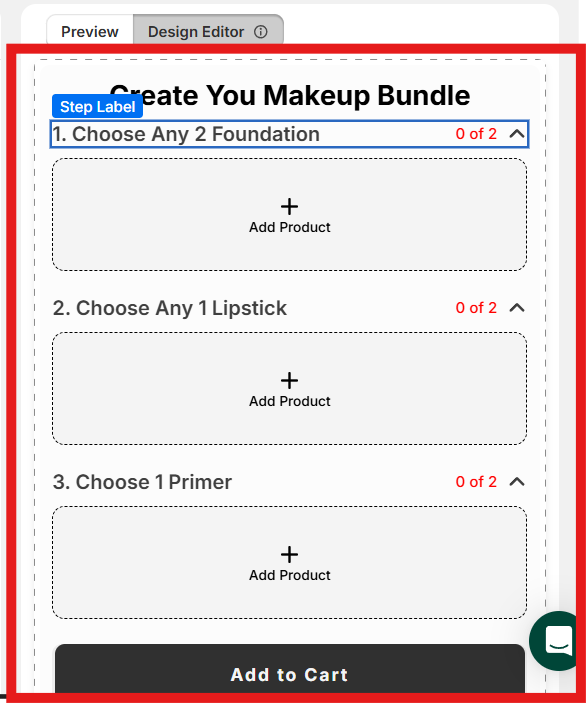
Switch to the Design Editor tab to customize the appearance of your bundle (as shown in the image).
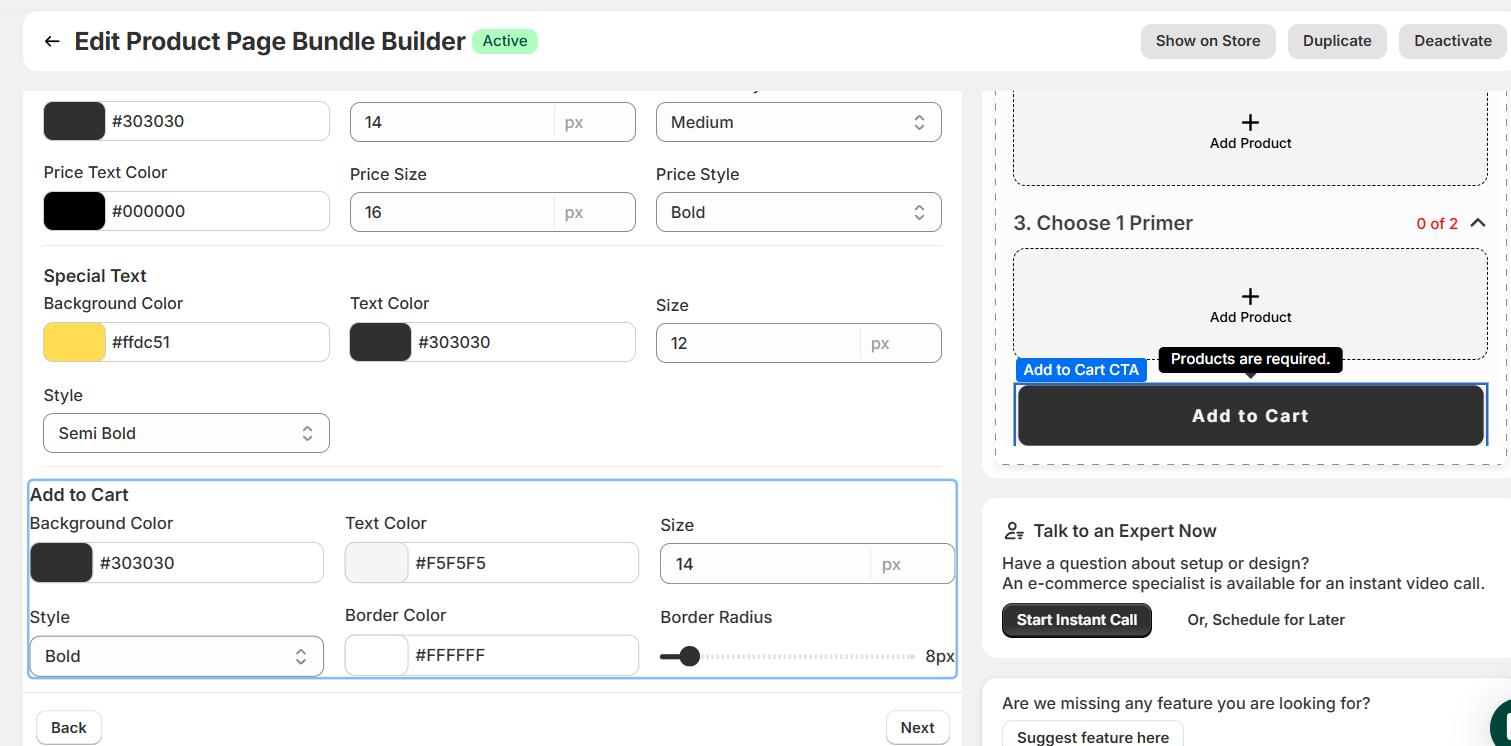
When you click on any section—such as “Choose Any 2 Foundation” or “Choose 1 Primer”—the corresponding element in the Design Editor will be automatically highlighted. This helps you easily locate and modify the specific design section you’re working on.
From there, you can:
1. General
Adjust general design settings for the widget:
Title
Style the bundle title to stand out clearly:

2. Product Card
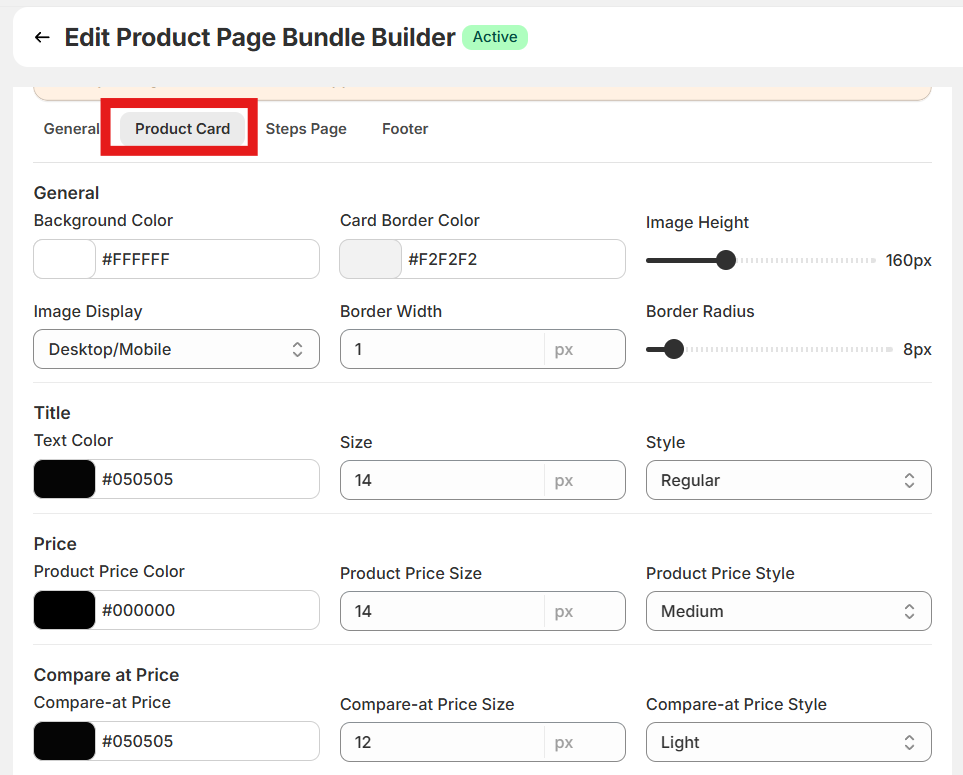
Customize the look and feel of each product card within the bundle to enhance visual appeal and match your store's design.
General
Title
Price
Variant Selector
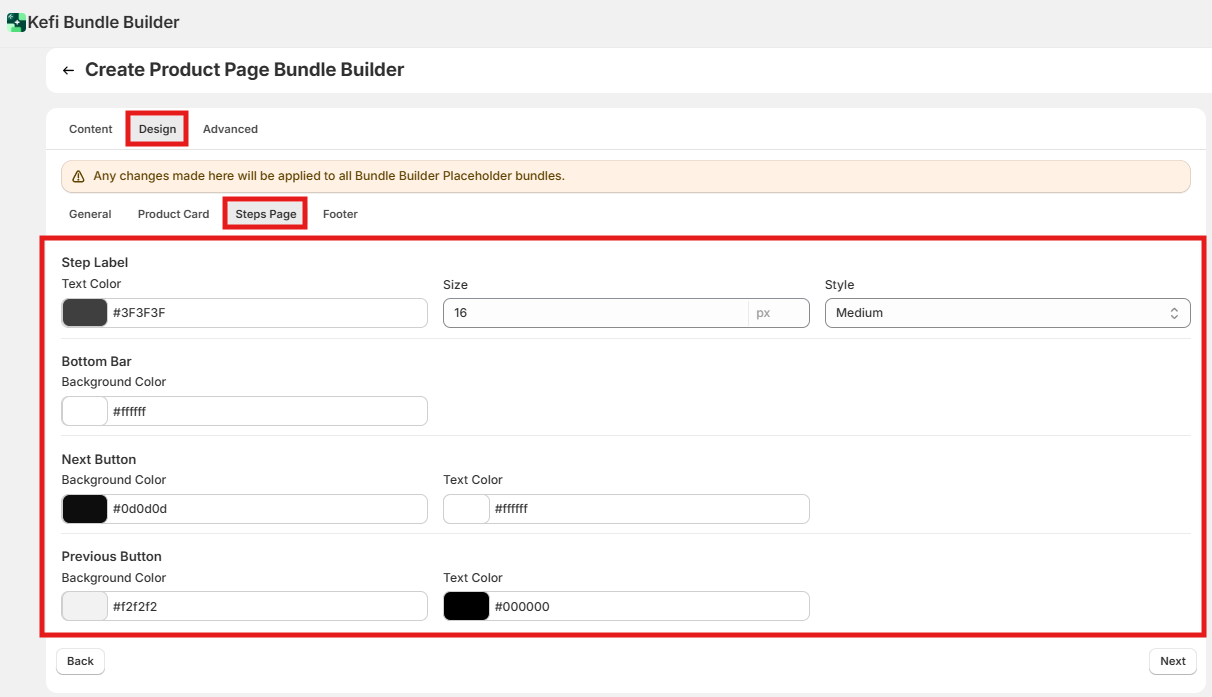
3. Step Page
Customize the step-by-step navigation section of the bundle widget for a seamless shopping experience.
Step Label
Bottom Bar
Next Button
Previous Button
4. Footer
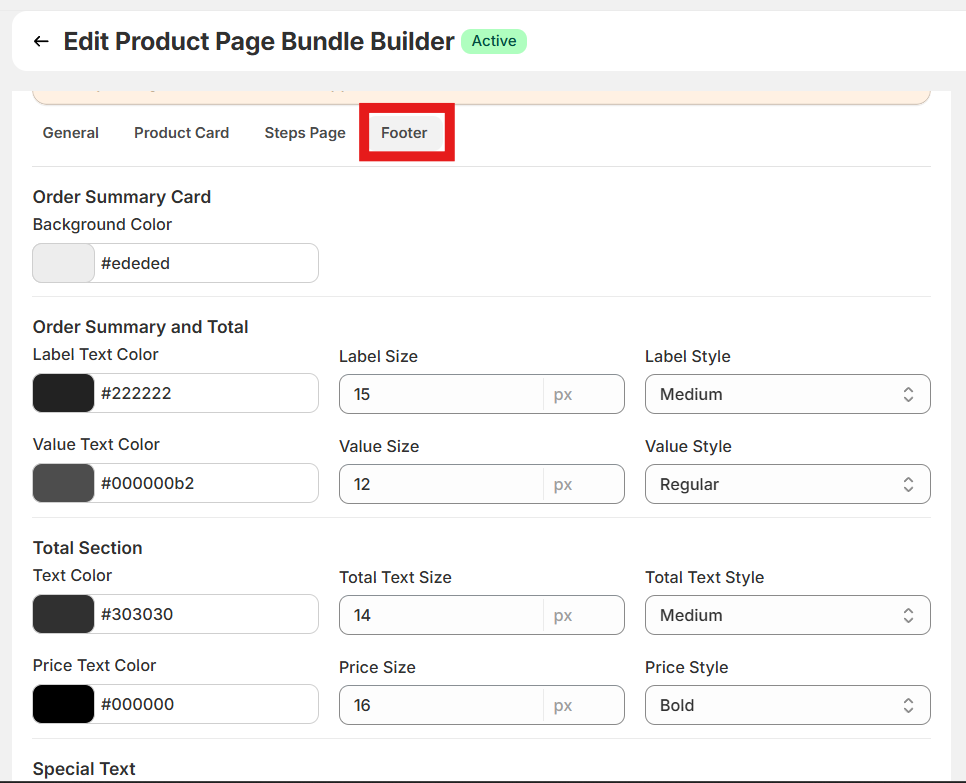
Customize the footer area of the bundle widget, including the total pricing display and the “Add to Cart” button, to ensure a consistent and branded checkout experience.
Total Section
Style the area displaying the total bundle price:
Add to Cart
Customize the appearance of the “Add to Cart” button:
STEP 8
Advanced section
This section gives you greater control over where, when, and to whom your bundle appears.
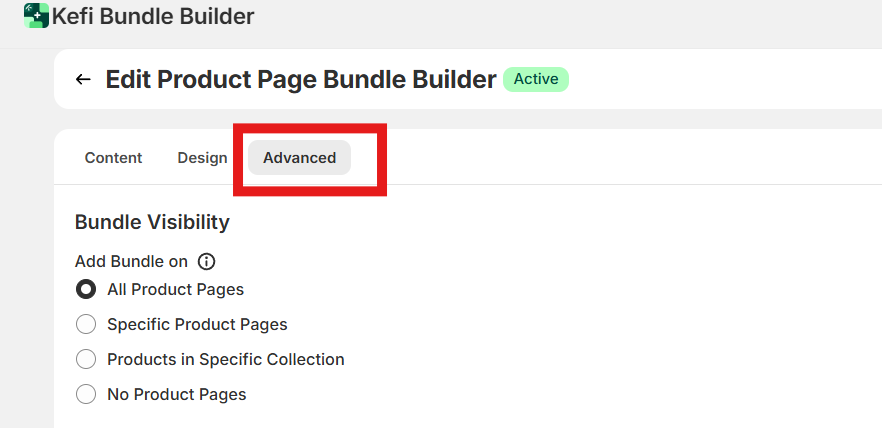
You can then choose Visibility.
This setting determines where your bundle widget will appear across your product pages. You can control where bundles are shown to match your marketing goals and customer journey.
1. Show on All Included Product Pages - Displays the bundle on every product page that contains a bundle item.
Best for: Maximum visibility and cross-selling.
2. Show on Specific Product Pages - Lets you choose where the bundle appears.
Best for: Focused promotions and cleaner layouts
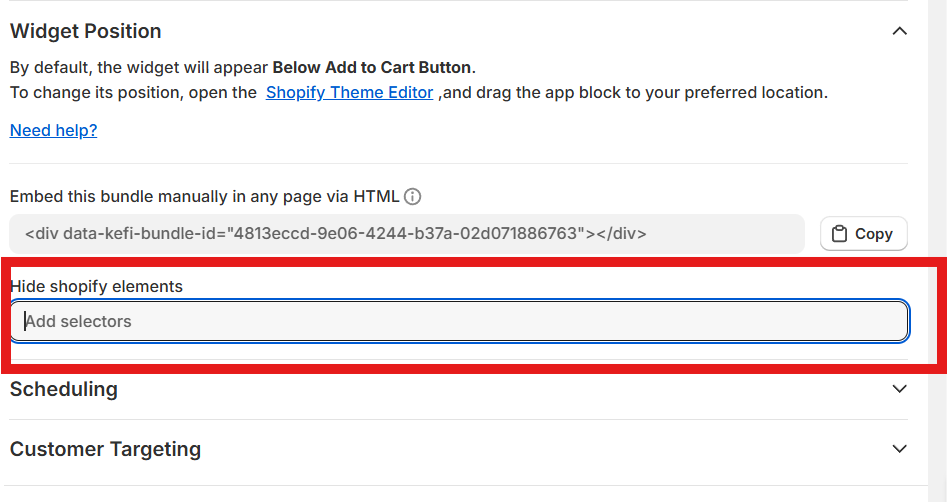
1. Widget Position
By default, the widget will appear below the Add to Cart button.
To change its position, open the Shopify Theme Editor, and simply drag the app block to your preferred location on the product page—no coding required.
Here is the detailed article to position the widget as per your needs.
How to Position Bundles on your Product Page?
Embed Bundle via HTML
You can also embed this bundle manually on any page using HTML.
Display the bundle wherever you like by placing the provided HTML tag directly into your theme file.
Hide Shopify Elements
You have the option to hide specific Shopify elements (like the default Add to Cart button or product price) to reduce redundancy when showing bundles.
Simply enter the CSS selectors of the elements you'd like to hide.
Product Settings
The Product Settings section gives you powerful customization control over how products are displayed and managed within each step.
Here’s what each option does:
Hide Out of Stock Products
Automatically removes products that are sold out from your bundle steps.
This ensures customers only see items that are currently available, improving the shopping experience and avoiding frustration at checkout.
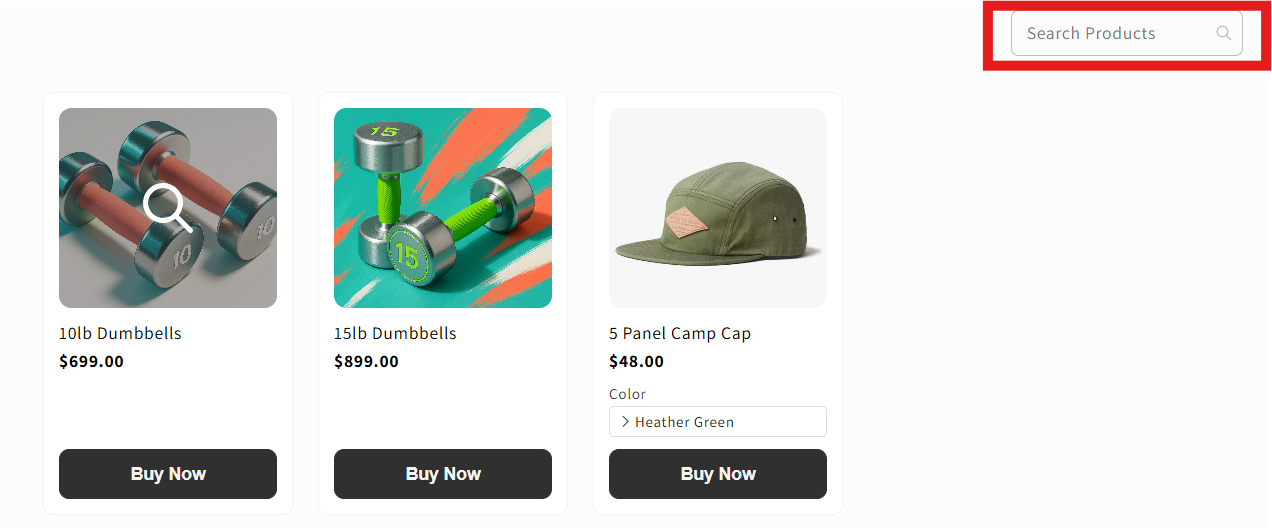
Show Search Bar
Displays a search bar within the product selection popup.
This is ideal for stores with large inventories, allowing customers to quickly find the product they want instead of scrolling through a long list.
Max Quantity Selection Per Product
Set a limit on how many units of a single product a customer can include in a bundle.
For example, if you set the max to 2, customers can’t add more than two of the same item in that bundle.
Product Card Size
You can define how product cards appear across devices for a clean, consistent layout:
Allow Pre-selected Products
You can pre-select specific products for customers when the bundle loads.
This is useful for guided bundles (e.g., “Starter Kits” or “Recommended Sets”) where some items are already chosen by default.
Note - Product that are already in the bundle only can be preselected

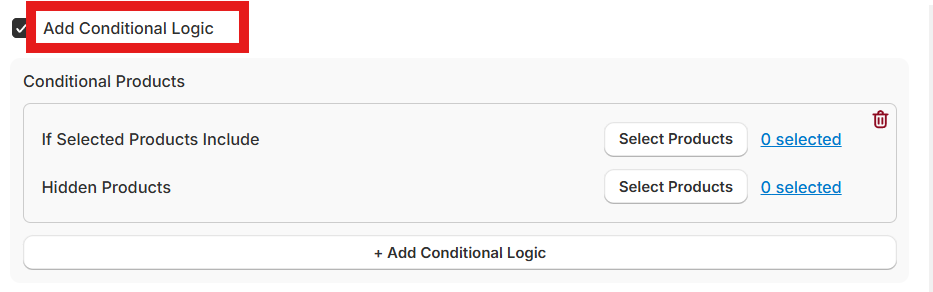
Add Conditional Logic
This feature enables dynamic bundling rules.
You can create conditional relationships between products based on user selections.
Example:
This ensures incompatible or duplicate products aren’t displayed together. It’s ideal for managing size-based, variant-based, or exclusive bundle options.
If you have any questions or need assistance, feel free to contact us:
.svg)
