Creating compelling product bundles has never been easier. With our Buy N, Discount on Cheapest/Costliest bundle type, you can reward customers for buying more — by automatically applying a discount to either the cheapest or costliest item in their cart.
Whether you’re running sitewide offers like “Buy 3, Get the Cheapest Free” or tiered volume discounts like “Buy More, Save More,” this setup guide will walk you through every step of the process to launch this bundle on your Shopify store.
In just a few minutes, you’ll be able to:
Let’s get started!
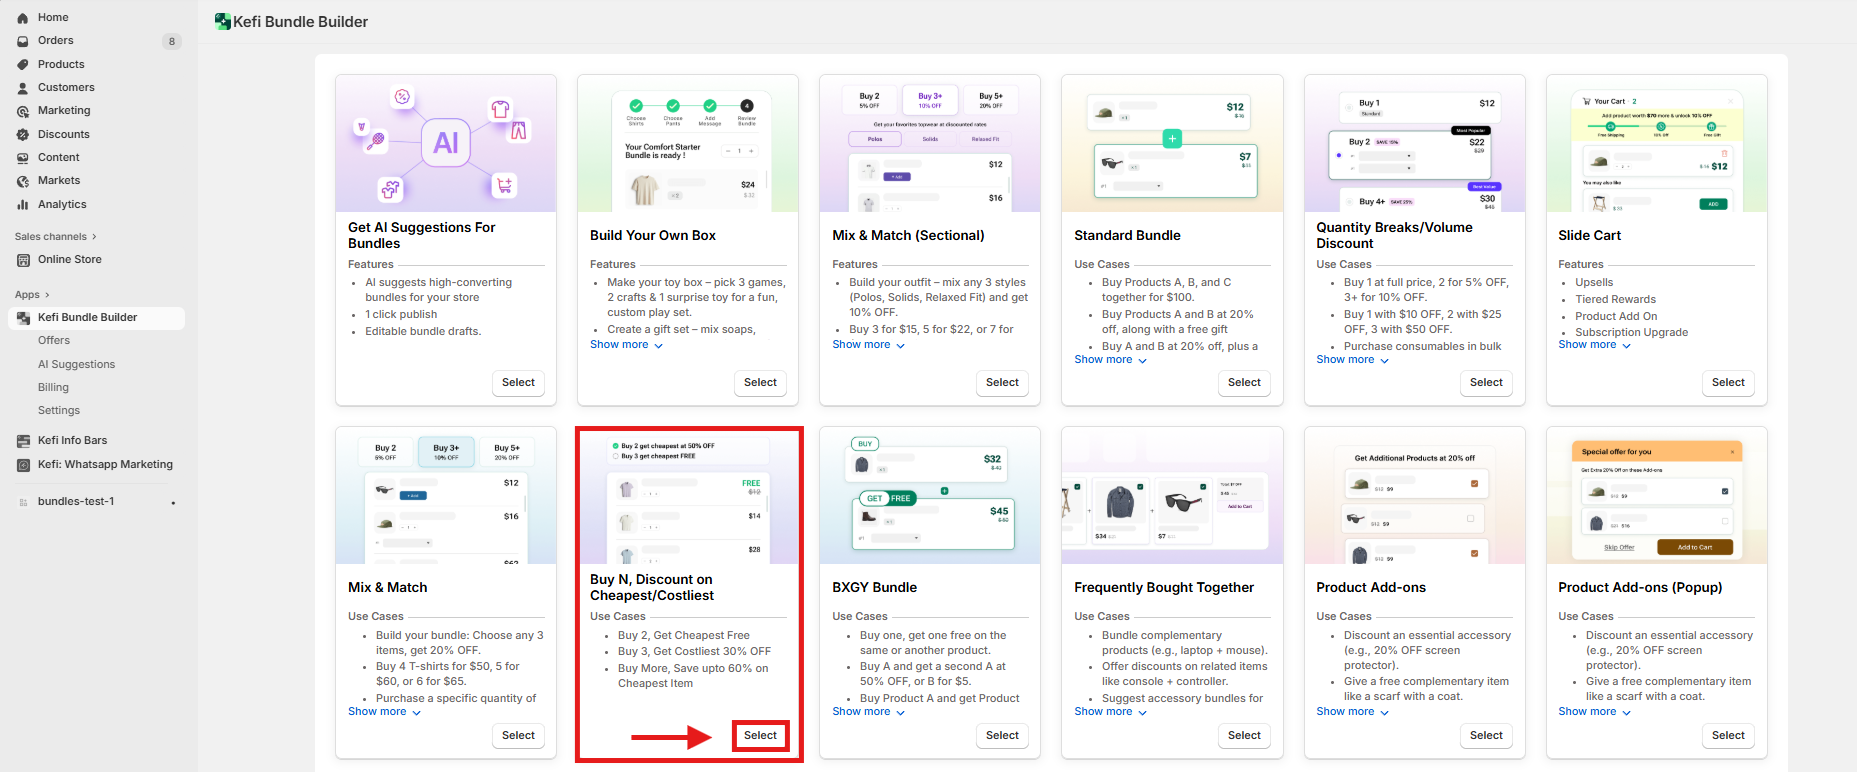
Go to the homepage and select the Buy N, Discount on Cheapest/Costliest. Click “Select”
After selecting Buy N, Discount on Cheapest/Costliest , you'll be redirected to the Content Section, where you can set up your bundle. This section includes:
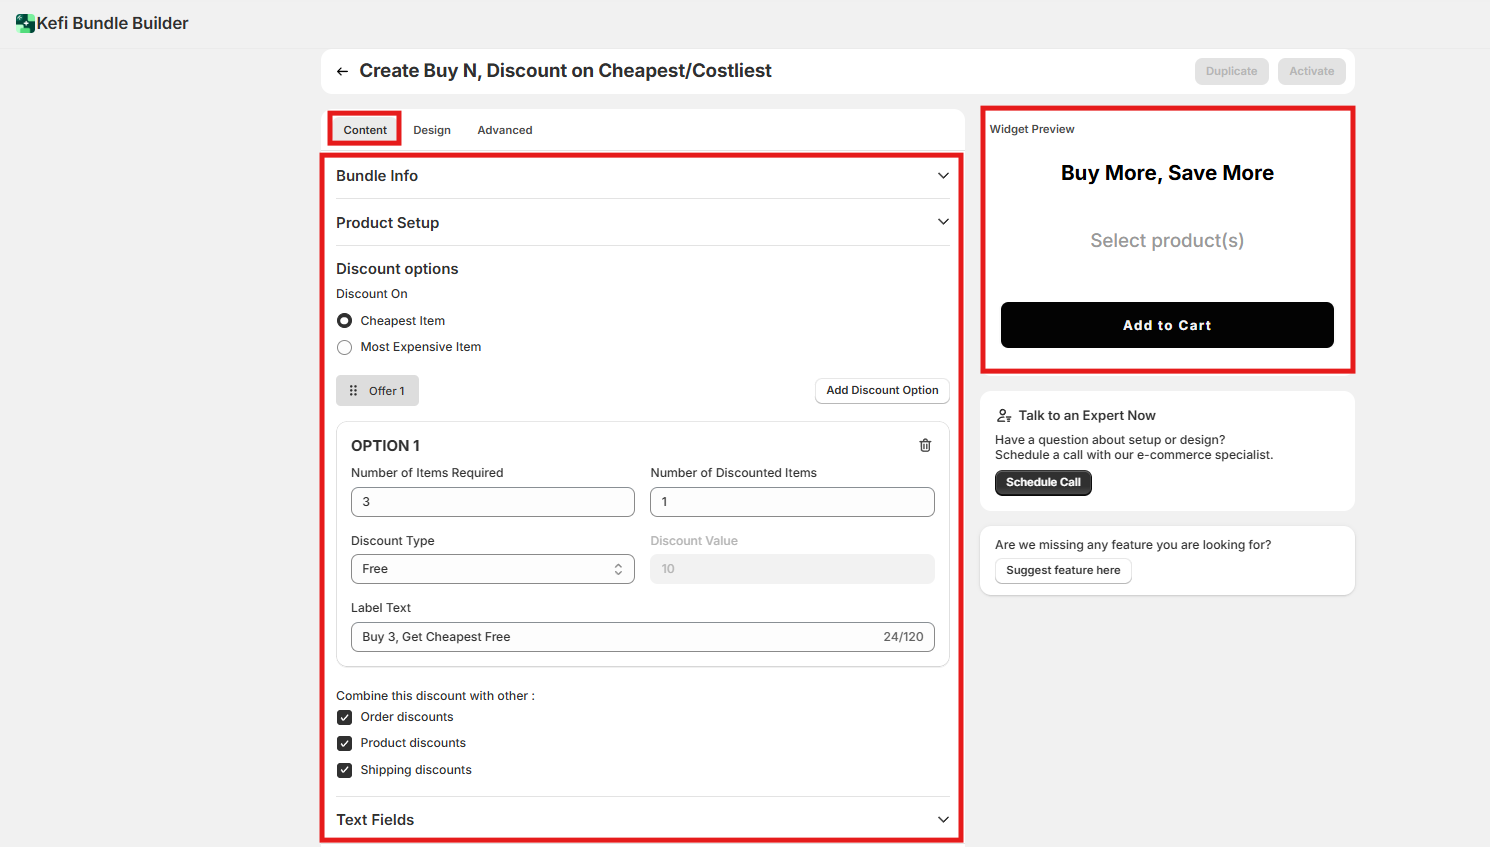
1. Bundle Info
In this section, you can add a title for your Buy N, Discount on Cheapest/Costliest Bundle. This title will be visible to customers, so make it clear and appealing.

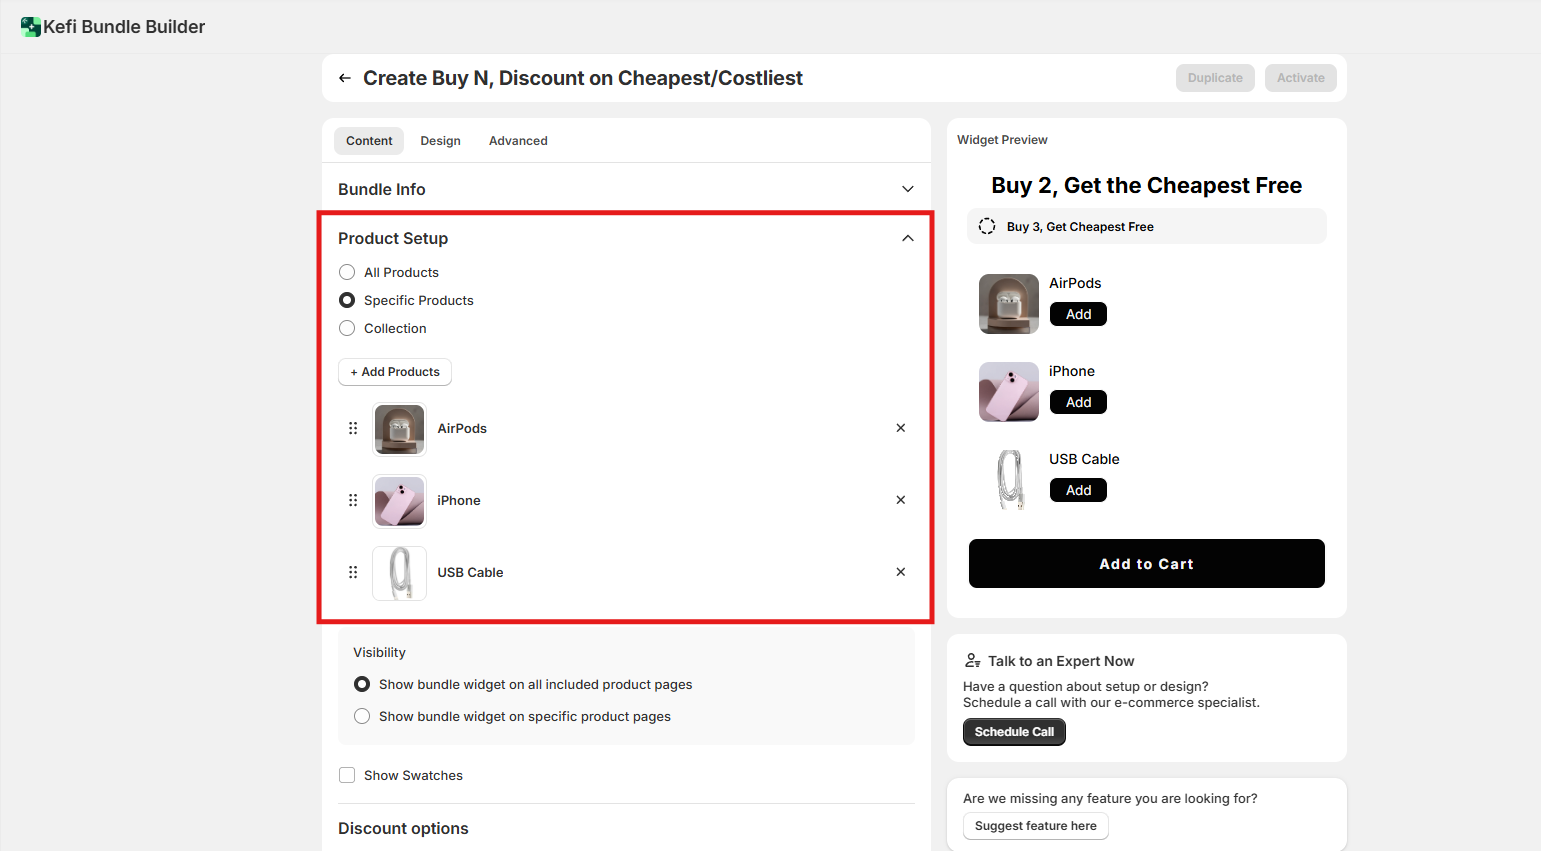
2. Product Setup
This section allows you to select which products will be part of your Buy N, Discount on Cheapest/Costliest offer. You have three flexible options to choose from:
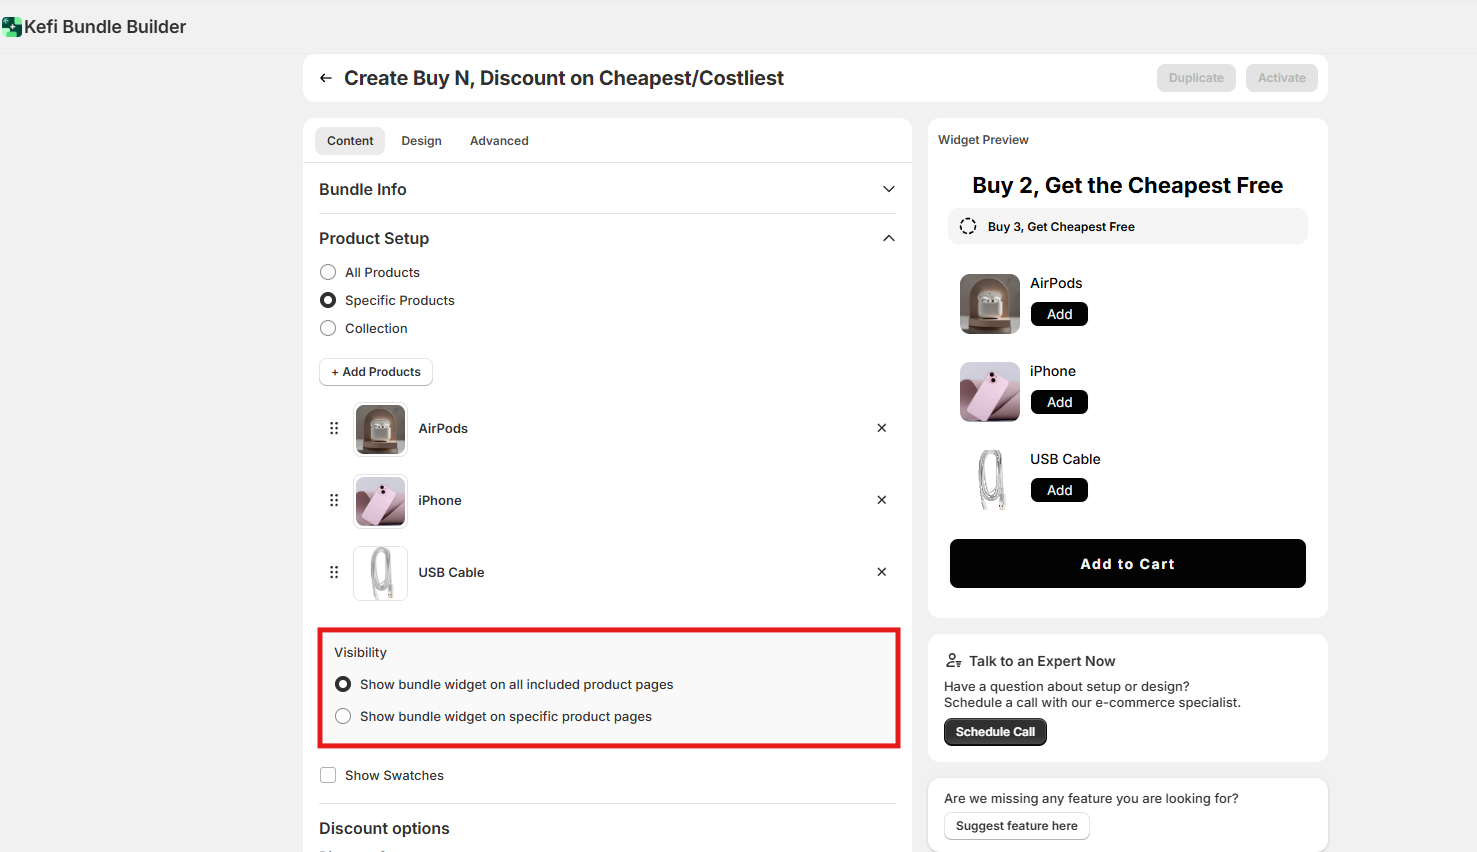
Widget Visibility Options
Decide where the Buy N, Discount on Cheapest/Costliest bundle widget should appear:
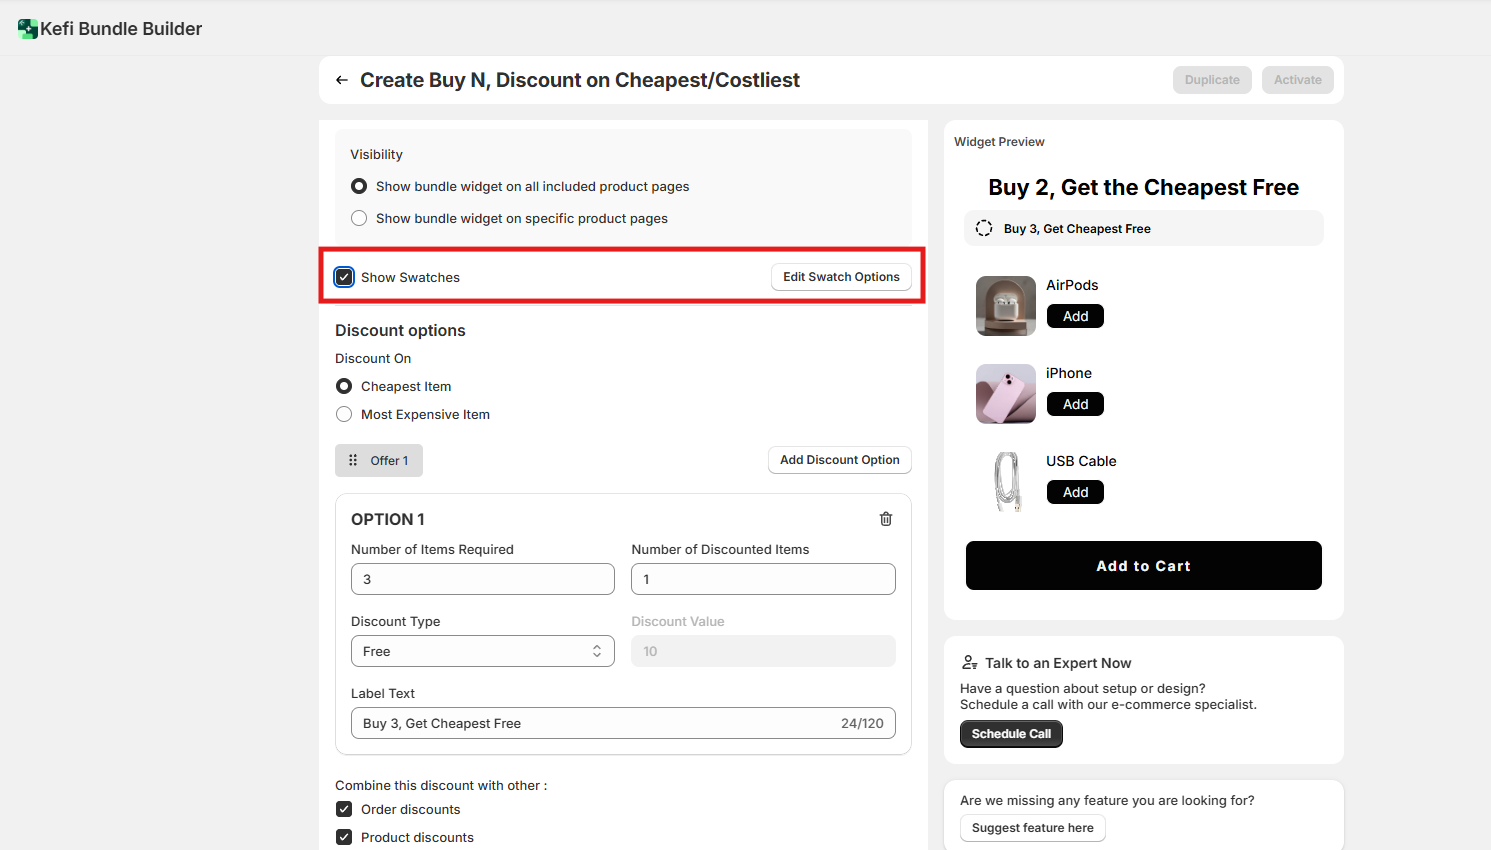
You can also display product variants - such as different colors, sizes, or styles—by enabling the Show swatches option.
This allows customers to view and select from the available variants directly within the bundle widget, improving the shopping experience.
To further personalize how these options appear, click on Edit swatches. Here, you can customize the swatch layout, labels, and appearance—for example:
3. Discount Option
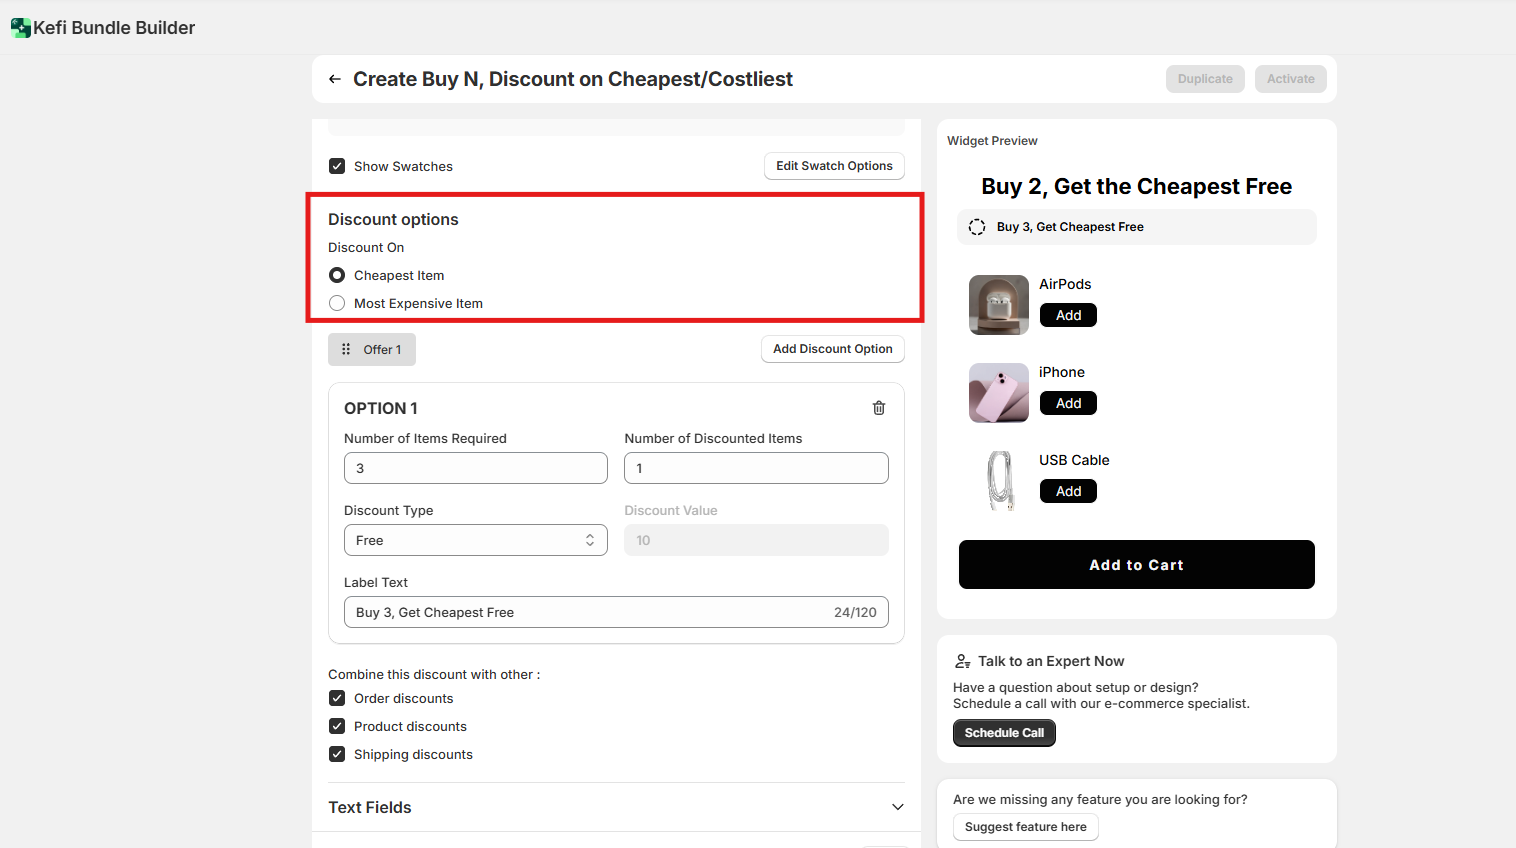
When creating a Buy N, Discount on Cheapest/Costliest bundle, you have full control over how and where the discount is applied:
Discount Applied To
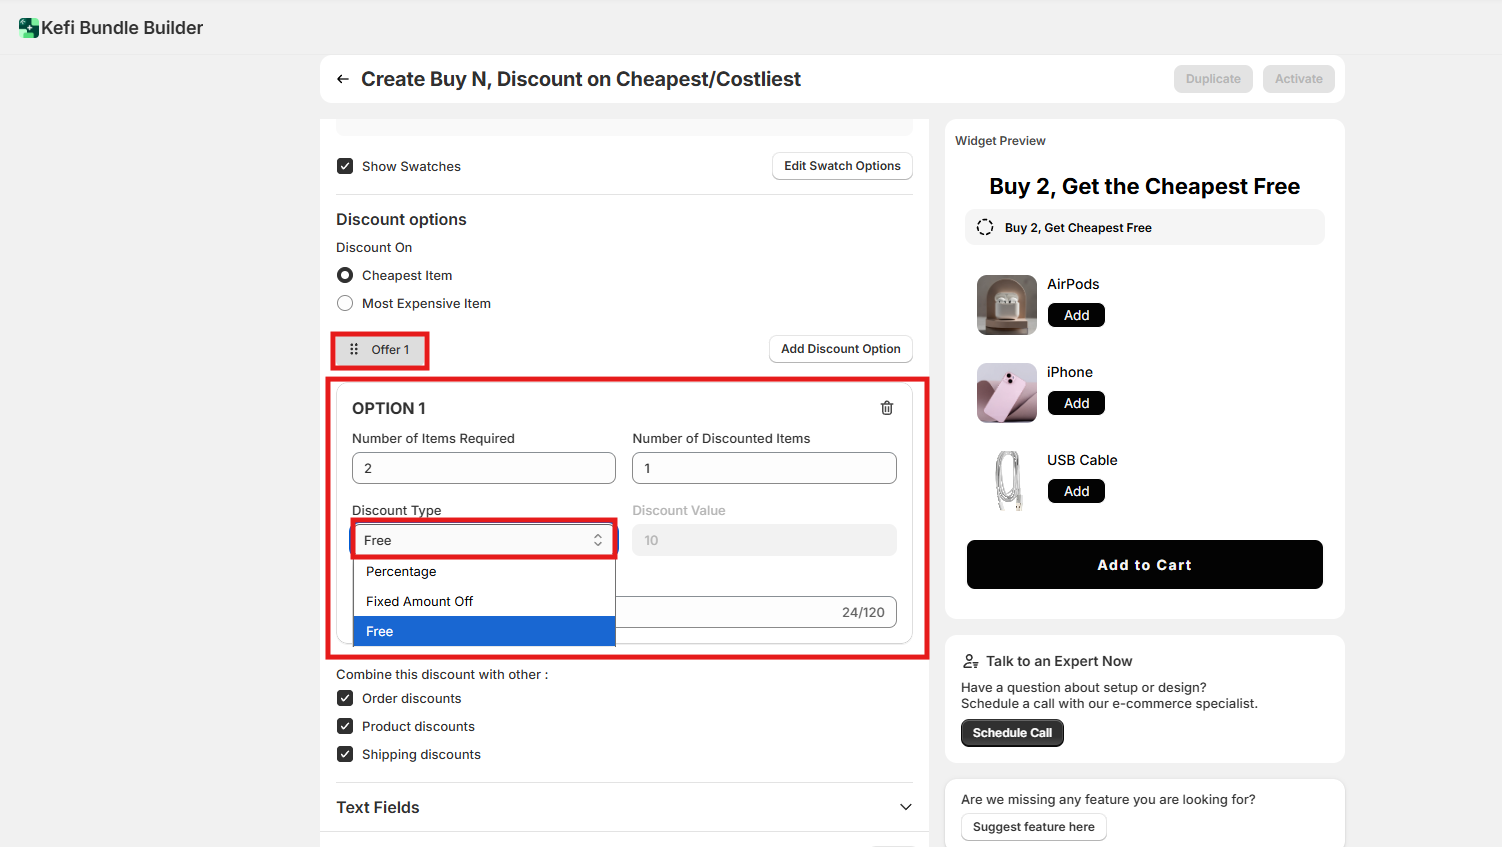
Discount Type
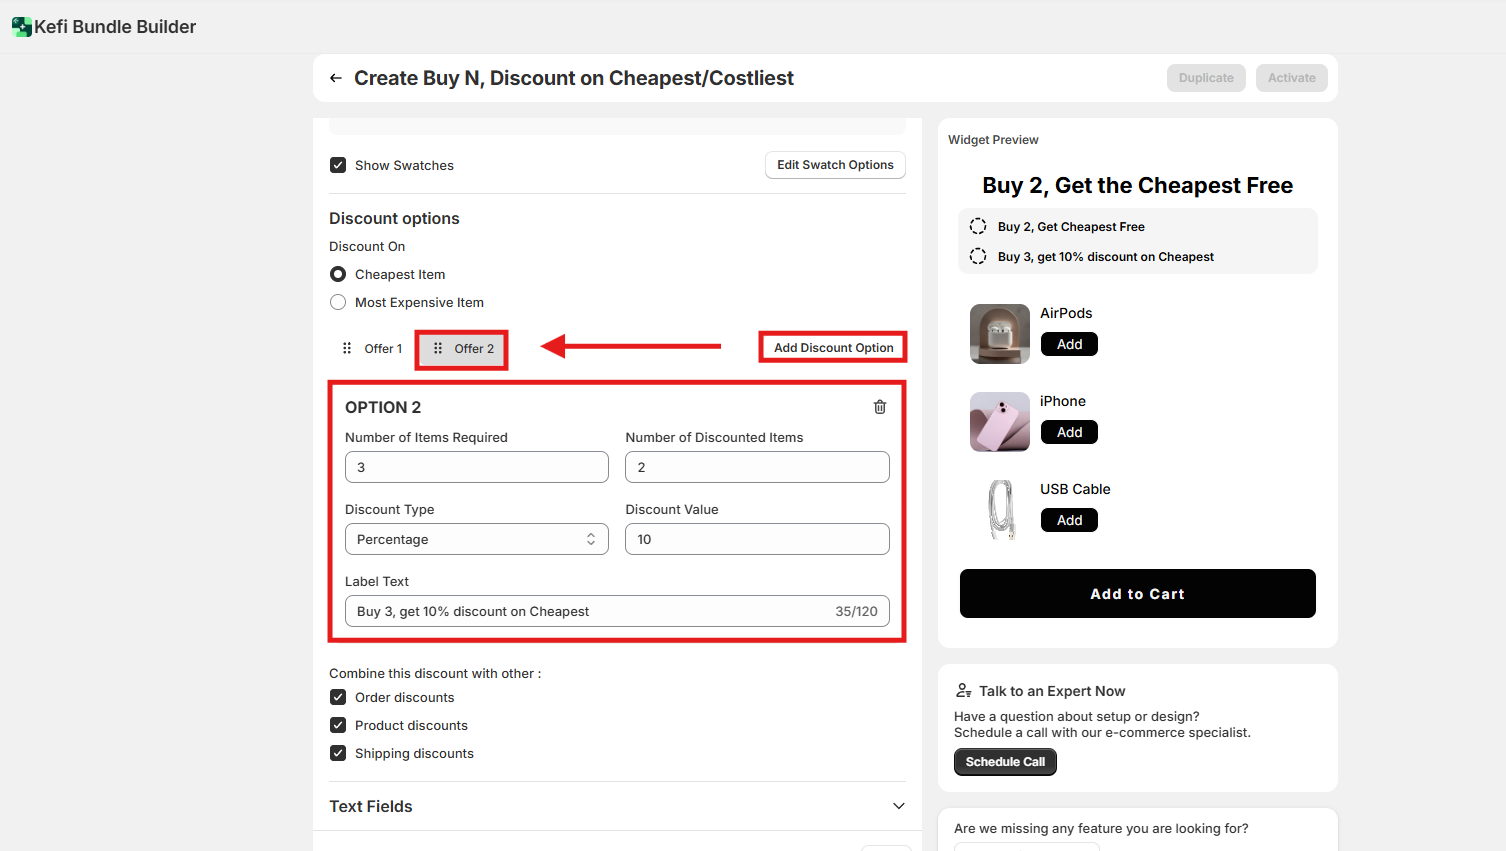
You can add additional discount tiers by clicking the “Add Discount Offer” button.
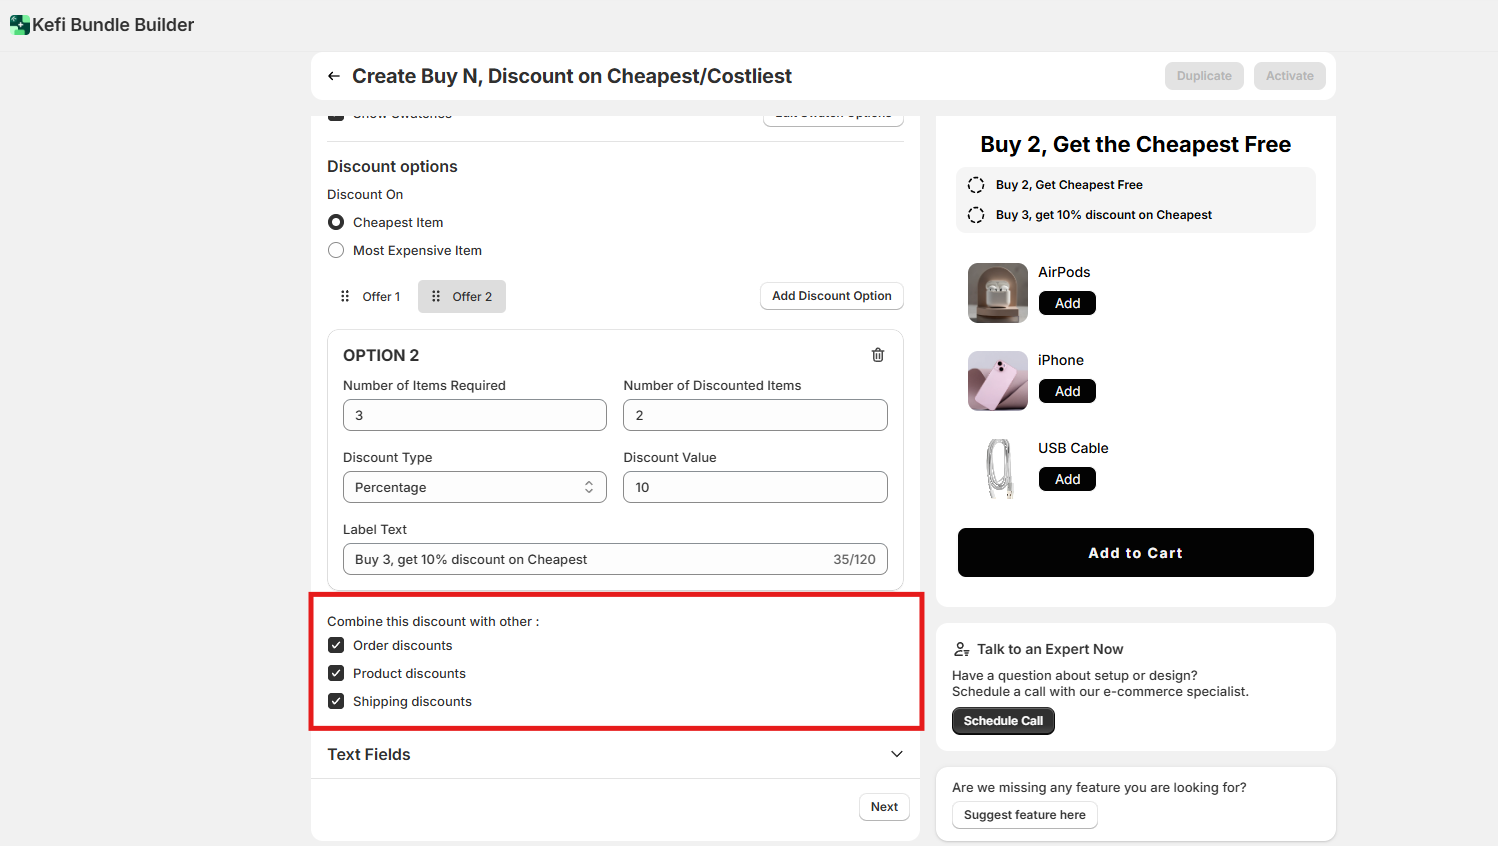
Combine this discount with other:
You can choose to combine your add-on discount with other types of discounts active in your store, including:
This allows you to create more compelling promotions by layering multiple incentives for your customers.
4. Text Fields
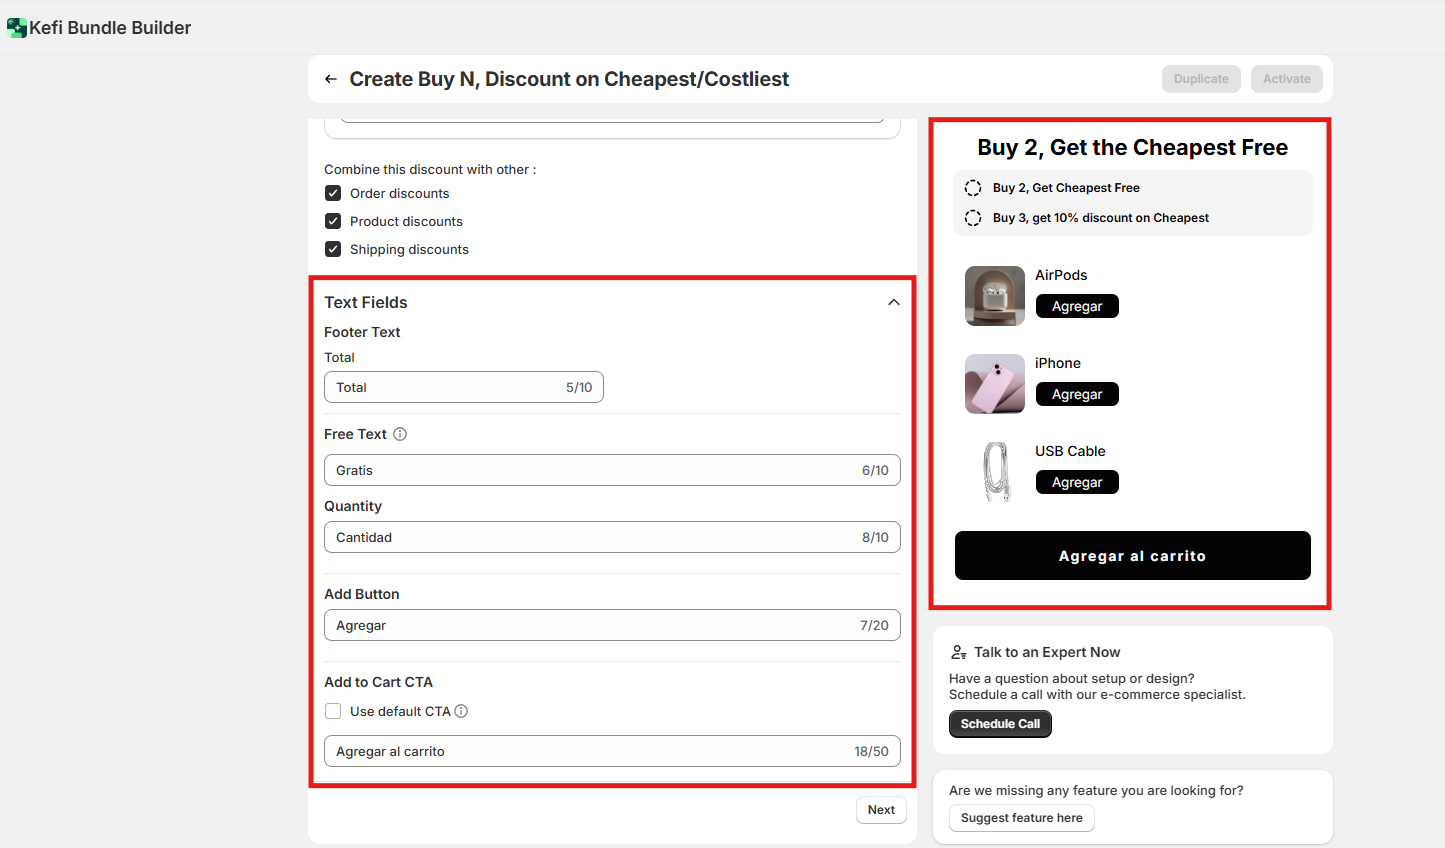
This section allows you to customize all the text shown on the Buy N, Discount on Cheapest/Costliest bundle widget. It’s perfect for aligning the language with your brand tone or translating content for different markets.
You can easily update key elements such as:
Now , click on the “Next” button to proceed to the next section .
After clicking the next you would be redirected to the next section that is Design
Design Your Bundle Widget
The Design section allows you to tailor the appearance of your bundle widget so it seamlessly matches your store’s branding and layout. A well-designed widget not only enhances visual appeal but also builds trust and improves the overall customer experience.
To give you more flexibility and control, the customization options are now grouped into three main sections:
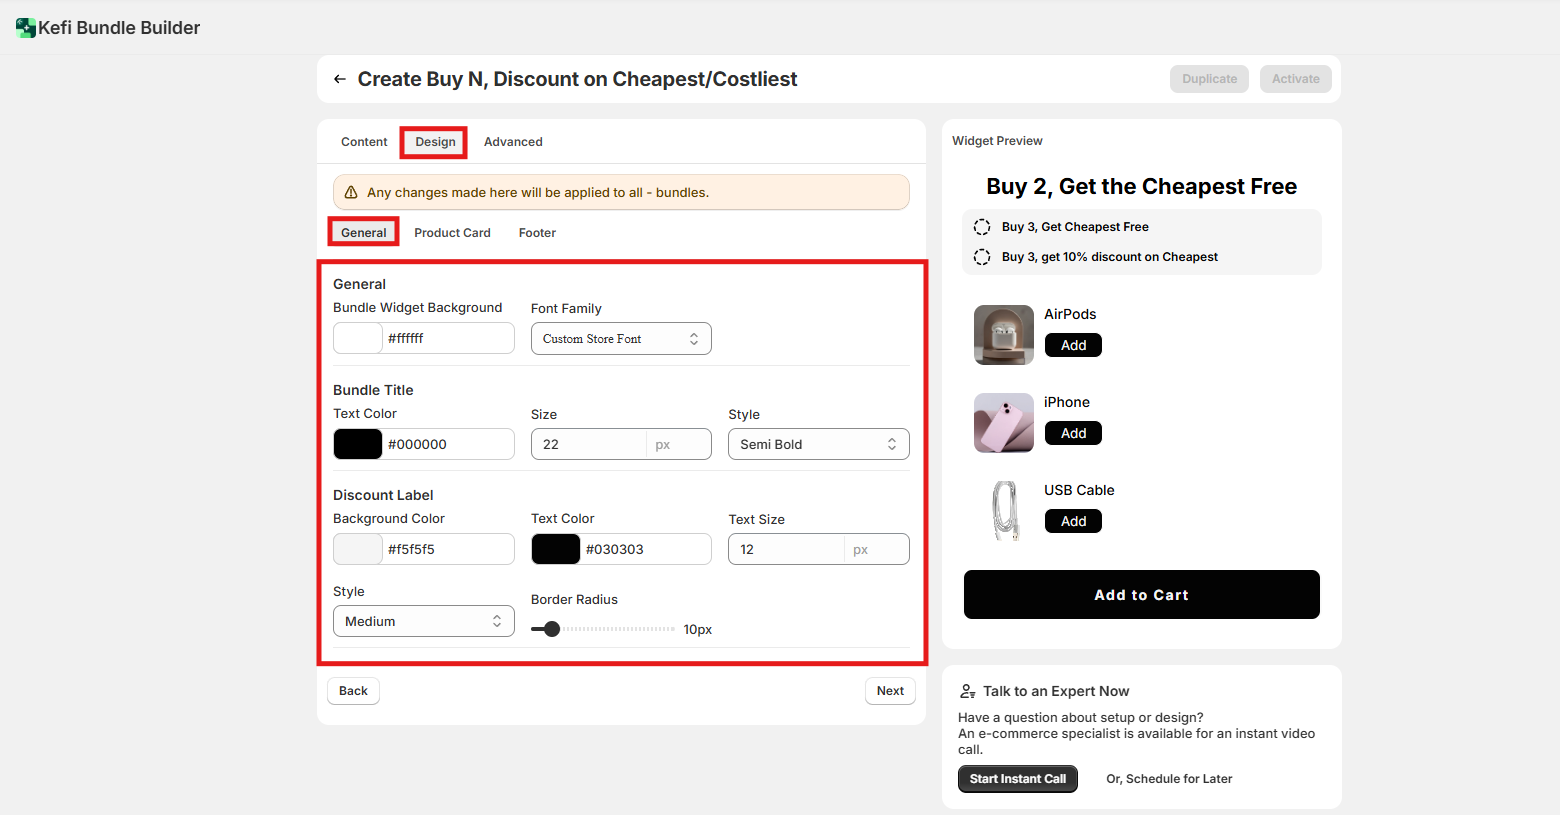
1. General
These settings affect the overall look of the entire bundle widget.
Bundle Title
Discount Label
2. Product Card
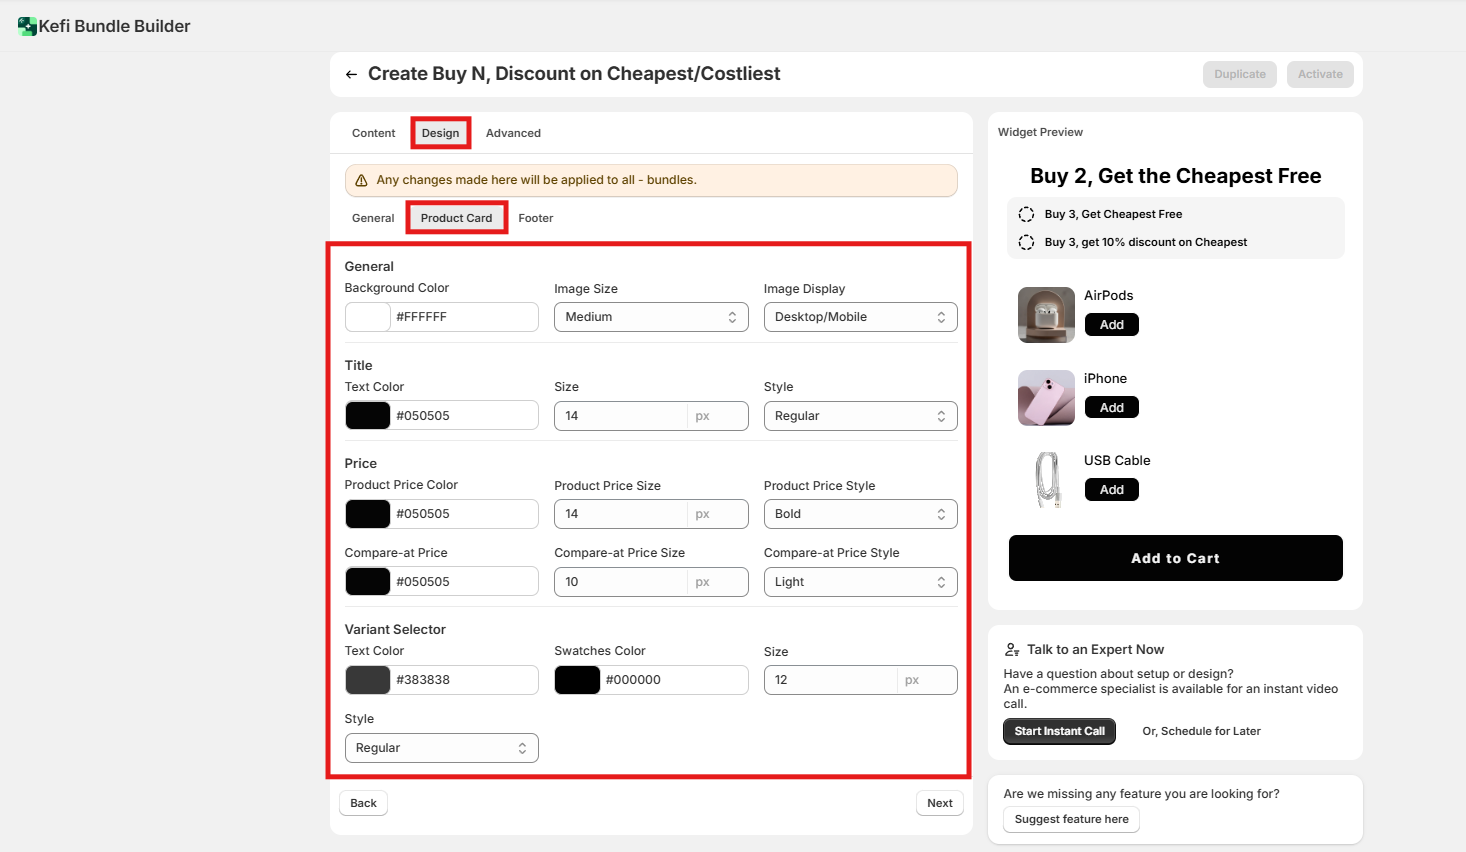
These options control the visual styling of each product shown in the bundle.
General
Title
Price
Compare-at Price
Variant Selector
3. Footer
These settings control the look of the footer section where pricing and the Add to Cart button appear.
Total Section
Add to Cart Button
These design settings help you create a cohesive, branded look that encourages user engagement and trust. You can preview all changes live using the widget preview on the right-hand side of the setup screen.
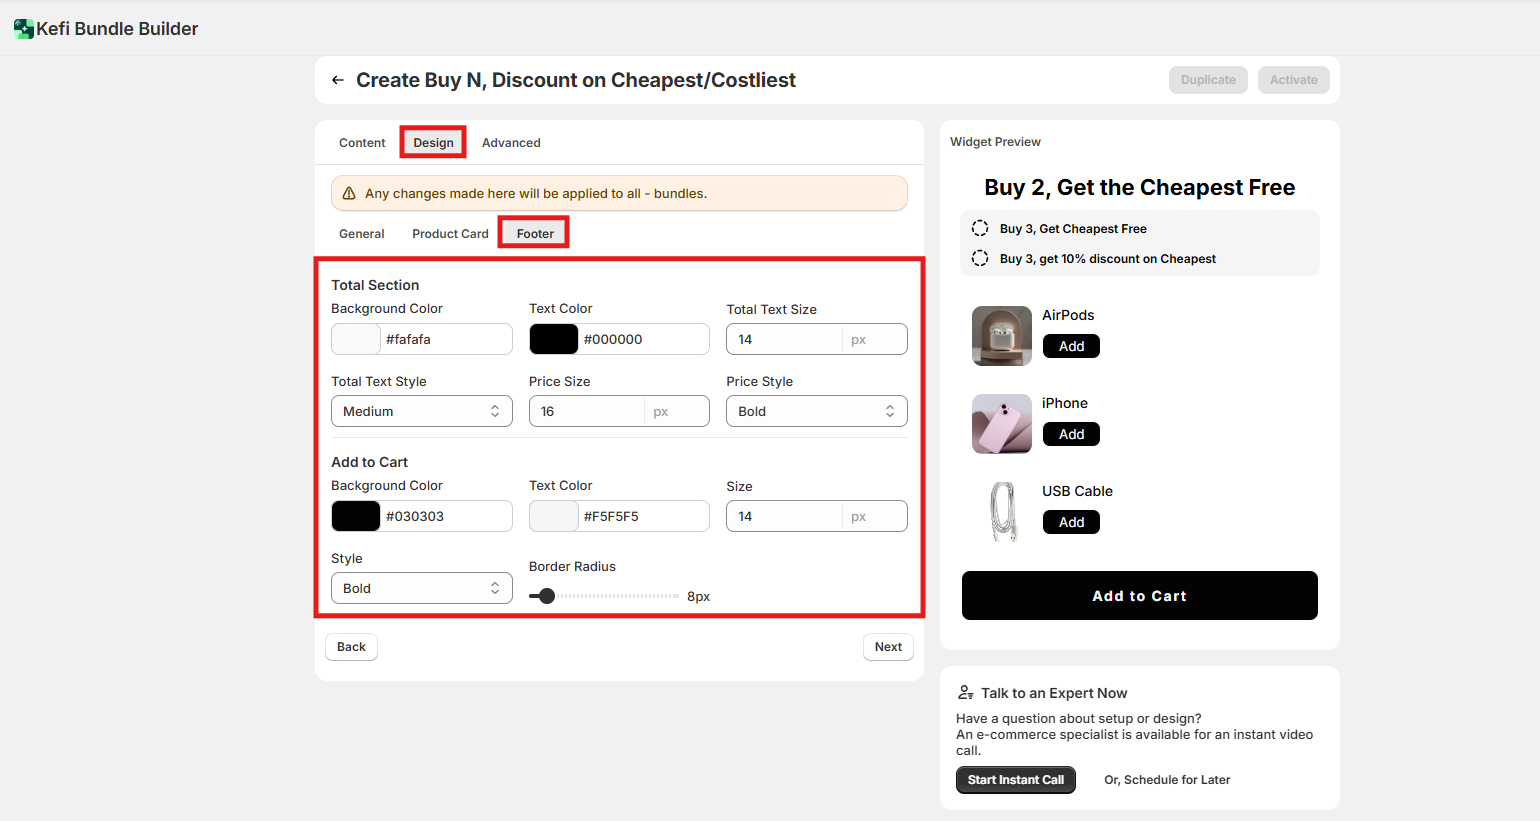
Now, click on the “Next” button to proceed to the next section.
After clicking "Next", you’ll be redirected to the following step: Advanced.
Advanced Settings - The Advanced section gives you greater control over when, where, and to whom the bundle widget is shown. These settings are useful for precise targeting and scheduling. Let’s dive into each option:
1. Widget Position
By default, the widget will appear below the Add to Cart button.
To change its position, open the Shopify Theme Editor, and simply drag the app block to your preferred location on the product page - no coding required.

Embed Bundle via HTML
You can also embed this bundle manually on any page using HTML.
Display the bundle wherever you like by placing the provided HTML tag directly into your theme file.
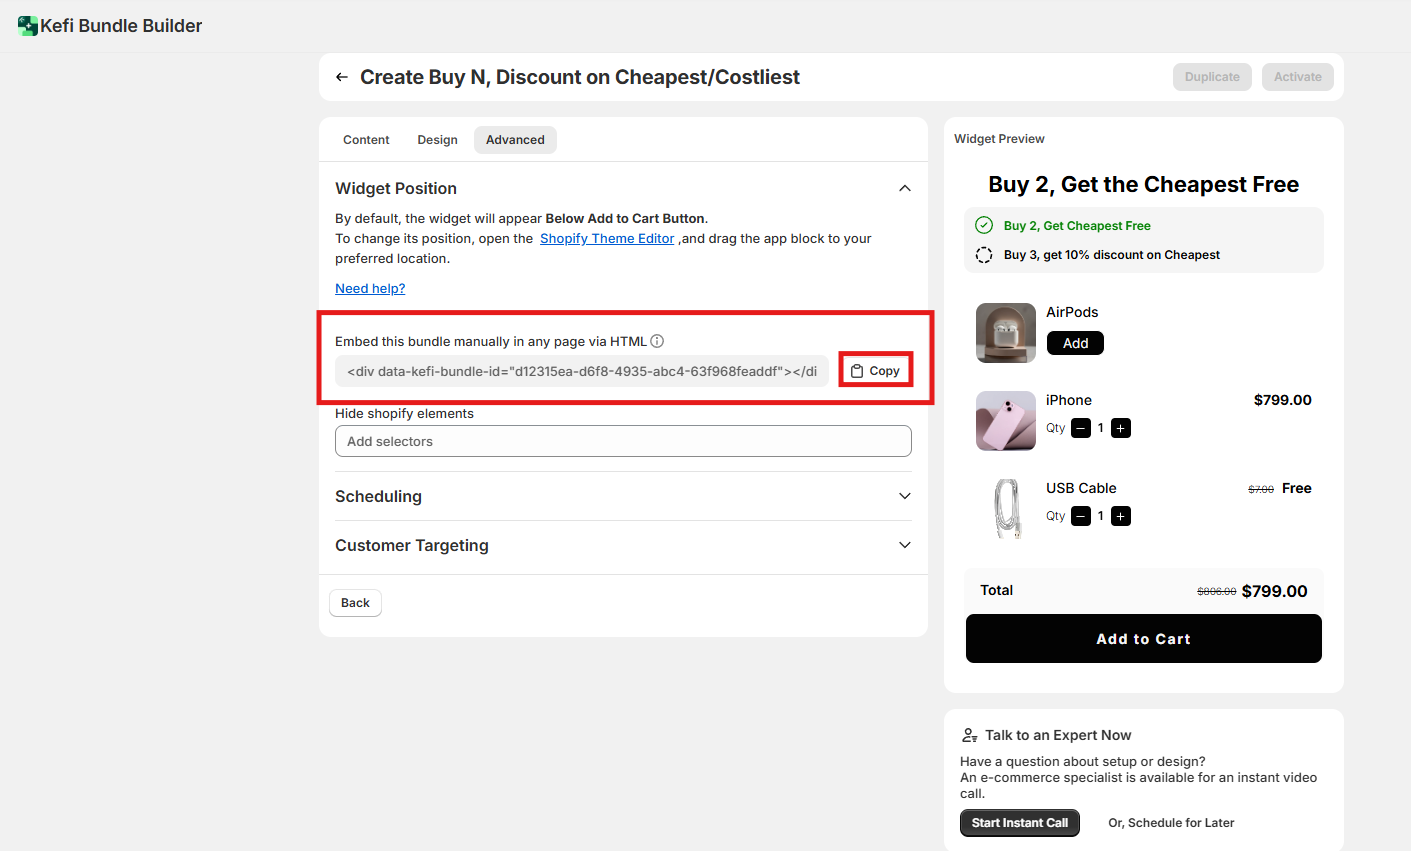
Hide Shopify Elements
You have the option to hide specific Shopify elements (like the default Add to Cart button or product price) to reduce redundancy when showing bundles.
Simply enter the CSS selectors of the elements you'd like to hide.
For example:
This helps create a cleaner, more focused layout around your bundle widget.
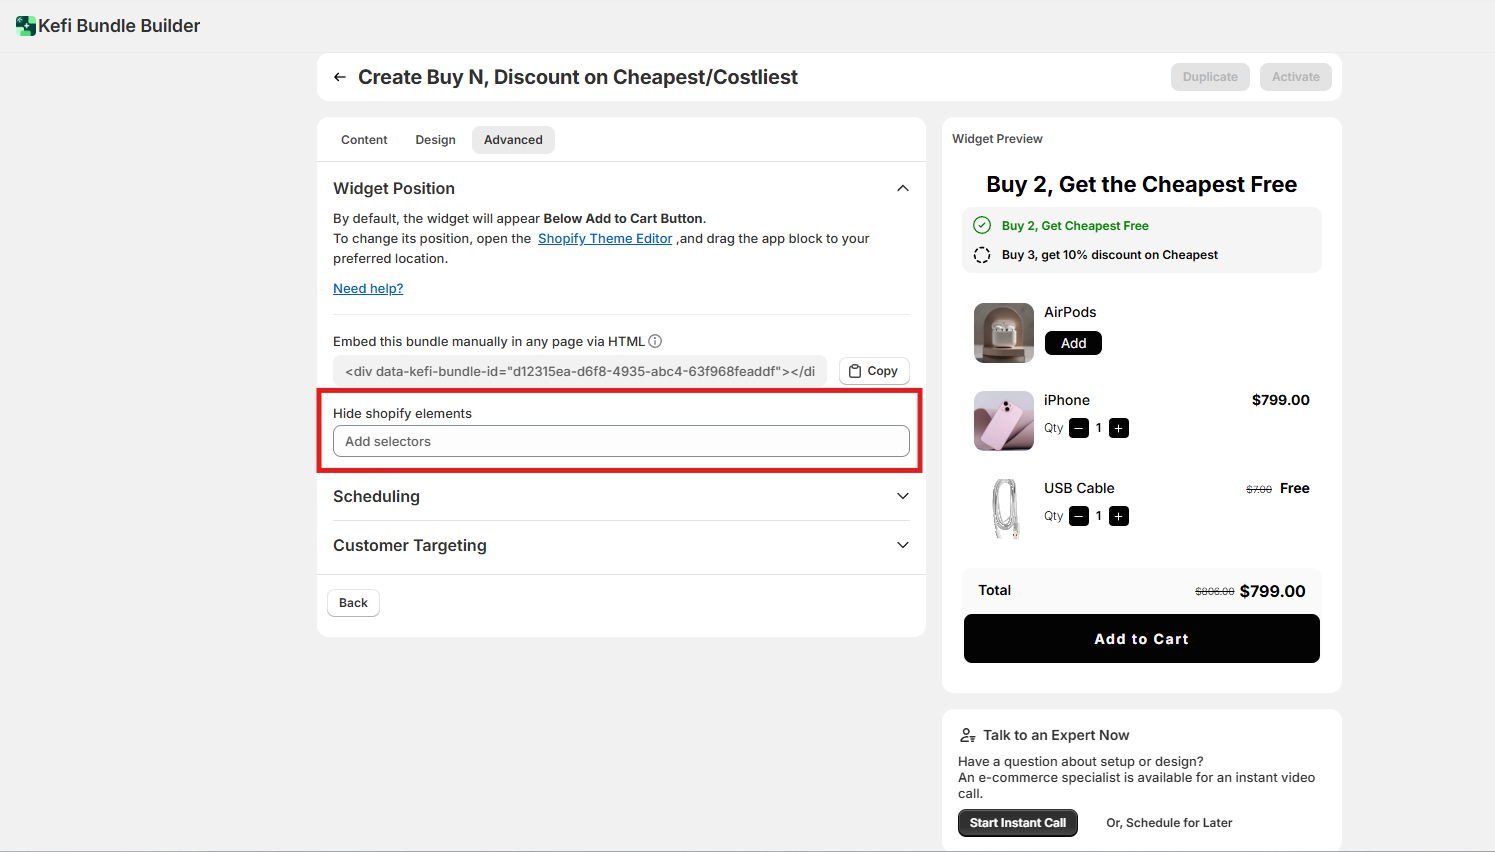
For a detailed step-by-step guide, refer to this help article:
How to Position Bundles on Your Product Page
2. Scheduling
Set a start and end date for your bundle campaign. This is perfect for time-sensitive promotions, seasonal offers, or flash sales. The widget will only display during the defined period.

3. Customer Targeting
Control who sees the bundle by targeting:

In case of Specific Customer Segment -

Click on “Save” button to save all the changes

Click on “Activate” to activate the widget on your shopify store(make sure you have enabled the core snippet button in order to see the bundles on your store).
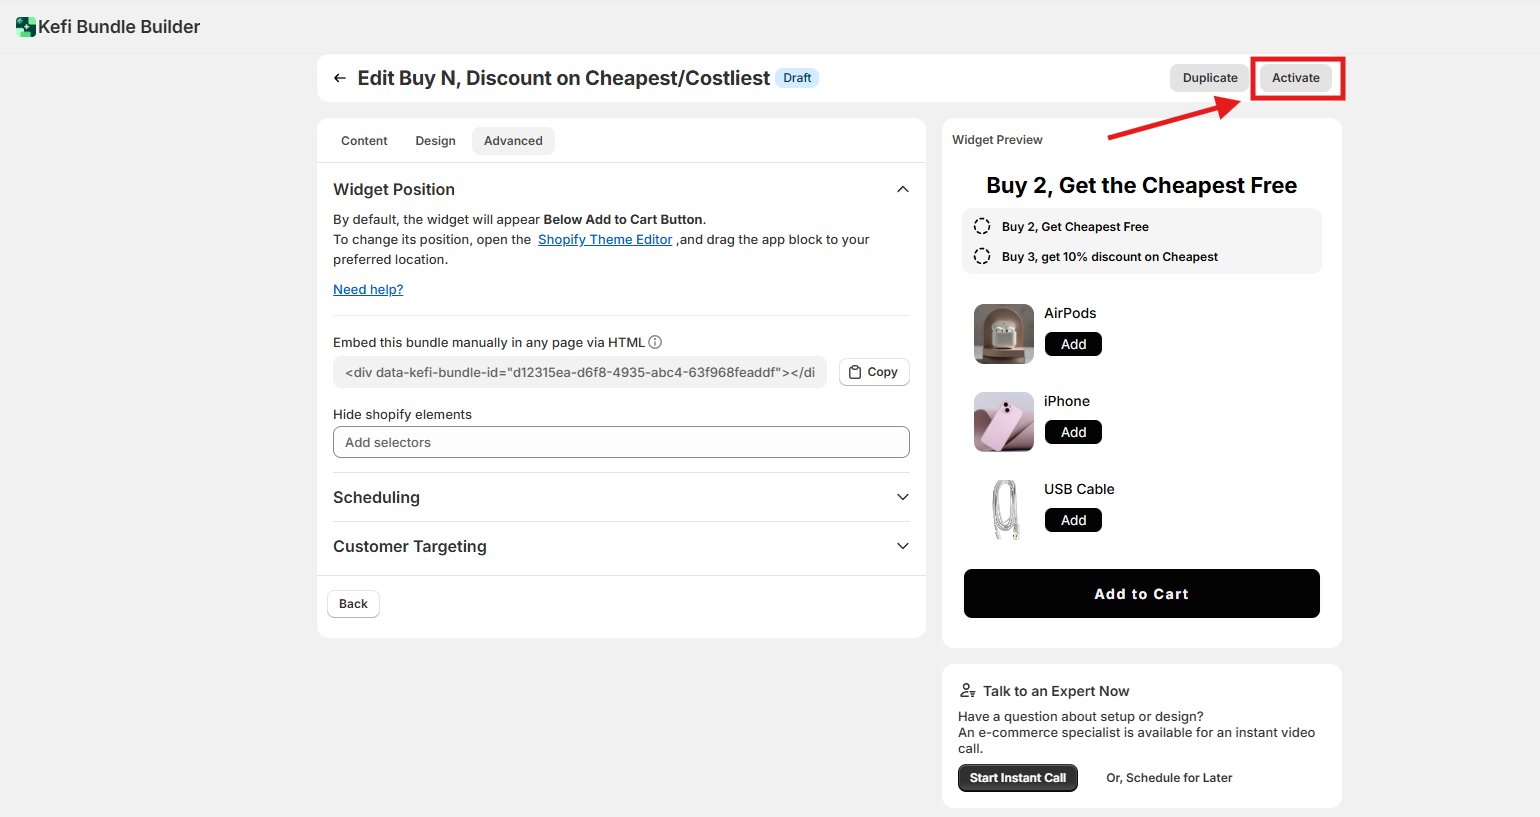
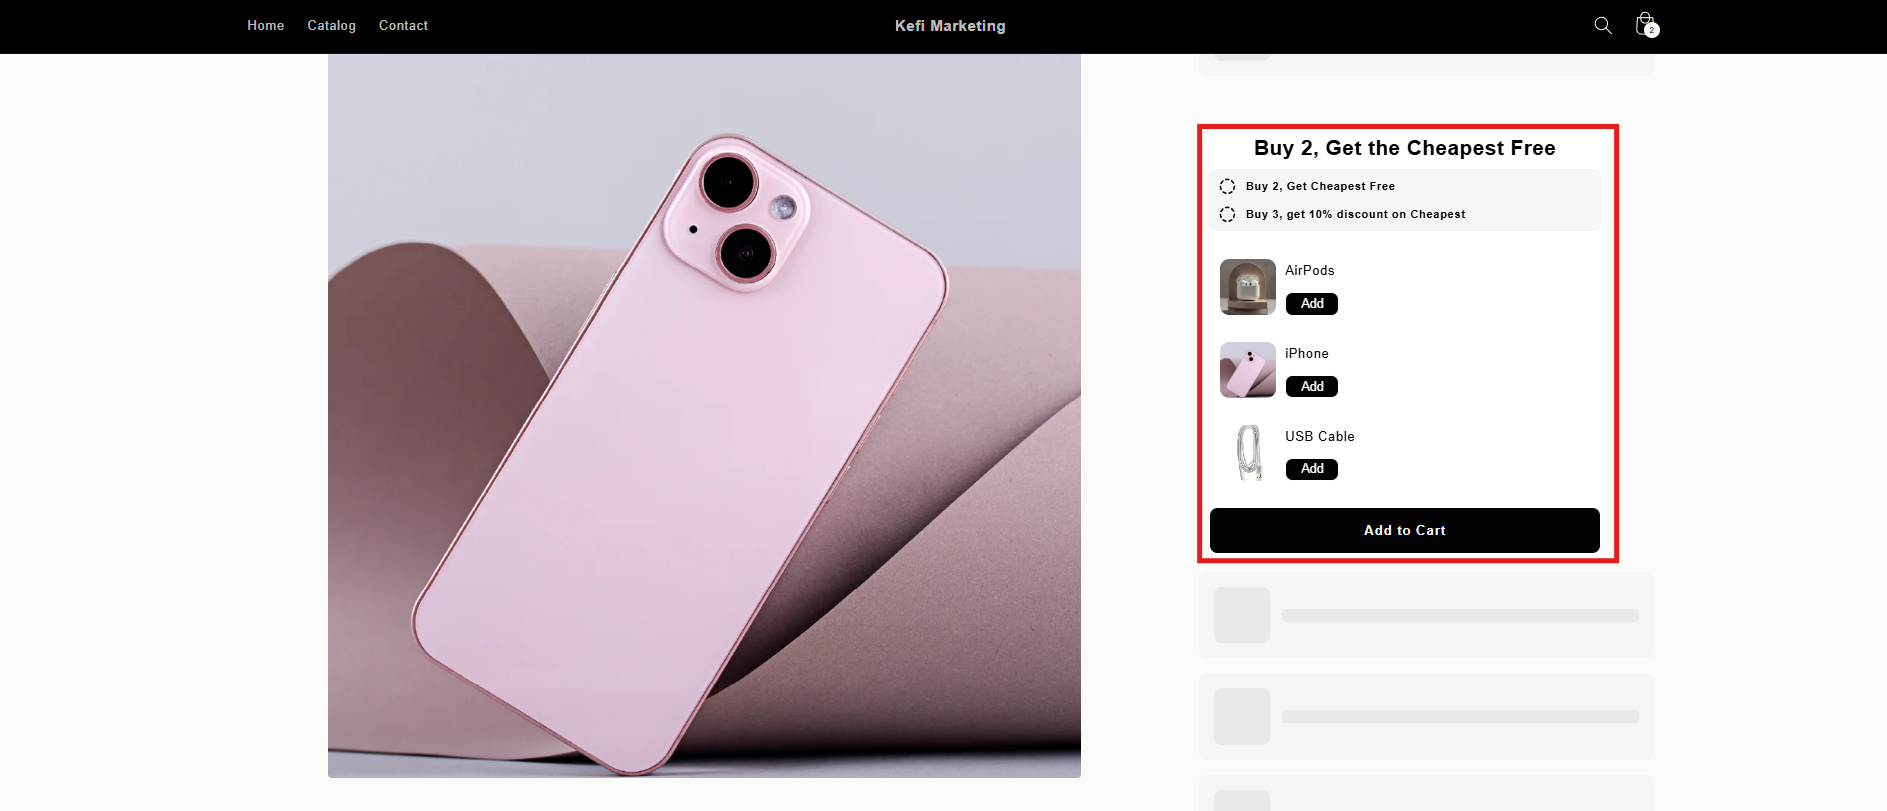
Your Buy N, Discount on Cheapest/Costliest Bundle is Now Live! Click the “Show on Store” button to Preview the bundle as it appears to your customers
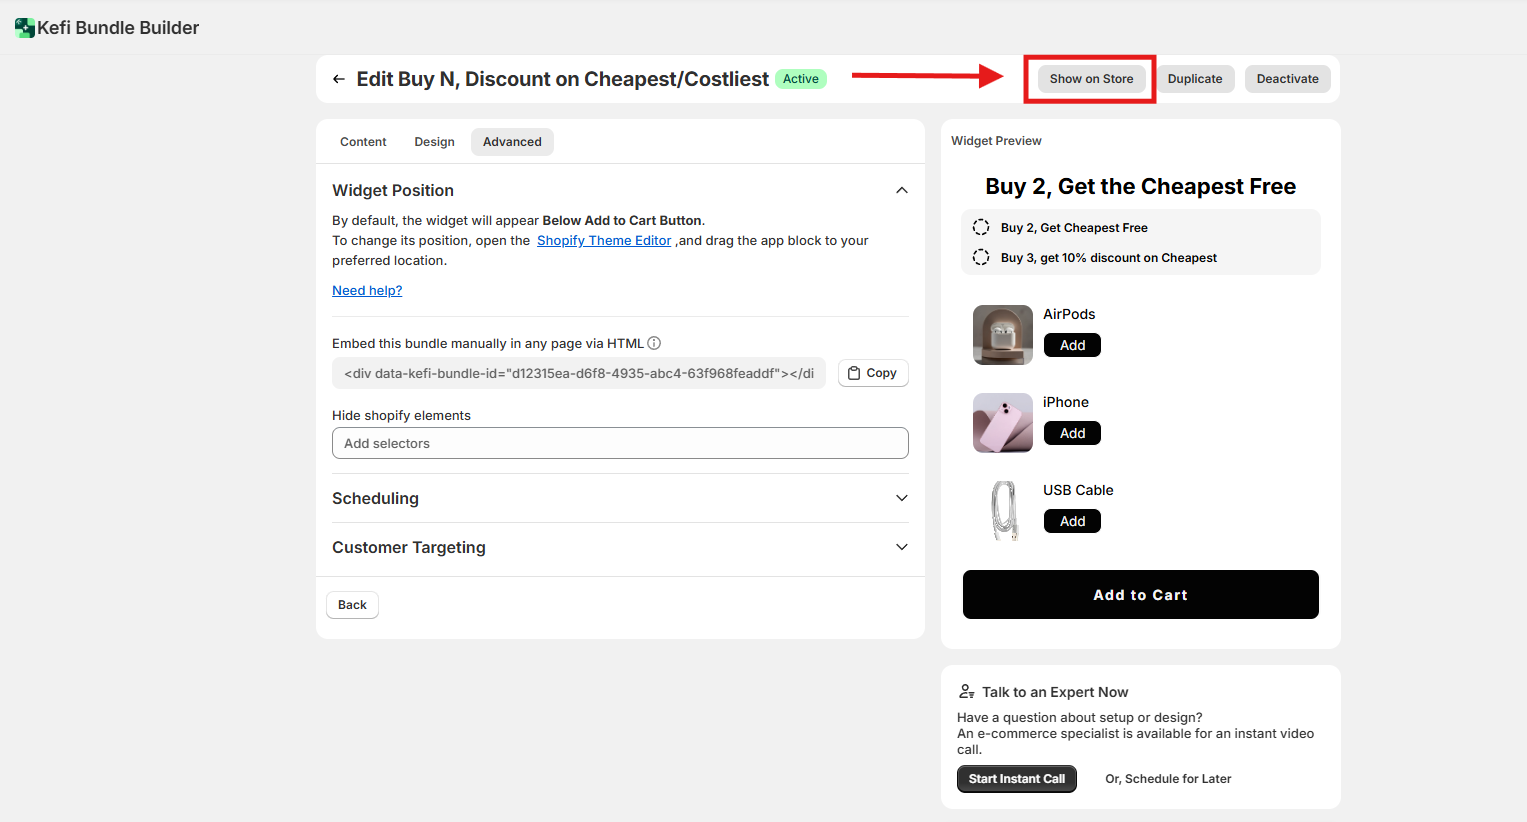
Now, head over to your storefront to see the Buy N, Discount on Cheapest/Costliest Bundle live in action.
If you have any questions or need assistance, feel free to contact us:
.svg)
