Product Add-ons (Popup) allow you to enhance the shopping experience by offering relevant product suggestions or promotional deals when customers add an item to their cart. This feature is a powerful tool to boost average order value, highlight complementary products, and provide targeted discounts in a seamless and engaging way.
Once an Add-on Popup is created, it will automatically trigger when a customer adds the main product to their cart. The popup will display the add-on offer, allowing the customer to conveniently add the suggested item to their cart directly from the banner. This ensures the promotion is visible at the perfect moment, helping drive upsells without interrupting the shopping flow.
Go to the Kefi Bundle Builder homepage and select the Product Add-ons (Popup). Click “Select”
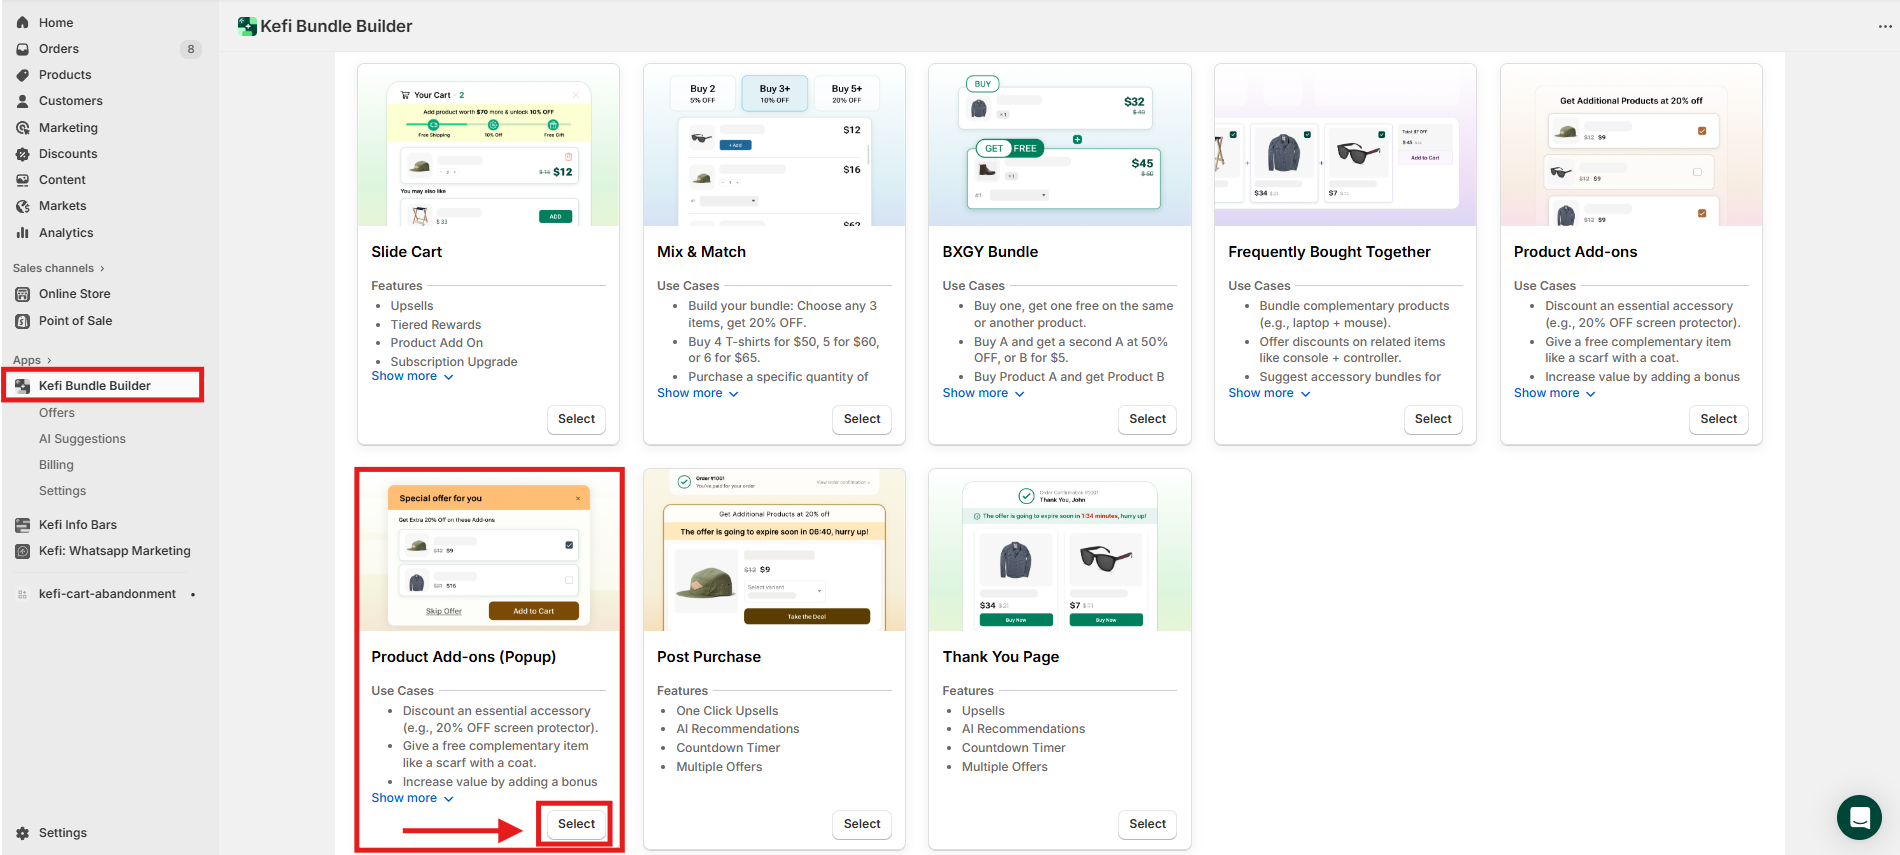
After you choose to create a Product Add-on (Popup), you'll be redirected to the Content section. This area is divided into four key sub-sections that help you customize how your bundle looks and works on your store:
1. Bundle Info
The Bundle Info sub-section allows you to set the basic information your customers will see in the popup. It includes:
This section sets the tone for your add-on and helps ensure the offer is clearly communicated when the popup appears on the storefront.
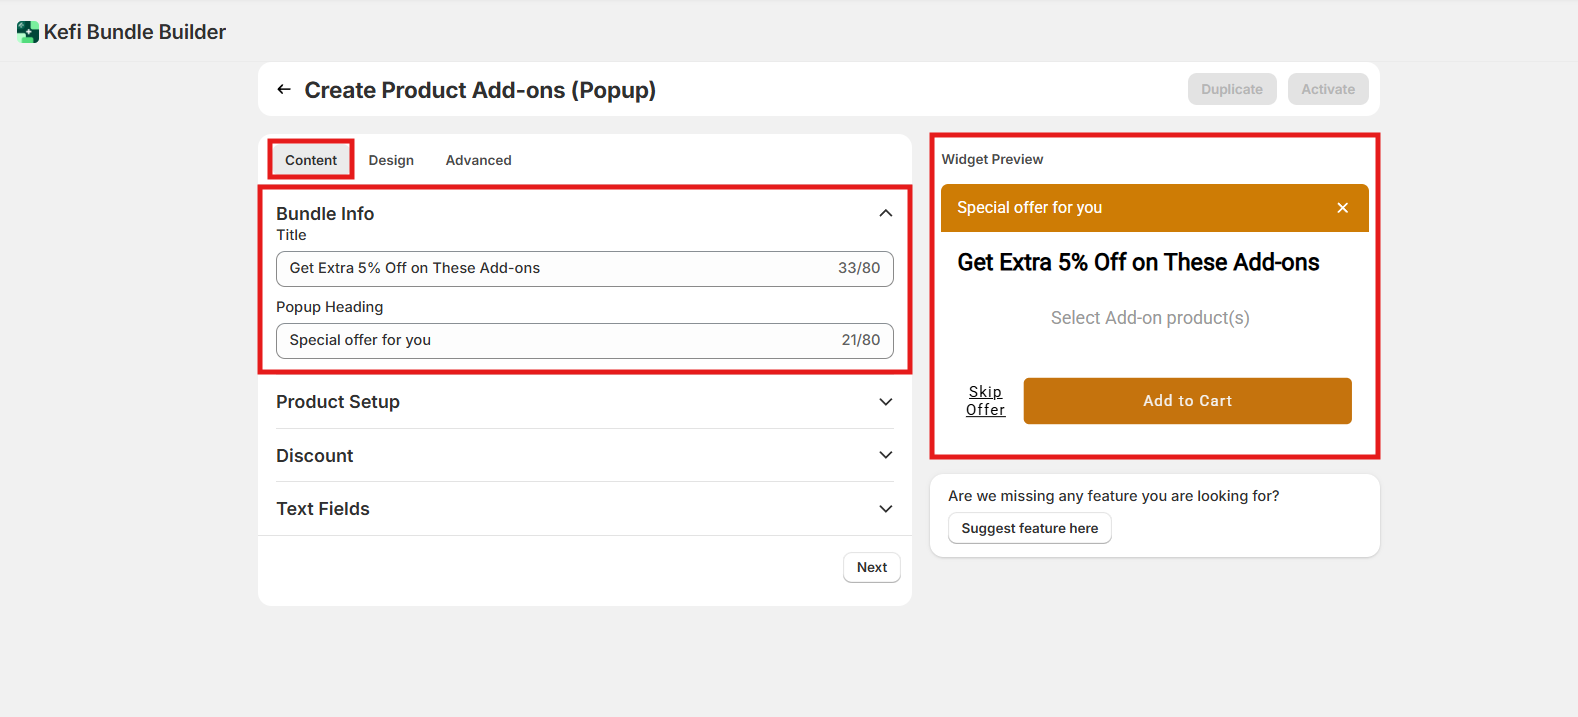
2. Product Setup
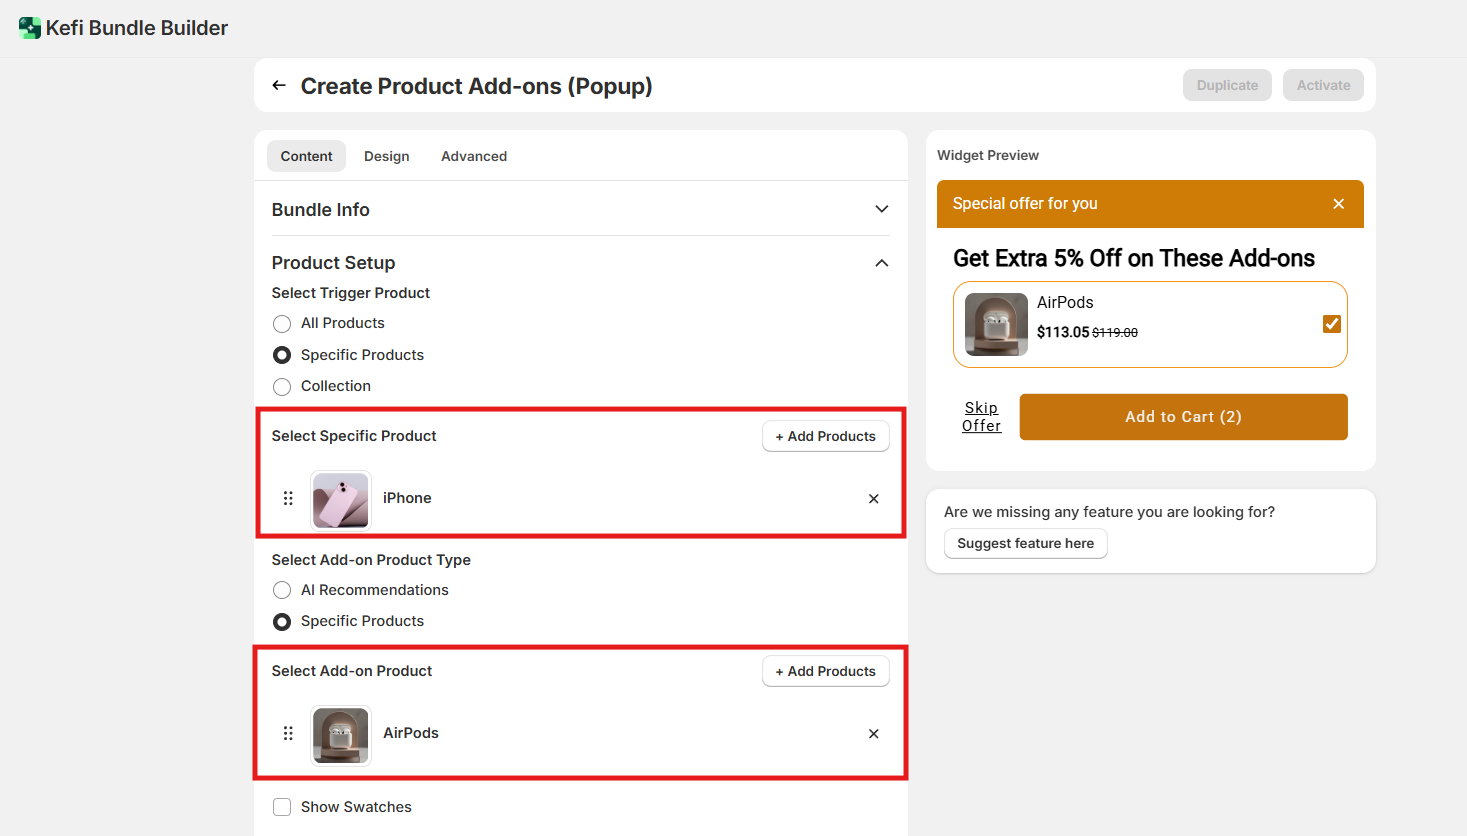
In the Product Setup sub-section, you define the relationship between the main (trigger) product and the add-on product. This determines when the popup is triggered and what product is shown as an add-on.
Here’s how this section works:
Trigger Product: Choose which product(s) will activate the popup. You have three options:
Add-on Product Type: Choose what type of product will be suggested in the popup:

Example Setup:
For demonstration purposes, we’ve selected:
Specific Products as the trigger, meaning the popup will appear when that specific product is added to the cart.
Specific Product as the add-on, where we’ve manually chosen the product we want to promote alongside the main item.
Now Add Product
Show Swatches - You can also display product variants-such as different colors, sizes, or styles-by enabling the Show swatches option.
This allows customers to view and select from the available variants directly within the bundle widget, improving the shopping experience.
To further personalize how these options appear, click on Edit swatches. Here, you can customize the swatch layout, labels, and appearance—for example:

3. Discount
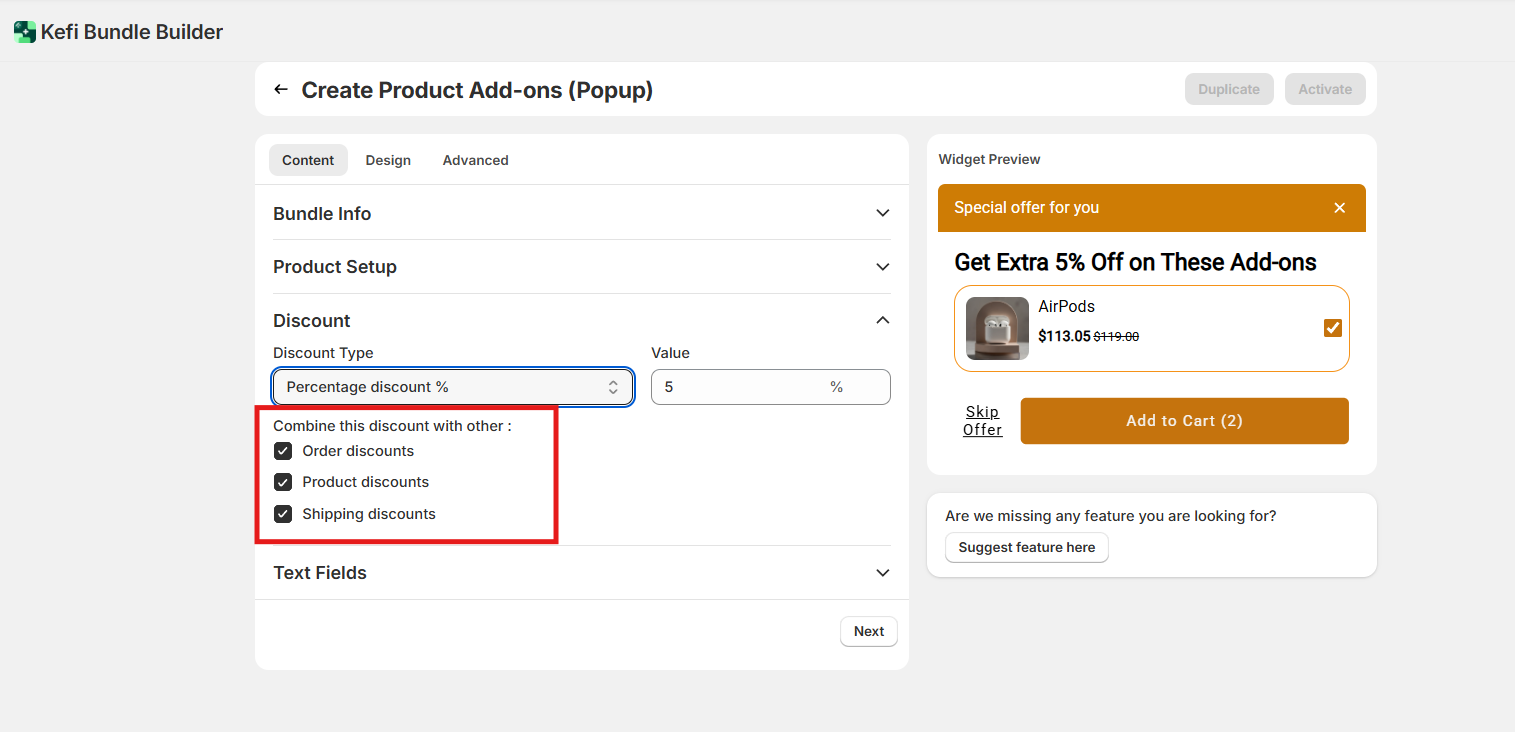
In this section, you’ll decide how you want to price the add-on product. There are two discount types available:
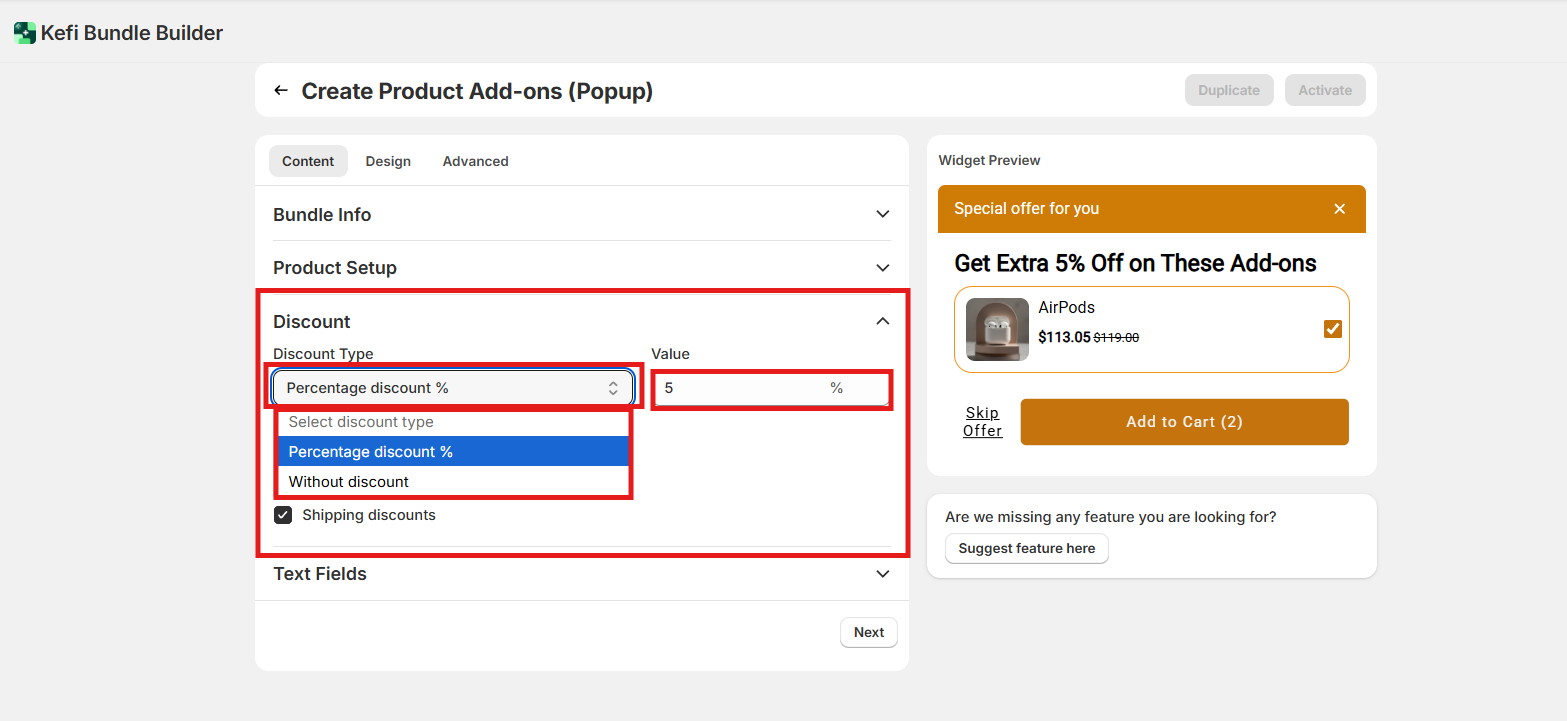
Combine this discount with other:
You can choose to combine your add-on discount with other types of discounts active in your store, including:
This allows you to create more compelling promotions by layering multiple incentives for your customers.
4. Text Fields
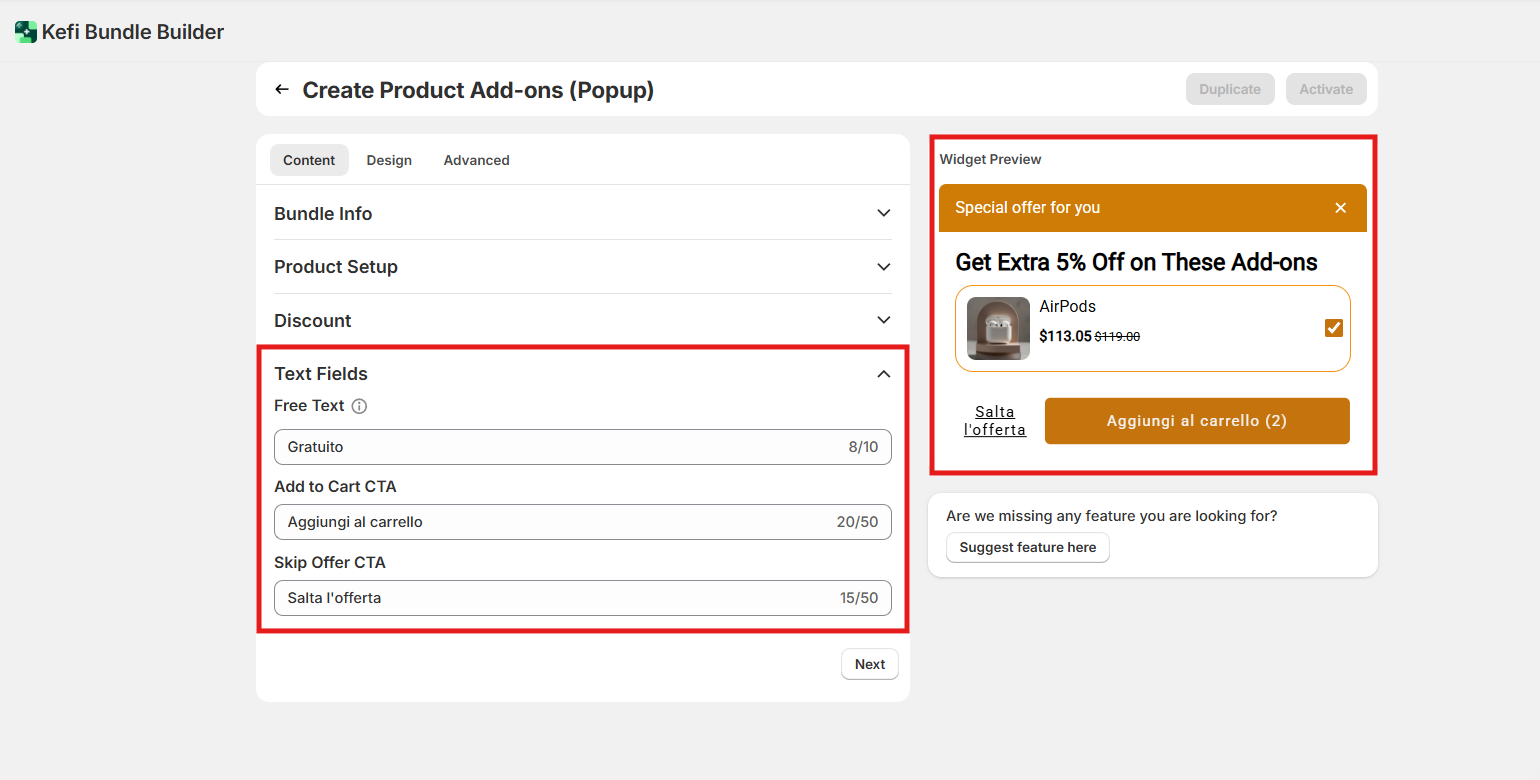
This section lets you customize all the text displayed on the bundle widget, making it easy to translate the content into a different language or align the messaging with your brand voice.
You can update elements like the Free Text, call-to-action and Skip Offer CTA labels to better engage your audience or fit regional preferences.
Widget Preview
On the right side of the screen, you’ll see a live preview of the bundle widget. This preview updates in real-time as you configure your Product Add-on settings.
The widget preview shows exactly how the offer will appear on your product page, including the selected add-on product, pricing details, and any customizations you've made (like text or discount settings). This helps you visualize the final design and ensures everything looks correct before publishing.
Use this area to double-check your layout, confirm product selection, and make any adjustments to improve the customer experience.

Now , click on the “Next” button to proceed to the next section .
After clicking the next you would be redirected to the next section that is Design
Design - The Design section allows you to tailor the visual appearance of your bundle widget, ensuring it aligns seamlessly with your store's branding and layout. You can customize everything from colors and fonts to image display and button styles. The design settings are organized into three main categories:
1. General
This section manages the overall styling of the bundle widget and popup.
Title
Popup

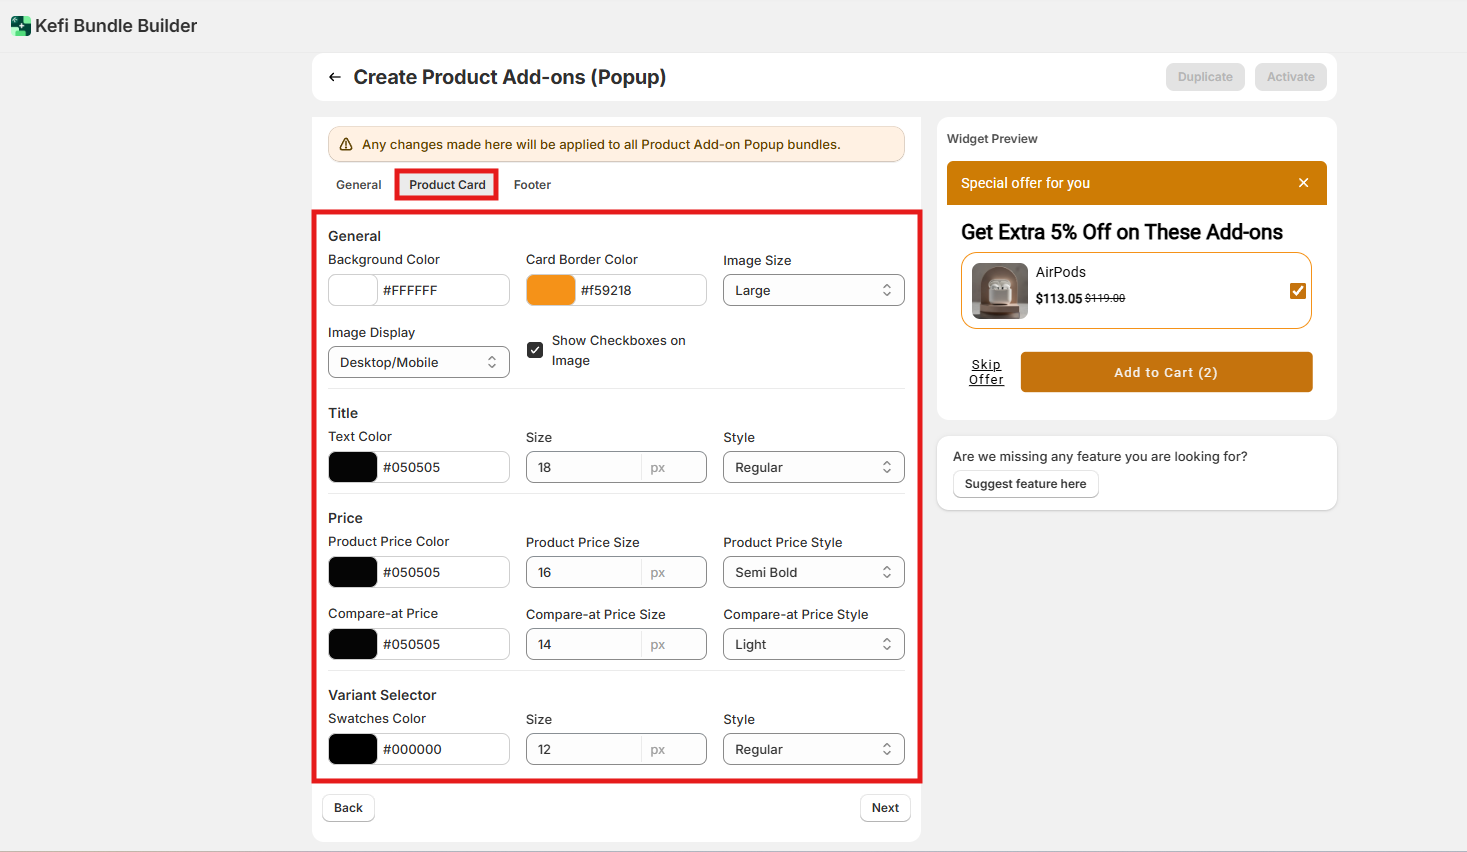
2. Product Card
This section controls the appearance of individual product cards within the bundle.
General
Title
Price
Variant Selector
3. Footer
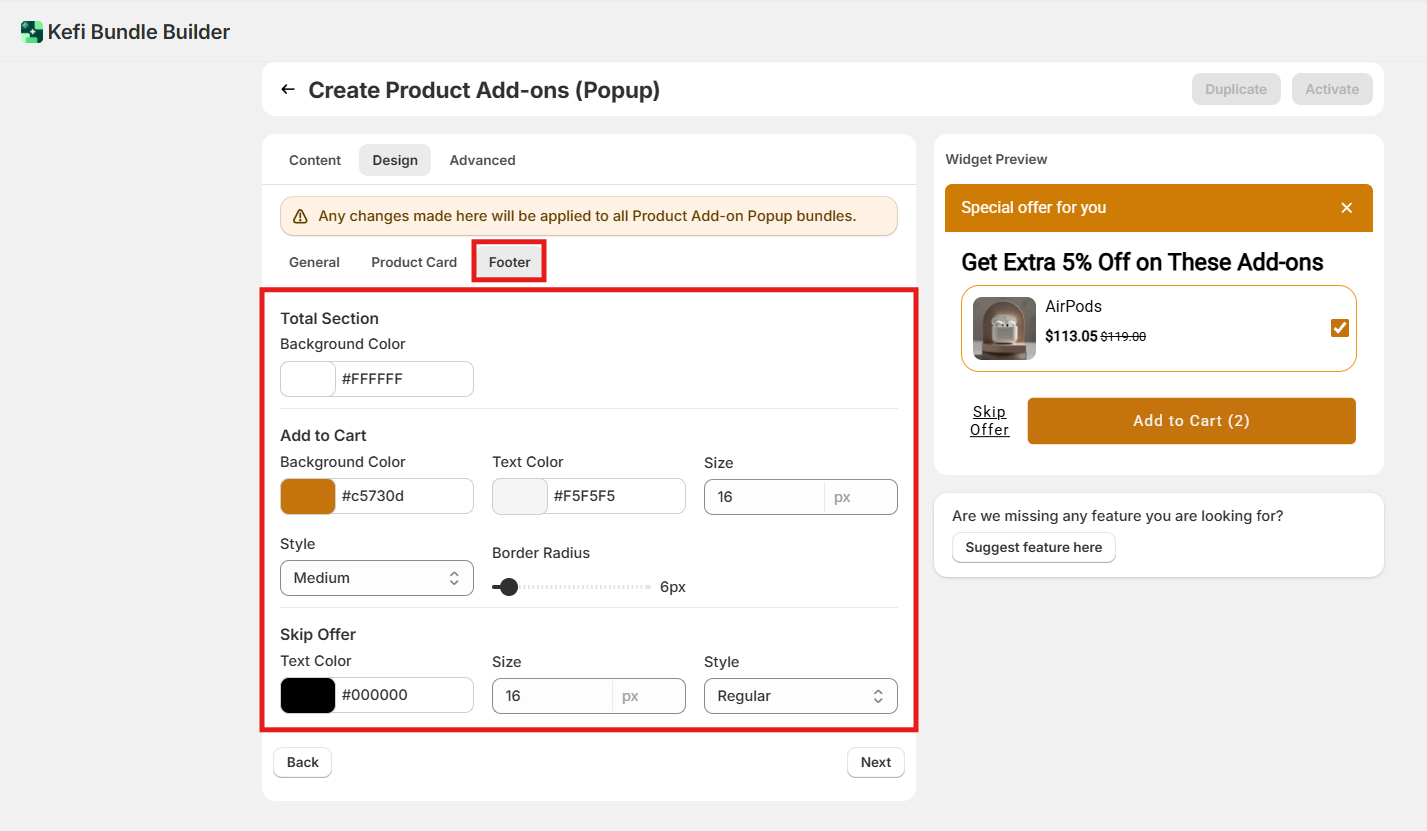
The Footer section allows you to style the bottom section of the bundle widget, including the pricing summary and action buttons.
Total Section
Add to Cart
Skip Offer
With these flexible design settings, you can ensure your bundle widget not only looks professional and visually aligned with your store but also provides a smooth and consistent experience for your customers across devices.
Now , click on the “Next” button to proceed to the next section .
After clicking the next you would be redirected to the next section that is “Advance”
Advanced Settings - These settings are useful for precise targeting and scheduling. Let’s dive into each option:
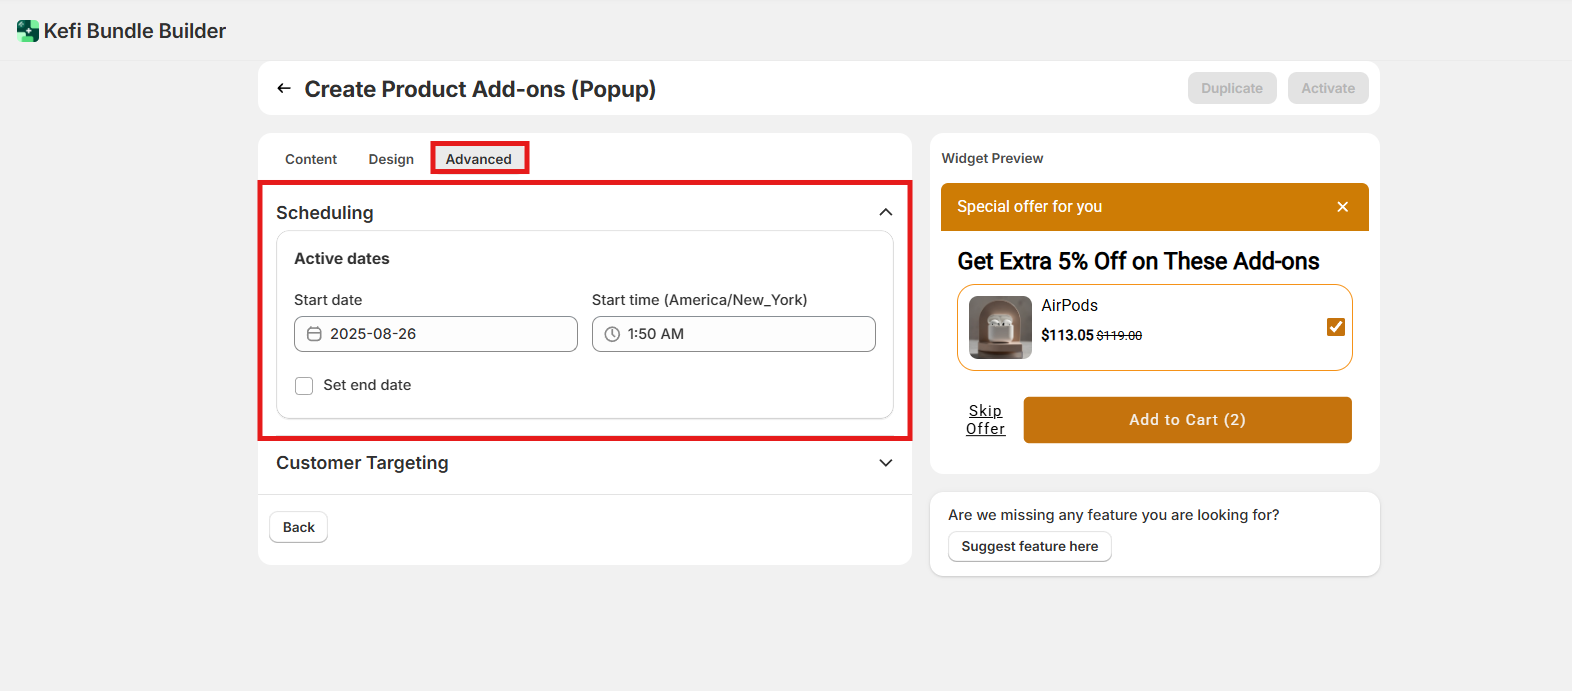
1. Scheduling
Set a start and end date for your bundle campaign. This is perfect for time-sensitive promotions, seasonal offers, or flash sales. The widget will only display during the defined period.
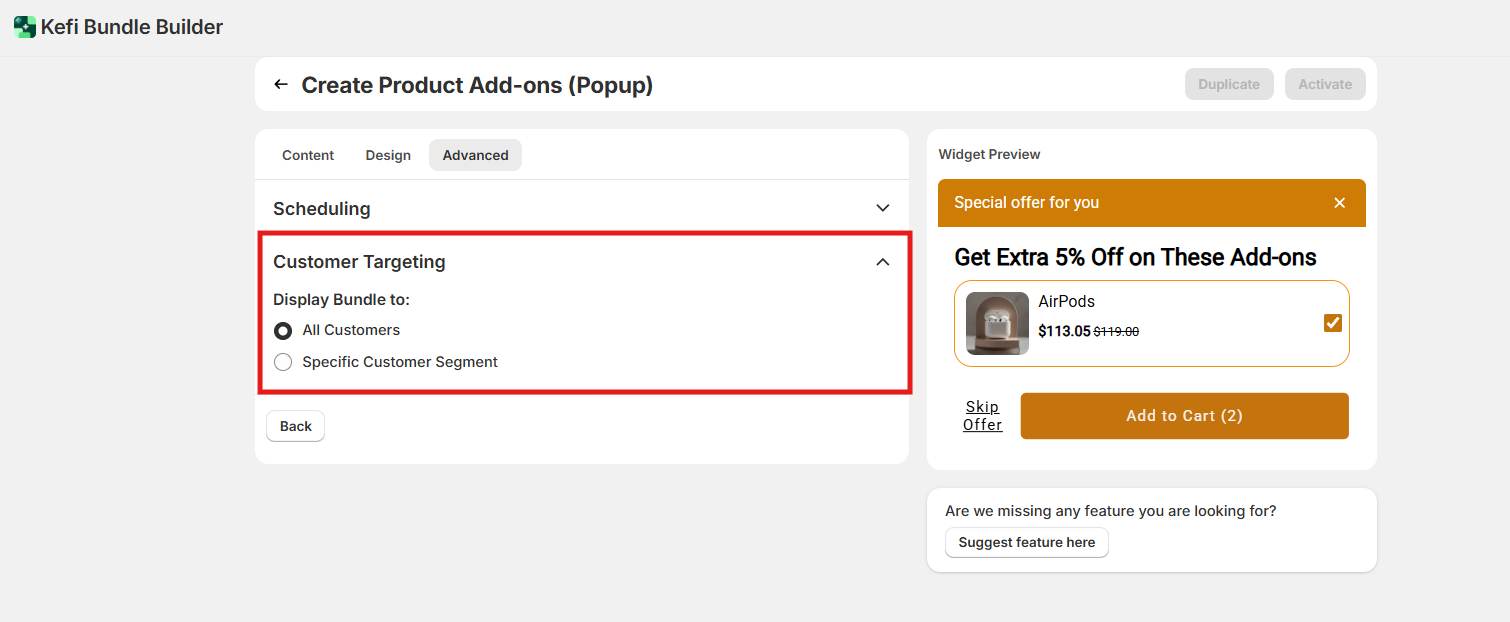
2. Customer Targeting
Control who sees the bundle by targeting:
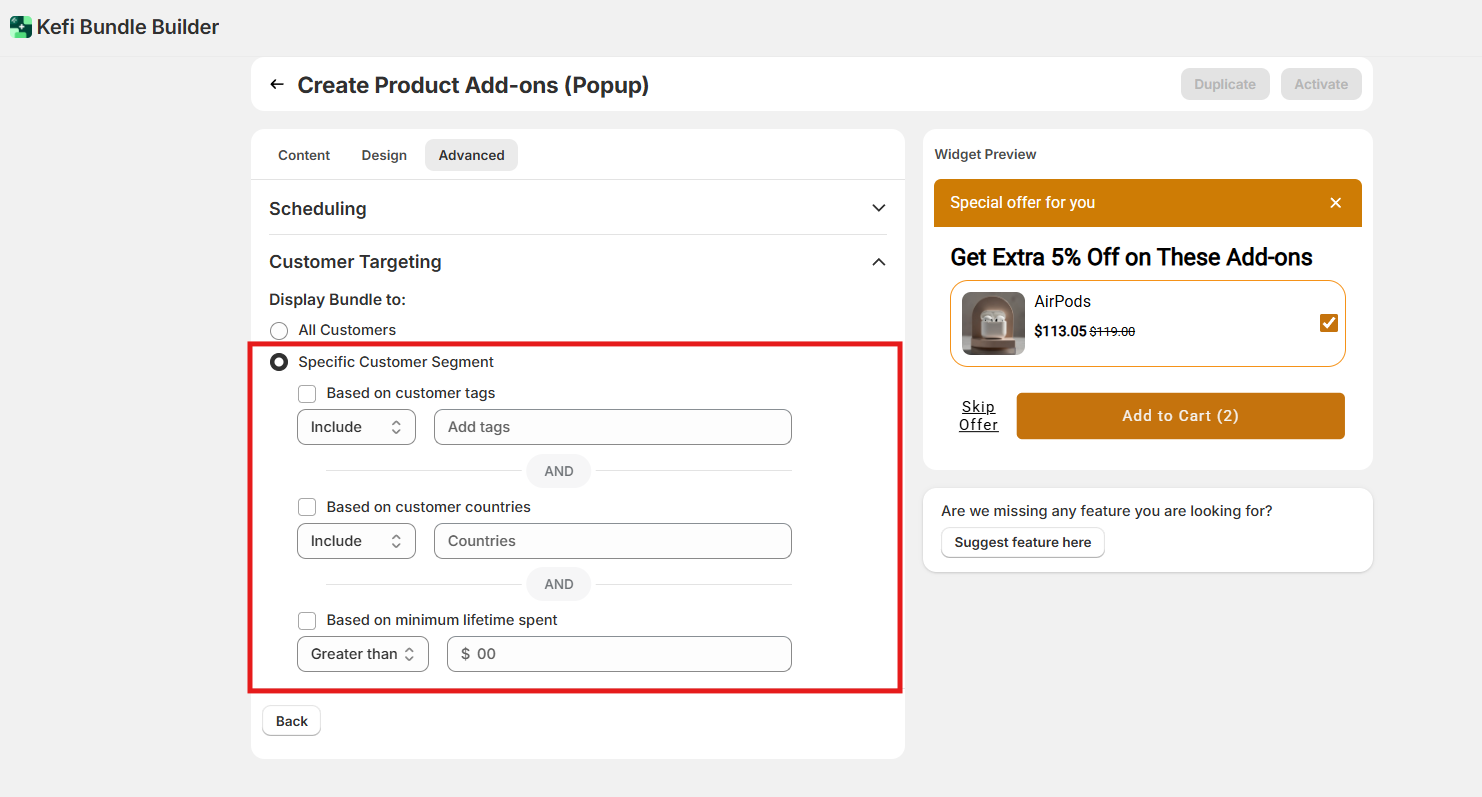
In case of Specific Customer Segment -
These filters can be combined using "AND" logic for precise control, perfect for offering exclusive deals, loyalty rewards, or regional promos.
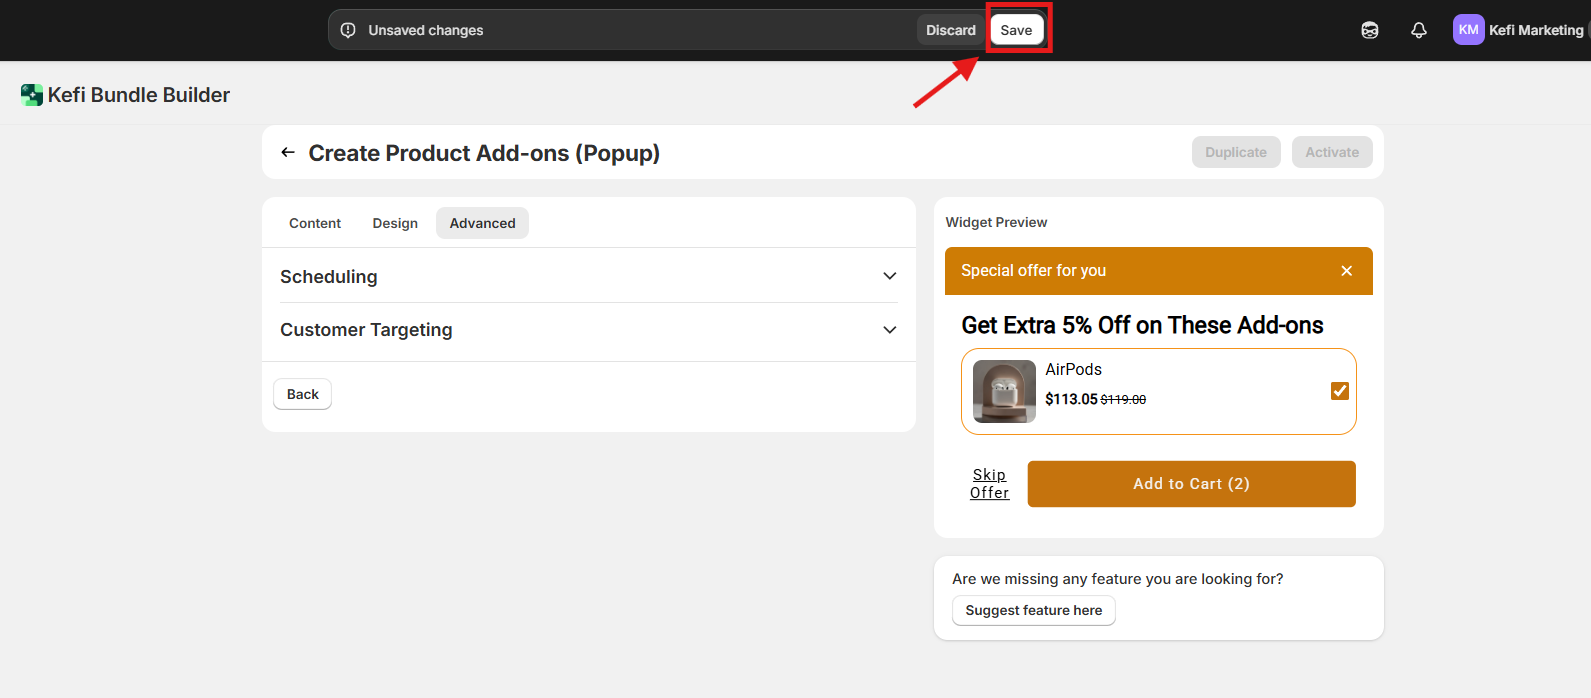
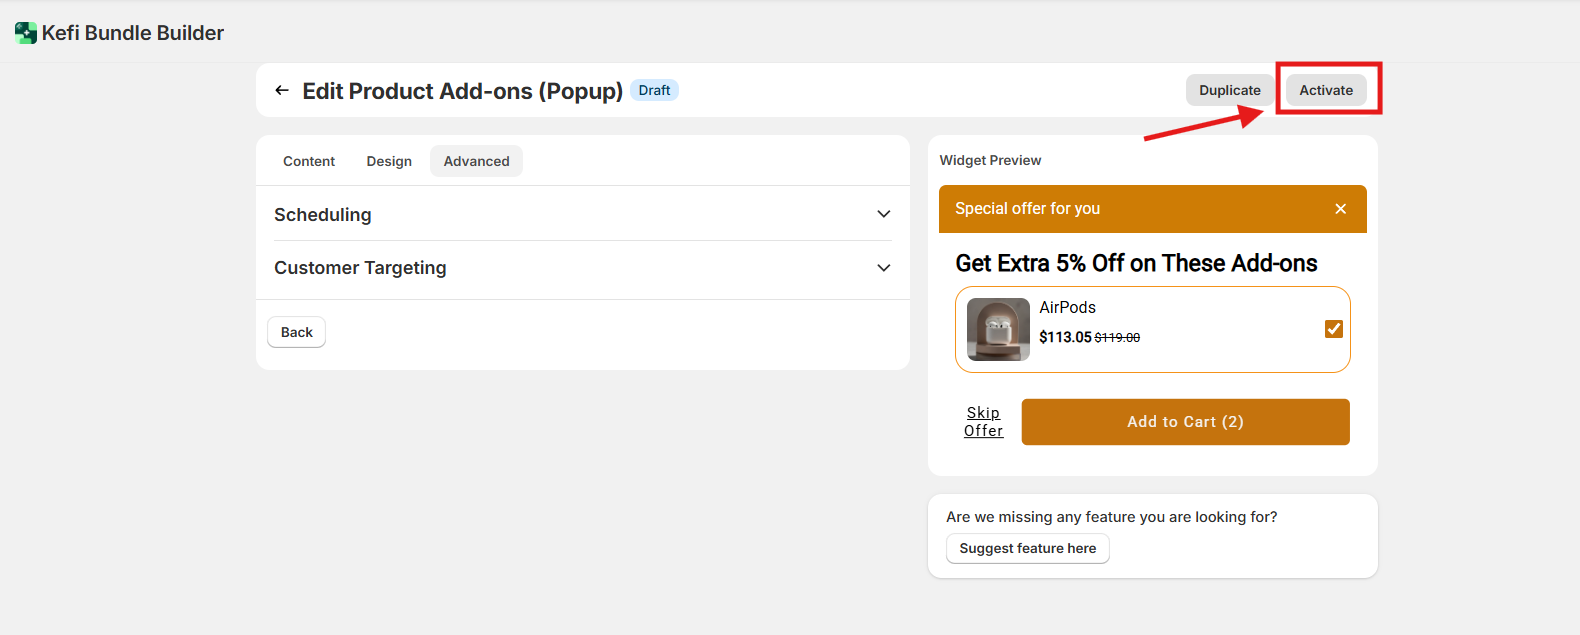
Now Check the widget Preview Click on “Save” button to save all the changes
Now click on “Activate” to activate the Popup
Once everything is set up, it’s time to test the experience in your store.
Visit your storefront and add a product (based on your trigger settings) to the cart. When the product is added, a popup will appear showcasing the add-on product you configured.
Customers will have two options:
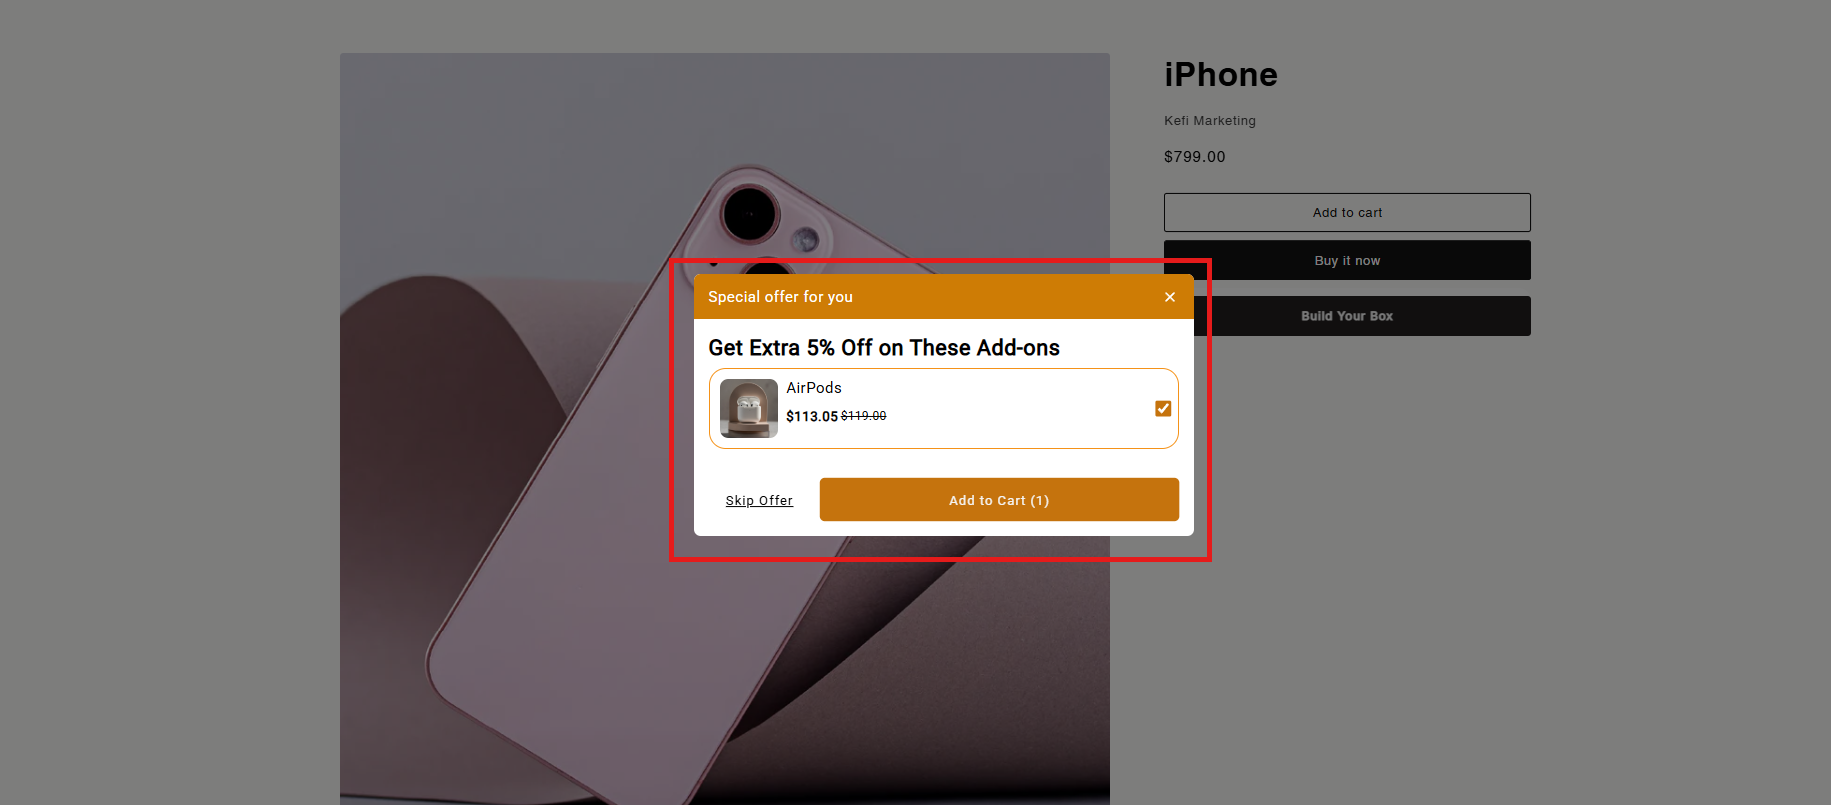
This final step ensures that your Product Add-on popup is working as expected and delivering a smooth, customer-friendly experience.
If you have any questions or need assistance, feel free to contact us:
.svg)
